


Simply change the trim to change the style.
10-15 minutes
Beginner
Introduction
Dissatisfied with the look of your recessed lights? Before you think about going through the cost and hassle of all new lighting, replace the trim instead. The trim is the he visible, decorative part of the light fixture that surrounds the bulb. By updating the trim you can vastly improve the appearance of your recessed lights. New trim can give the lights a cleaner more modern look, correct yellowing, or add more character. All you'll need is an affordable retrofit kit that's compatible with the brand and model of your particular lights. The task is simple and takes only minutes; and believe it or not, there are no tools needed!
Materials Required
- New recessed light trim
Project step-by-step (5)
Step 1
Determine the type of trim
Remove the existing trim and bulb of your recessed lights and look up inside the metal housing for a sticker with the brand name, the model number and compatible trim styles. If you can’t find the information or the brand isn’t available, take the old trim to a lighting store and look for matches. Most manufacturers have several different types and sizes of housing that will accept a variety of trim styles.
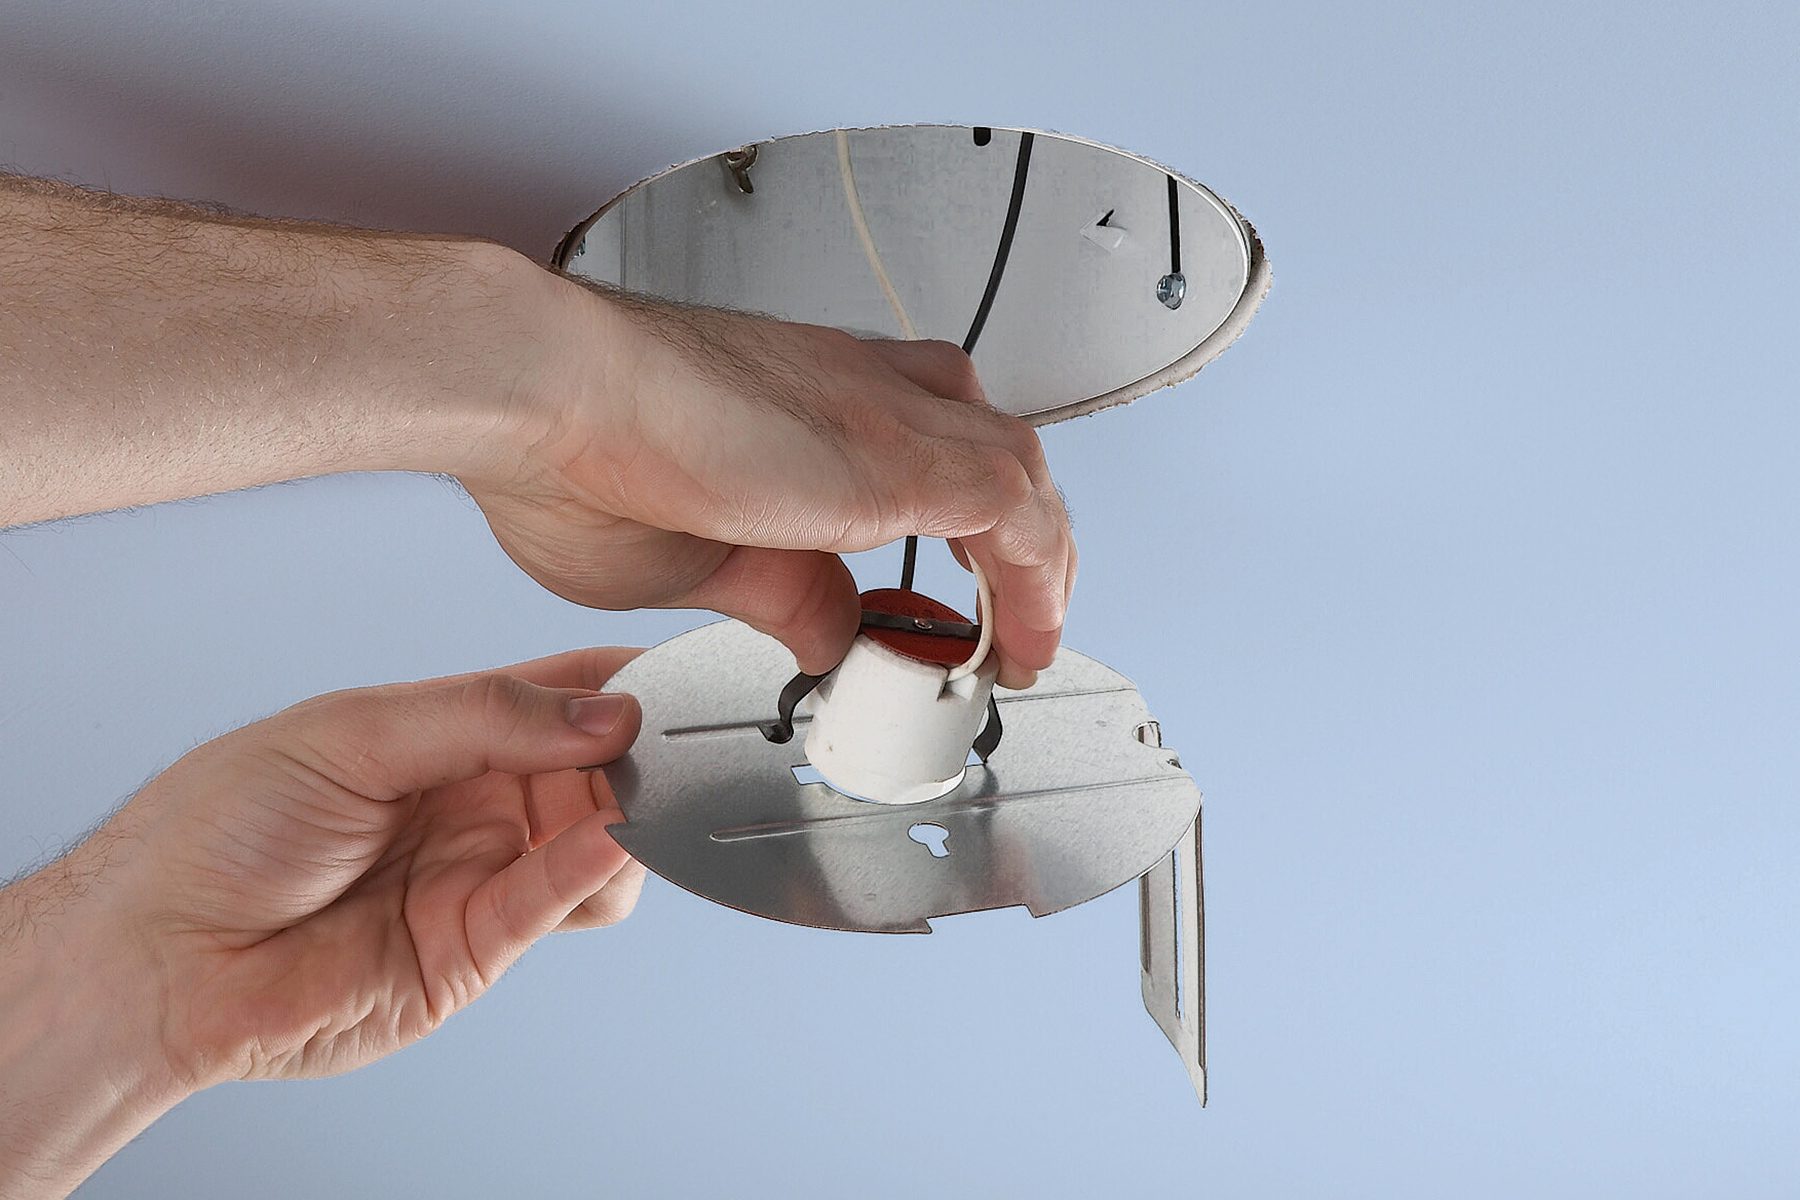
Step 2
Remove the old trim and base
Changing old, yellowed trim for new trim is simple—just pull out the old trim and attach the new trim in the same hooks. Remove the metal base from the housing, then pinch the spring clamps that hold the ceramic light socket in place.
Step 3
Install the new trim
Slide the spring-loaded metal arms up into the slots in the housing, then push the trim up against the ceiling and put the lightbulb in.
Step 4
Eyeball-style trim
You can also replace standard trim with an eyeball-style trim that can be aimed in different directions, but it takes an extra step.
First, turn off the switch and circuit breaker and remove the bulb. Unscrew the wing nut that holds the base of the light in place and remove the socket. Then, snap the socket into the top of the eyeball shroud and push the eyeball trim up into the can. Be sure to use the type of bulb recommended on the label in the housing.
If you’re planning to save energy, you can upgrade light fixtures.
Step 5
FAQ
Can I use different styles of trim for different lighting effects?
Yes, the main recessed lighting trim styles are baffle, reflector, open, gimbal, and eyeball. Baffle trim has a ribbed interior which reduces glare, and is not flush with the ceiling. Reflector trim has a reflective surface that bounces light around the room. Gimbal and eyeball trim allow you to pivot the light to focus on one particular location. Open trim is the most basic, it sits completely flush with the ceiling and the bulb is visible.
Is it safe to replace recessed light trim myself?
Yes, replacing the trim on a recessed light is a simple process. Most trims are designed to be easily removed, and then simply snap the new trim in place. No tools required, no rewiring, and you don’t have to replace the housing. It’s a safe project for any lighting novice.