


Complete big paint jobs fast with a glass-smooth finish.
Variable
Beginner
$300 to $800
Introduction
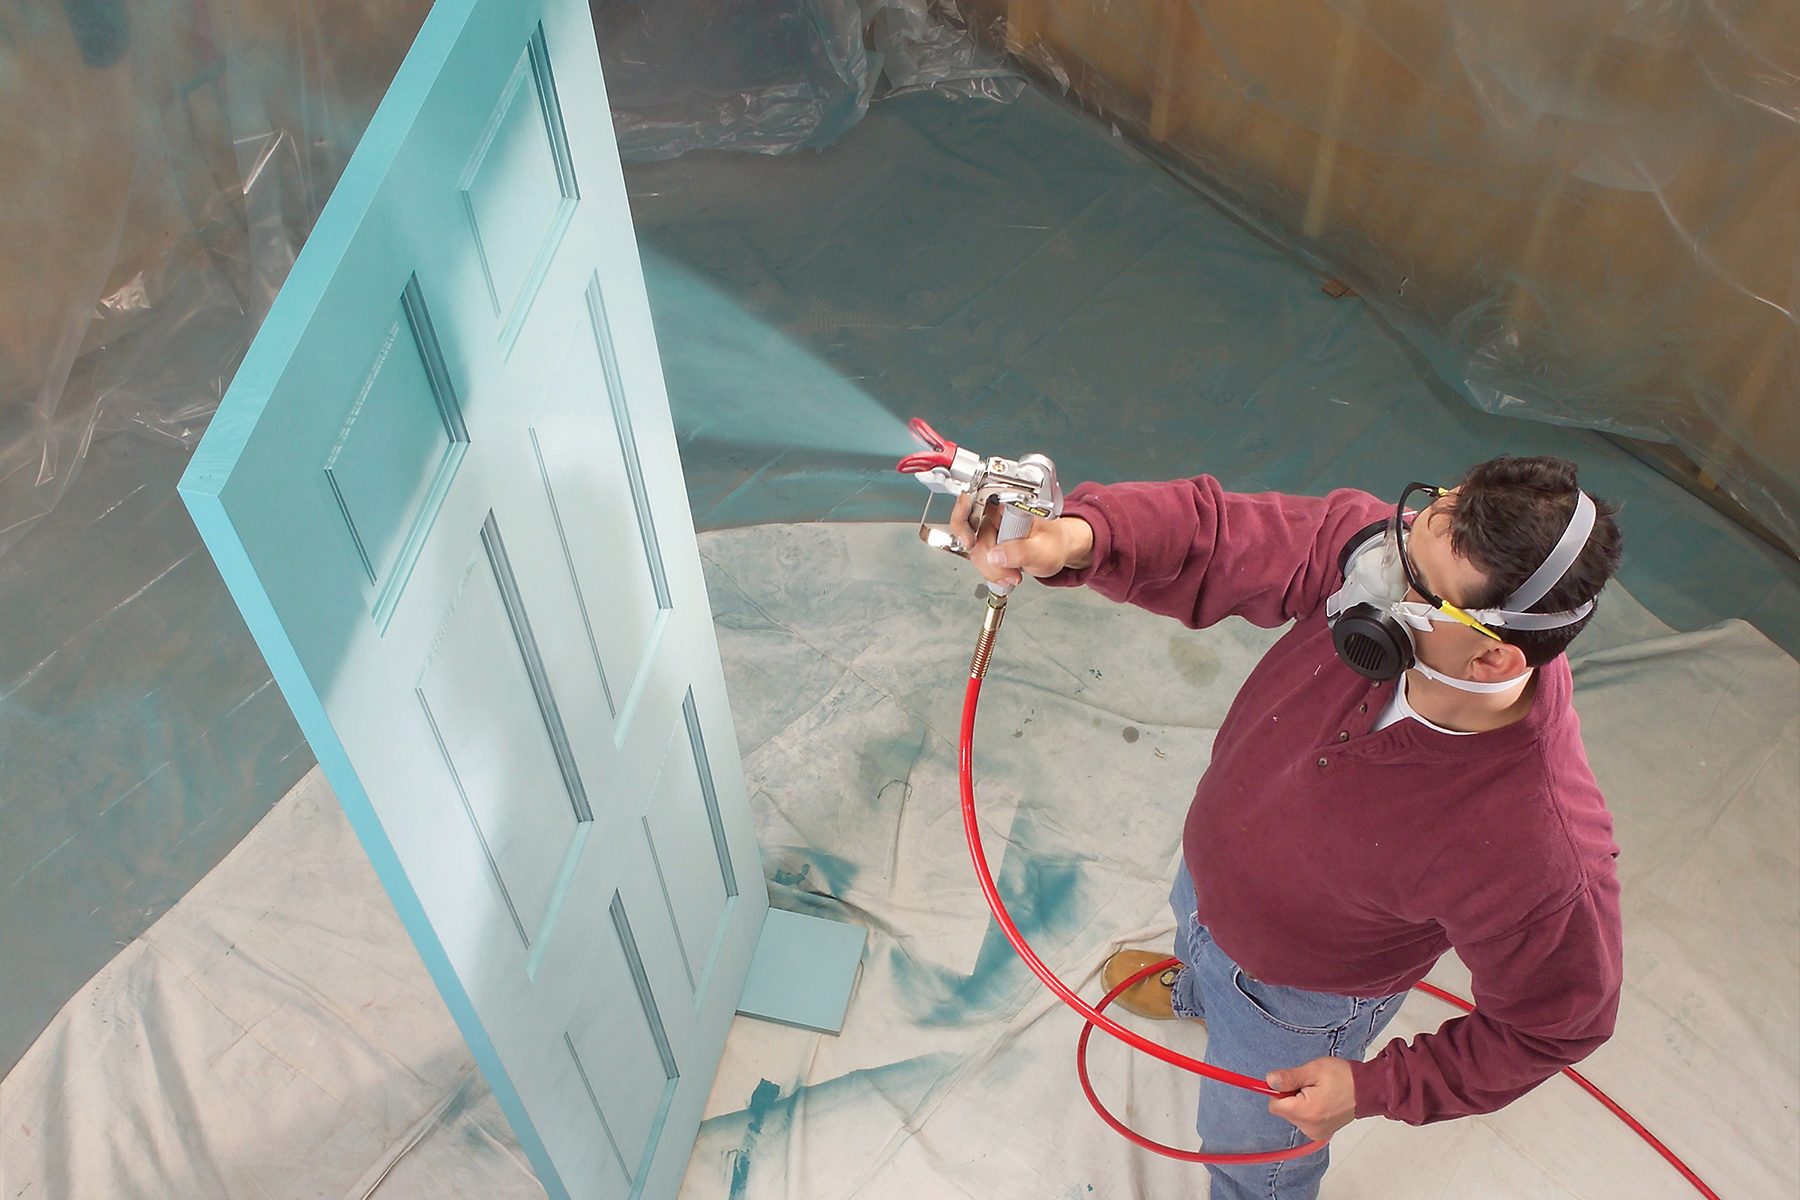
If you want to speed up a big job, like painting the exterior of your house, or one that requires a glass-smooth finish on woodwork or doors, consider using an airless paint sprayer. A popular tool with painting pros, airless sprayers use high pressure to atomize paint and quickly apply a smooth, even coat. DIYers can use this tool as well, but need to understand its components, setup and operation techniques for best results.
This article will guide you through the essential steps and tips for effectively using an airless sprayer, ensuring a flawless finish on your next painting project. Read on for easy-to-follow tips from two painting experts: Shayne Pancione from Pancione Painting Plus and Nick Slavik from Nick Slavik Painting and Restoration Company.
What Is An Airless Paint Sprayer, and How Does It Work?
As the name implies, an airless sprayer doesn't need compressed air to pressurize paint and push it through the tip of a spray gun like a standard paint sprayer or an HVLP paint sprayer does. Instead, it uses an electric or pneumatic pump, or sometimes a gas-powered engine, to accomplish that.
It works by pumping paint at a very high pressure (up to 3,000 psi), through a hose and out a tiny hole in the spray gun tip. The tip is designed to break up the paint evenly into a fan-shaped spray pattern of tiny droplets. "Using different tip sizes controls the size of the fan pattern and the amount of paint that is sprayed out," Pancione says.
Advantages of Painting With an Airless Paint Prayer
- Works with different materials: Using different tips, you can spray thin liquids like stain, lacquer and varnish or thicker liquids like latex house paint.
- Applies paint quickly: Since an airless sprayer pumps paint directly from a can or 5-gallon bucket, you can apply a lot of material quickly. Pancione cites this as one of the biggest advantages.
- Covers intricate surfaces: Airless sprayers make fast work of covering intricate surfaces like furniture, fences or siding. "Cedar shingles may take several coats to brush in, and you'll still miss some spots," Pancione says, "but with an airless, the paint has the ability to easily cover these difficult areas."
- Smooth finish: Airless sprayers leave a smooth finish without brush or roller marks.
Airless Sprayer Safety Precautions
Read and follow the painting safety precautions included in your sprayer manual. If you rent a sprayer, ask for a list of precautions.
Here are the most important ones:
- Keep the trigger locked and follow the pressure relief procedure when you stop spraying, before cleaning, and before servicing the sprayer or installing tips. Never put your hand in front of the sprayer tip unless the unit is off and depressurized. The high-pressure spray can inject paint under your skin, causing a serious poisoning hazard. If you do puncture your skin with the spray, get to a doctor immediately.
- Wear safety glasses and an approved respirator when you're spraying.
- Work in a well-ventilated area.
CAUTION: When you're spraying flammable oil-based products, follow all grounding precautions to prevent sparks. Read your manual or ask the rental store for instructions on grounding the gun and metal pail.
Tools Required
- Airless sprayer
- Bucket
- Mesh filter bag
- Protective glasses
- Respirator mask
Materials Required
- Butcher paper
- Painter's tape
- Plastic sheeting
- Protective gloves
Project step-by-step (8)
Step 1
Before you start spraying
Whether you rent or buy an airless sprayer, there are key setup points.
- Ensure the screen at the intake point is clean.
- Ensure the removable filter near the pump and in the handle of the airless spray gun are clean.
- Strain your paint through a mesh filter bag to remove lumps and avoid clogged filters.
- Mask off any nearby areas from overspray. “We may spend several hours masking off anything that should not get painted before we begin spraying anywhere,” Pancione says.
Step 2
Prime the pump and clear air bubbles
Before you can start spraying, or after your bucket runs out of paint, you have to prime the pump. “If it’s not primed, the gun will either sputter or will not work properly,” Pancione says.
- Place the smaller prime tube in a waste pail and the suction tube in the bucket of strained paint.
- Turn the prime/spray valve to “prime.”
- Switch on the pump.
- Turn the pressure valve up until the pump starts.
- When the paint starts flowing from the prime tube, move it into the paint bucket.
- Clip the prime tube to the suction tube.
- Let the pump run for about 30 seconds or until no more air bubbles come out of the tube.

Step 3
Fill the hose and spray gun
Once the pump is primed, you’re ready to fill the hose with paint.
- Remove the guard and spray tip if installed.
- Hold the airless paint sprayer gun (guard and spray tip removed) over the waste bucket and pull the trigger.
- Switch the valve to the “spray” setting.
- Let go of the trigger when paint is flowing in a steady stream from the gun.
- Lock the trigger and follow the steps below to adjust the pressure.

Step 4
Choose and install the spray tip
Spray tips slide into a hole in the front of the airless paint sprayer gun. They’re labeled with a three-digit number, like 309 or 517. Doubling the first digit tells you the spray fan width with the gun held 12 in. from the surface. The next two digits indicate the size of the hole in thousandths of an inch.
A 415 tip, for example, would have an 8-inch-wide fan with a .15-in. orifice, while a 517 would have a 10-in. fan pattern and a .17-in. orifice.
For fine finishes with thin products, Slavik uses a smaller orifice and narrower fan width. He recommends using a wider fan and larger orifice tip when applying thick paint on bigger jobs like “exterior painting or large interior surfaces.”
- Screw the guard assembly loosely onto the gun.
- Align the guard at a 90-degree angle to your desired spray pattern.
- Insert the spray tip until the tab is engaged.
- Align the tip and tighten it.
- Rotate the tip to face the arrow forward.
- Snug the guard assembly hand-tight.

Step 5
Adjust the pressure
Too little pressure will result in an uneven spray pattern and too much pressure causes excessive overspray and premature tip wear. “We test the fan pattern on a piece of craft paper. If you see ‘tails’ or thin lines of paint on the edge of the fan pattern, incrementally adjust the pressure up until they go away,” Slavik says.
- Turn on the pump and move the prime/spray lever to the “spray” position.
- Direct the sprayer at a testing material and spray a strip of paint across it.
- Look for tails in the spray pattern. If present, turn up the pressure.
- Retest and adjust until the paint is evenly distributed across the fan pattern.

Step 6
Apply the paint
Consider practicing your technique on scrap material first before moving to your actual project. “No one is perfect when they start,” Slavik says.
- Move the sprayer across the surface before squeezing the trigger to activate the spray. This avoids overapplying paint.
- Keep the sprayer about 12 inches from the surface and move quickly in a sweeping, side-to-side motion. Keep the gun parallel to the surface. Only work in an area you can easily reach without angling the gun.
- Overlap about half of the previously painted strip when you make the next pass with the sprayer. Keep the gun perpendicular to the surface.

Step 7
FAQ
Why isn’t my airless paint sprayer working?
According to Slavik, it’s probably due to a clogged filter or tip due to poor cleaning. Or you forgot to prime the pump. “This can lead to paint splatter, uneven spray patterns or the gun not working at all,” Pancione says.
Should you rent or buy an airless paint sprayer?
DIYers and homeowners should consider renting an air sprayer for occasional use.
How to clean an airless paint sprayer?
First, flush the system with solvent or clean water until it runs clear. Then, disassemble all sprayer parts and clean with a brush and the necessary cleaning solution.
How long can I leave paint in an airless paint sprayer?
“You should be able to leave your [paint in your sprayer] for a few days,” Slavik says, as long as you seal the paint and sprayer tip.
Can you use an airless sprayer to paint a car?
You can use an airless sprayer to paint a car, but it won’t deliver very professional results.
Step 8
About the Experts
- Shayne Pancione is the owner of Pancione Painting Plus, a full-service residential and commercial painting company in Easthampton, Massachusetts. He has over 25 years of experience in the trade.
- Nick Slavik is the owner of Nick Slavik Painting and Restoration Co. in New Prague, Minnesota. He has more than 25 years experience as a professional painter and served his country through two tours of duty in the Middle East. He is a contributor to “This Old House,” and produces a weekly Facebook show called “Ask A Painter.”