An easy approach to hanging drywall the right way.
Our editors and experts handpick every product we feature. We may earn a commission from your purchases.
Learn more.

An easy approach to hanging drywall the right way.
Our editors and experts handpick every product we feature. We may earn a commission from your purchases.
Learn more.
Installing drywall is not rocket science, but it will go faster and look better if you learn the fundamentals before you start (instead of after you're done).
Drywall is one of the easiest-to-use and cheapest construction materials in the world. Even a serious mistake will make you chuckle, knowing you’ve wasted little time and little money. And the money you save handling the task yourself will come in handy when furnishing that new room.
Working with drywall doesn’t require a lot of finesse, but it is heavy work. But if you are in reasonably good physical condition, don’t be afraid to tackle one, two or even three rooms on your own. It’s sometimes hard to interest a pro in hanging just a room or two, or even get on the schedule. Besides, defining and covering the walls with a finished material can be satisfying.
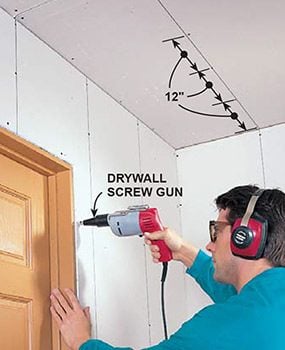
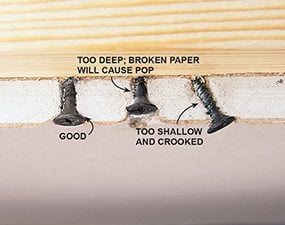
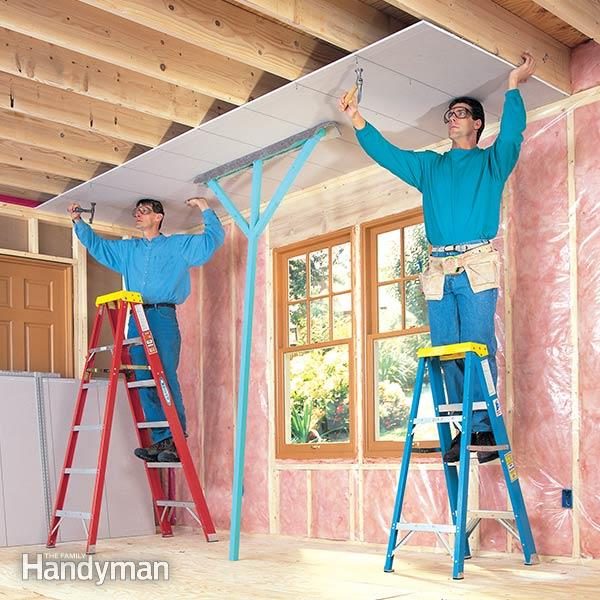
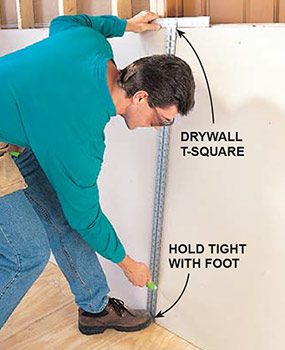
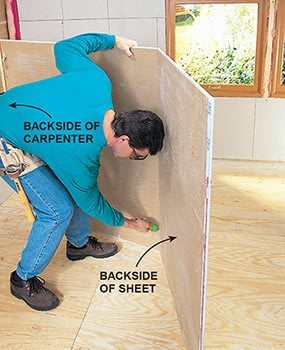
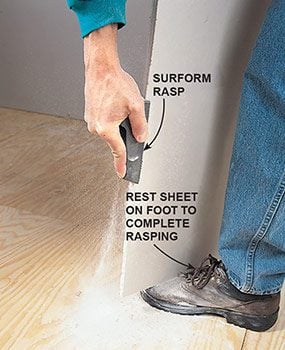
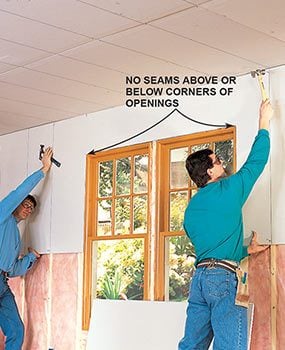
This how to install drywall article will demonstrate the basics of hanging drywall. If you do a good job of hanging drywall, the drywall can be taped and finished smoothly and easily. “Taping” refers to the process of filling fastener holes, applying joint tape and three layers of taping compound to seams and corners, and then sanding. Poor drywall hanging techniques make it difficult for even a seasoned taper to deliver a flat, uncracked surface that’s free of nail pops and ready for paint. We’ll show you the techniques and tools the pros use to get the drywall job done fast and in a way that makes taping as painless as possible.
Also, learn what to do if your ceiling is sagging.
Most drywalling calls for three basic types of drywall material:
Door and window jambs and electrical outlets are usually set up for 1/2-inch drywall, so check to confirm. Three-eighths-inch and 1/4-inch are available as well but are rarely used except on curved wall surfaces or areas where thinner rock is required. For example, if you’re patching old plaster walls, 3/8-inch may be the only thickness that will match the depth of the plaster.
Drywall usually comes in either 4×8 or 4×12 sizes. If you live in an area large enough to support a commercial supplier, it’ll offer more variety than an average lumberyard. It may have 9-, 10- and 14-foot lengths, 54-inch widths for 9-foot. ceilings and odd things like flexible drywall for curved surfaces. Drywall lengths don’t radically affect overall material cost. If you think you can handle 12-foot. sheets (and if they’ll fit through the stairwells), they’re the way to go. You’ll have far less waste and fewer seams to tape. Keep in mind that a 4×8 sheet weighs 55 lbs. and a 12-footer about 82 lbs.
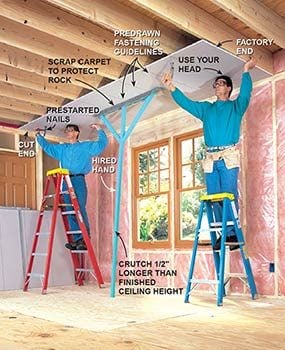
Drywall is heavy stuff, so consider saving your back by renting a drywall lift for a day. This can be especially beneficial when you are understaffed or when you have to handle larger drywall sizes, such as 12-foot sheets. Drywall lifts disassemble easily, weighs about 75 lbs. and will fit in a minivan or small pickup. A lift makes it possible to hang rock solo, but it’s still nice to have a helper for loading the rock onto the lift. A lift tilts from vertical to horizontal. Wheels allow you to roll it up to the drywall stack, load a sheet onto the rack, roll it back into position and crank the sheet up into place. Although a lift can also be used for wall placement, its strong suit is ceilings.
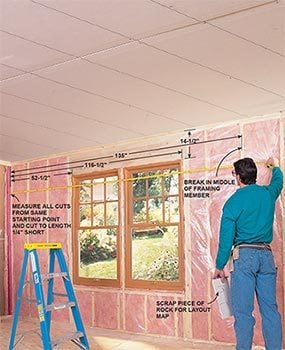
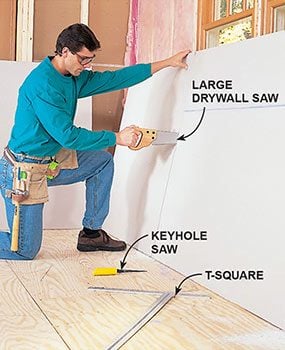
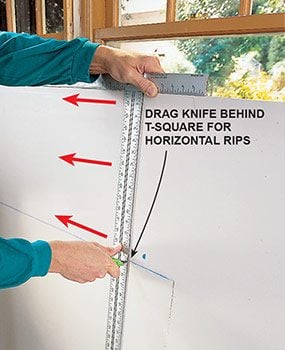
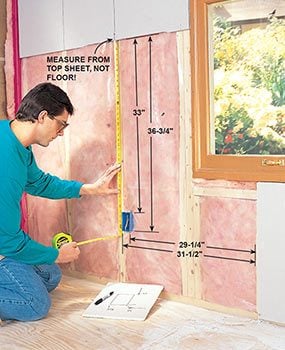
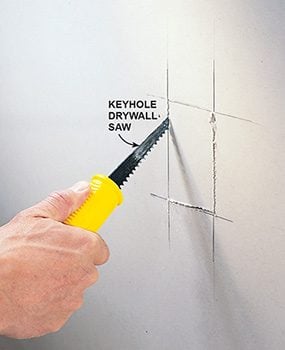
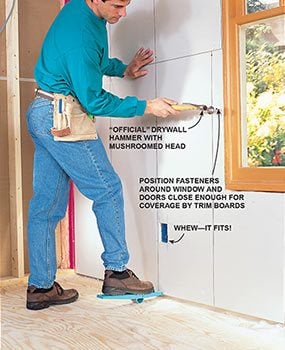
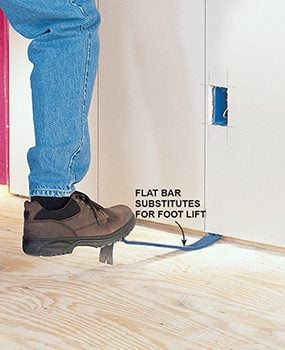
Although we don’t show one in use here, pros now use a spiral saw to cut openings for outlets, lights and even doors and windows. The basic idea is easy: Just mark the approximate center of the outlet or light, hang the sheet of drywall, and then poke the thin spiral bit through the center mark and follow the edge of the fixture all the way around. For door and window openings, hang the sheet across the opening and then follow the framing with the spiral bit—no measuring required, and you get a perfect cut every time. Of course, it takes a little practice to get the hang of the tool, it kicks up a lot of dust, and the basic tool costs $70 to $100, but if you’re doing more than one room it may be worth the investment.