


DIYers tend to accumulate all kinds of tools for all kinds of projects. The key to staying efficient, though, is to make sure you always have the right tools at hand. Check out these ideas to make sure you keep your tools organized!

21 Tool Storage Tips and Tricks That’ll Transform Your Space
1
/
21

Garden Tool Storage Cubby
This build-it-yourself tool storage cubby keeps your gardening tools right where you need them. It looks beautiful in your garden. Plus, you can paint or stain it whatever color you choose to make it blend in or stand out.
2
/
21
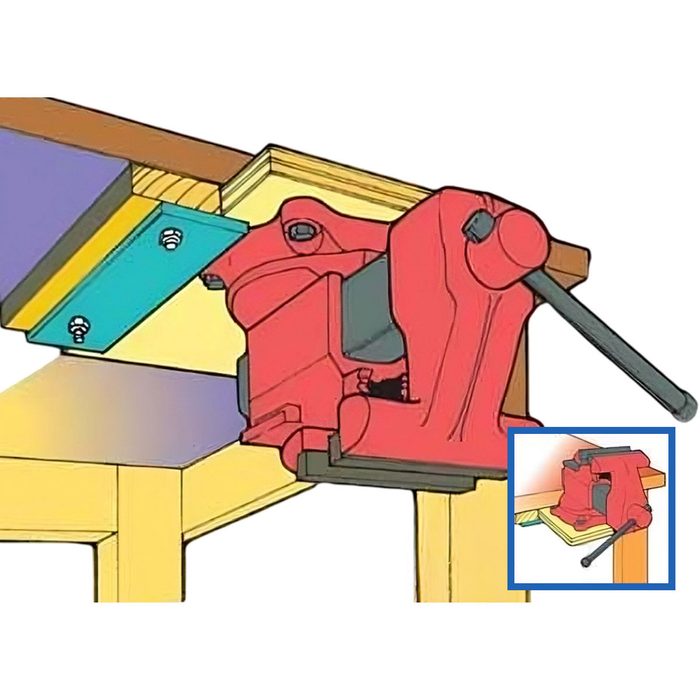
Bench-Top Storage
Looking for a smart way to keep a vise or small bench-top tool right at your fingertips without cluttering your workbench? Build this slide-in base and mount the vise or tool on it so the entire unit can slide back in, upside down, and out of the way. Countersink holes are placed under the base so you can recess the mounting nuts and washers.
3
/
21
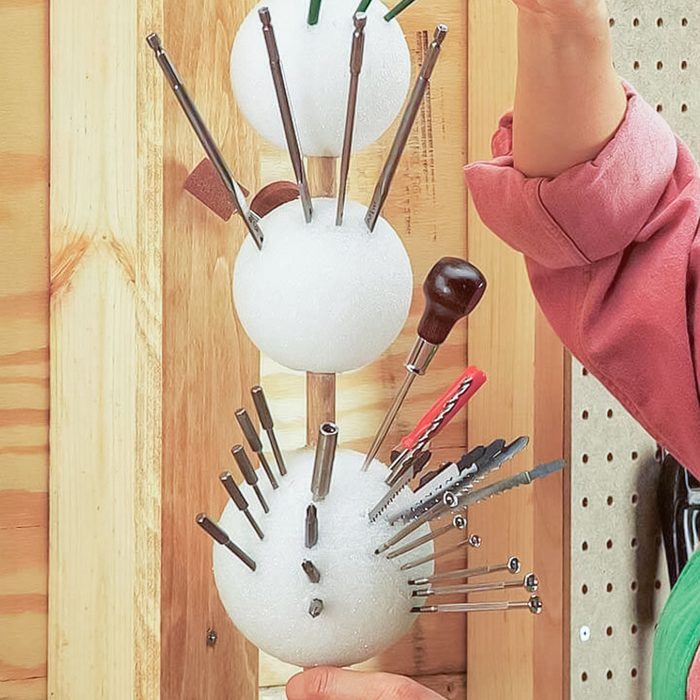
Foam Ball for Sharp Tools
Here’s a pointer on storing pointed tools for instant availability. Drill 5/8-in. holes through a few 4- or 5-in. foam craft balls (available at craft stores), and skewer and glue them along a 5/8-in. dia. dowel with construction adhesive.
Screw together a 3/4-in. wood bracket, drilling a stopped 5/8-in.-diameter hole 1/2 in. deep in the bottom end and a 3/4-in. hole through the upper end. Screw the bracket at a convenient height, slide in the foam balls and load them with drill, router and spade bits; paint brushes; screwdrivers; Allen wrenches; awls; X-Acto knives; pencils and anything else you own.
4
/
21

Panpipe
While this tool storage device may look like a variation on the Pan flute of Greek mythology, it’s actually a great place to store tools that easily get lost—like chisels, files, pencils, scroll saw blades and hobby knives. For the fatter tools, use PVC cement to join short pieces of 1-1/4-in. PVC pipe side to side into a panpipe design, then add pieces of 1/2-in.pipe along the front of the flute for skinnier tools. Build a simple case around the pipes to create a floor and a back for hanging on a shop wall.
5
/
21

New Angle on Small Tool Storage
Find a bare spot on a wall or workbench and screw on a 2-ft. piece of 2-in.-wide, slotted angle iron available at home centers. It’s the perfect hangout for screwdrivers, bits, safety glasses and sanding drums.
6
/
21
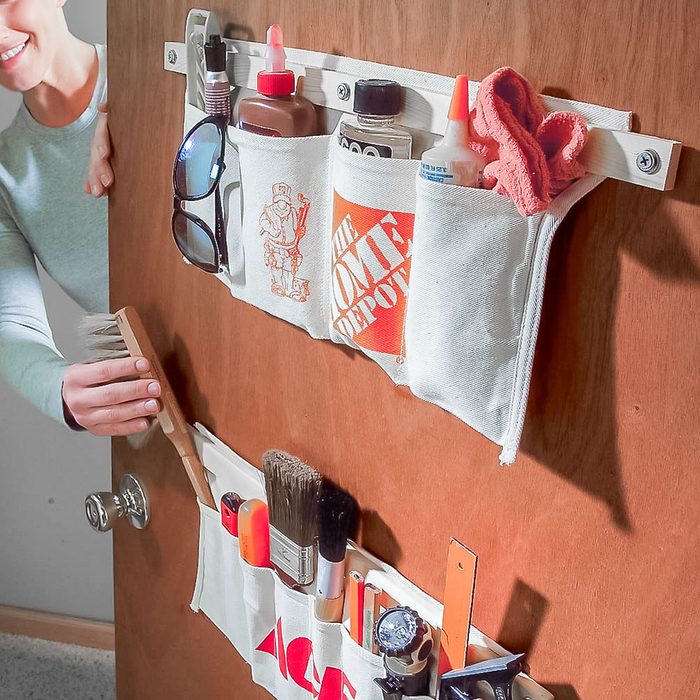
Behind the Door Storage
Tool aprons can be modified to store nearly any household item. Just sew a variety of pocket widths in the aprons, then mount the aprons by screwing a wood strip through the top of each and into a door. For hollow-core doors, use hollow anchor fasteners to hold the screws firmly to the door.
7
/
21
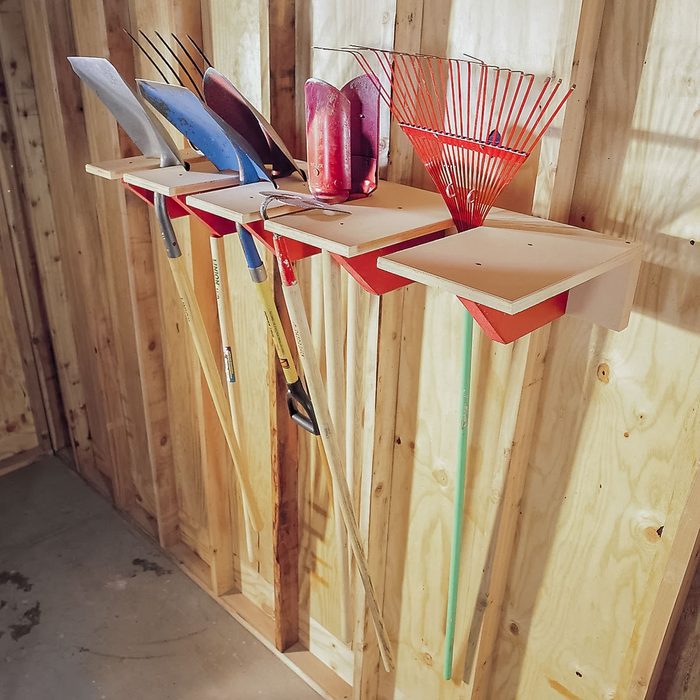
Long-Handled Tool Rack
This compact rack is strong and simple to build. You can store shovels, rakes, a sledgehammer—any long-handled tools—conveniently up and out of the way. The unit holds up to 14 items, giving you more flexibility and storage capacity than nails pounded in the wall.
8
/
21
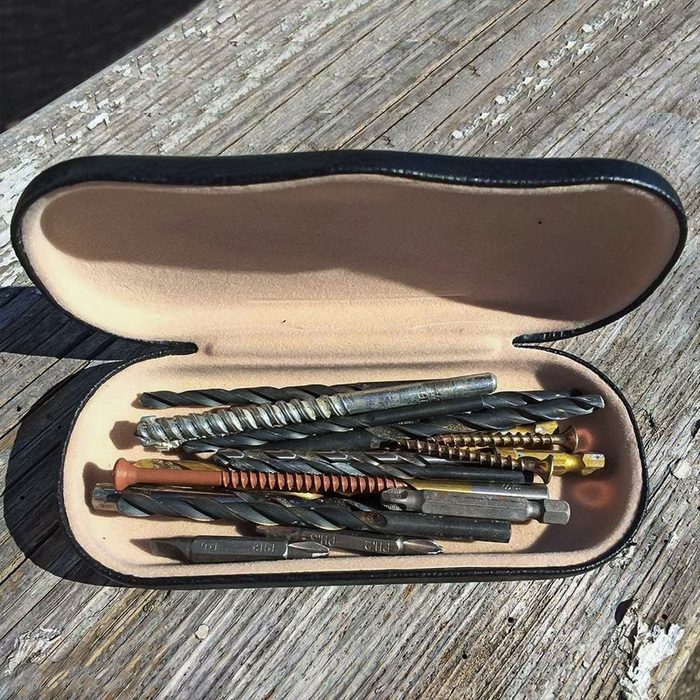
Eyeglass-case Hardware Holder
“My wife has a drawer full of old eyeglass cases that she doesn’t use anymore, so I repurposed them to store small things like drill bits and screws. I stick a case in my shirt pocket when I’m working and toss it into a toolbox when I’m done. It’s much easier than digging around for small stuff in the bottom of my tool apron.”- Norm Smith
9
/
21
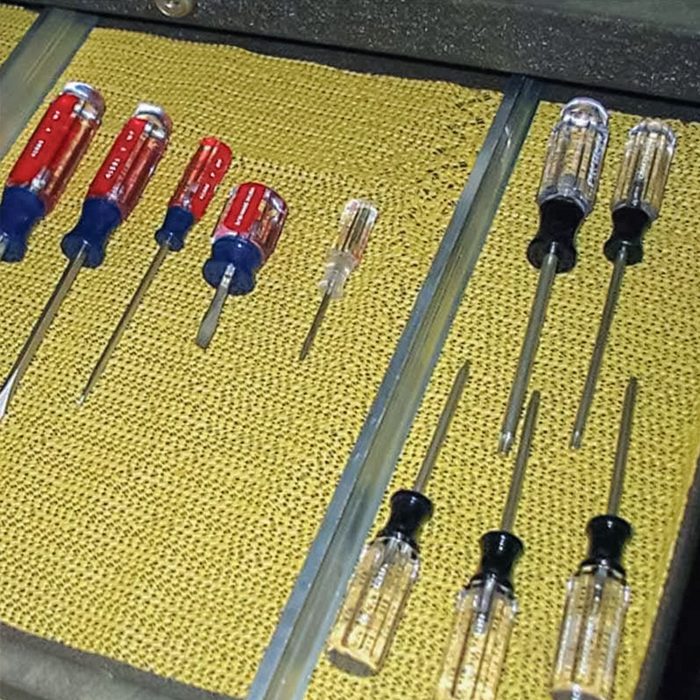
Toolbox Liner
Rubbery shelf liner works great in toolboxes, but there’s a cheaper alternative. Cut a nonslip rug mat to fit any size drawer and keep tools from sliding around.
10
/
21

Air Tool Station
A 2-1/2-gallon bucket is all you need to cleverly store air tools and hoses on a wall right by the air compressor. Screw a 3/4-in. plywood shelf inside the bucket to create two storage areas, then attach the bucket to the wall with a couple of screws and washers. Load up the bucket with nailers, nails, tire pressure gauges and other accessories and coil the hose around it.
11
/
21
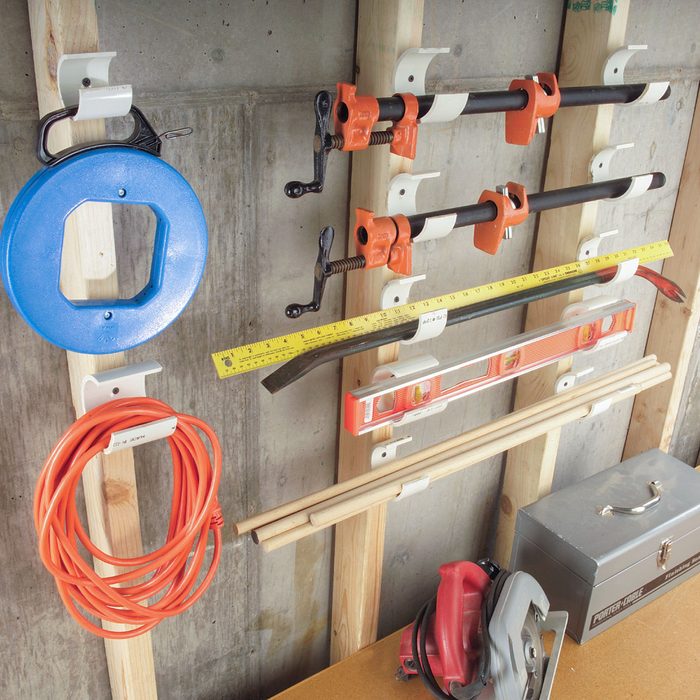
PVC Storage Hangers
Cut 2-in. pieces of 3-in. PVC and saw away a 2-in. section so it looks like a “C”. Drill screw holes and attach the hangers to studs or shop walls. Space pairs for convenient horizontal storage of longer tools such as levels and glue clamps. Use single segments for ropes, electrical cords or anything else that you want securely stored yet easily accessible.
12
/
21
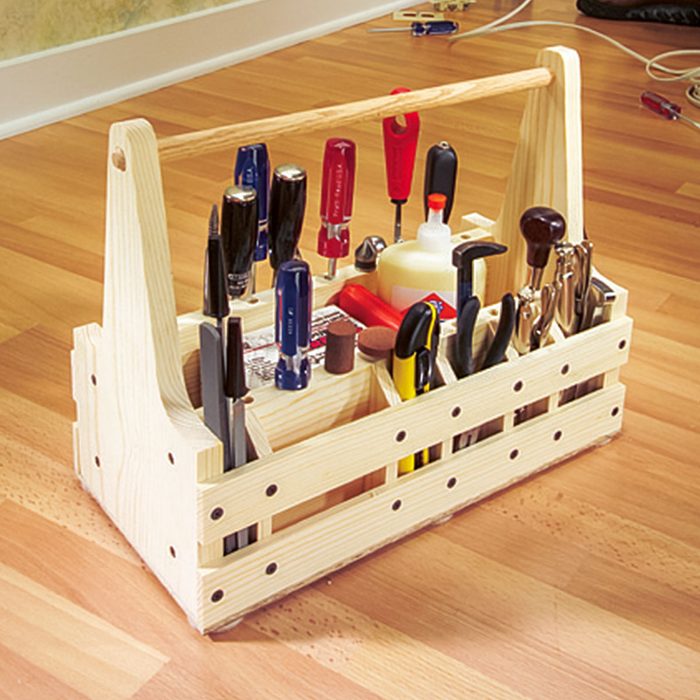
Tool Tote
Keep all your hand tools within easy reach in a portable 16-in. pine carton. Build one from a 1×8 x 12-ft. pine board, 1/4-in. plywood and a 3/4-in. oak dowel, and you’ll never run back to the garage for a bit, blade, wrench or nail. Here’s how:
- Cut and screw together the sides and ends, with the ends protruding 1 in. beyond the sides. Drill holes in the top of the ends for a 3/4-in. dowel handle and tap it in the holes before assembling the ends and sides. Drill the 3/8-in. storage holes in the top edges of the sides before assembly.
- Saw 1/4-in. x 1-1/2-in. pine strips for the side slats and screw them to the protruding ends.
- Cut and screw on the 1/4-in. plywood floor.
- Cut 3/8-in. pine partitions and screw them behind the side slats to create custom-width pockets for the tools.
That’s it—load it up and tote your tools with just one hand!
13
/
21
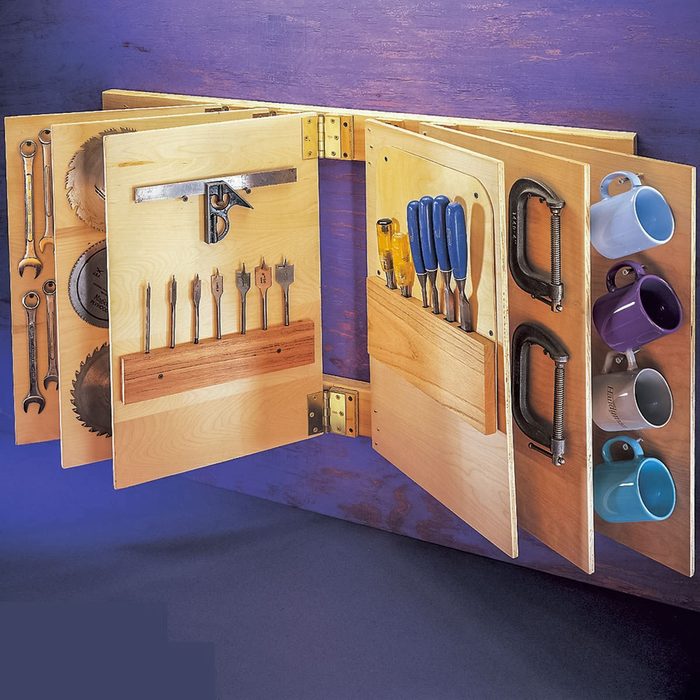
Flip-Through Storage Rack
Unless you live in an art gallery, wall space is always at a premium. Build this book-like storage rack, and expand your wall space exponentially. Grabbing a tool is as easy as flipping through a magazine. Mount two parallel 2x4s on the wall spaced 24 in. apart. Cut the leaves from 3/4 in. plywood and hang them from the 2x4s with 3-in. door hinges. Fur out the hinges with 3/4 in. plywood blocks so the pages can pivot without binding. Mount the leaves at least 4 in. apart to allow room for them to fold back.
Let your imagination run wild by creating holders for your various tools. For you pegboard fans, sandwich a 1×3 frame between two pieces of pegboard. Now, your collection of hooks and holders will work with this tool storage system.
14
/
21
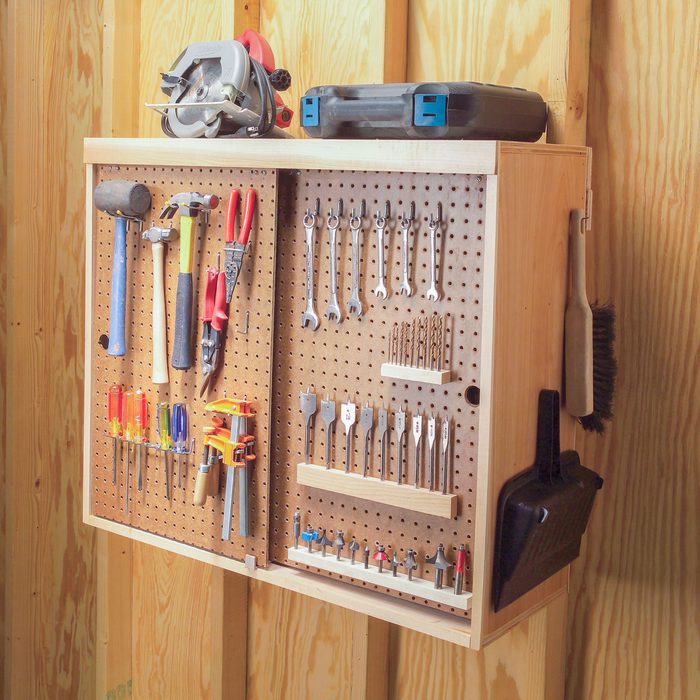
On-a-Roll Pegboard Doors
Maximize hand tool storage in a tool cabinet with this slick DIY project. The key to this project is a 4-ft.-long by-pass sliding door hardware set (about $15 at a home center). You mount a 1/4 in. pegboard onto it, making sure to provide enough room (2 in.) to hang tools on the pegboard and still allow it to slide by the door in front. The trick is to insert 1/2 in. plywood spacers in the roller hardware as shown.
You can use the floor bracket that comes with the slider hardware to maintain the same 2-in. clearance at the bottom of the cabinet. For door handles, simply drill a couple of 1-1/4-in. holes in the pegboard with a spade bit. Now pop in the pegs and hang up your tools.
15
/
21
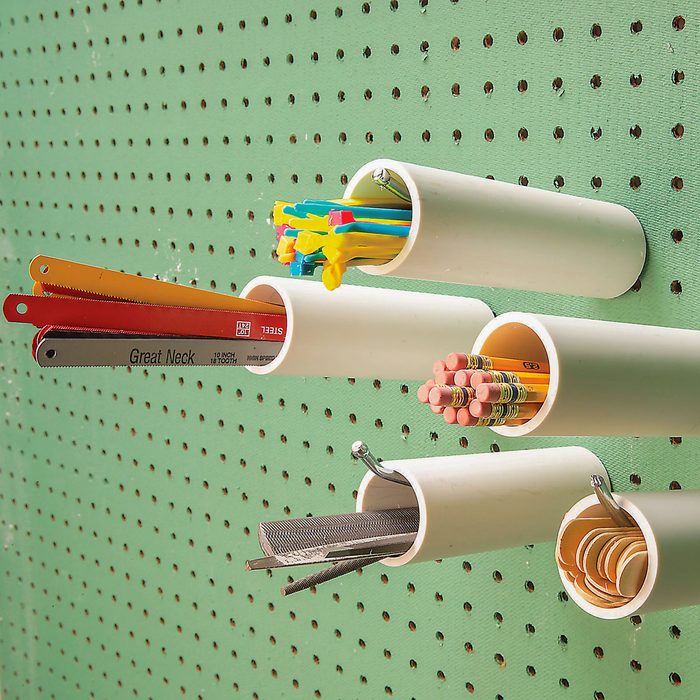
Pegboard Cubbyholes
Here’s a tool storage technique for all those slender tools and shop accessories. Cut short lengths of PVC pipe (1-1/2-in. and 2-in.-dia. pipes work well for most items) and slide them over pegboard hooks. Then load them up with files, hacksaw blades, zip ties, pencils, stir sticks and more.
16
/
21
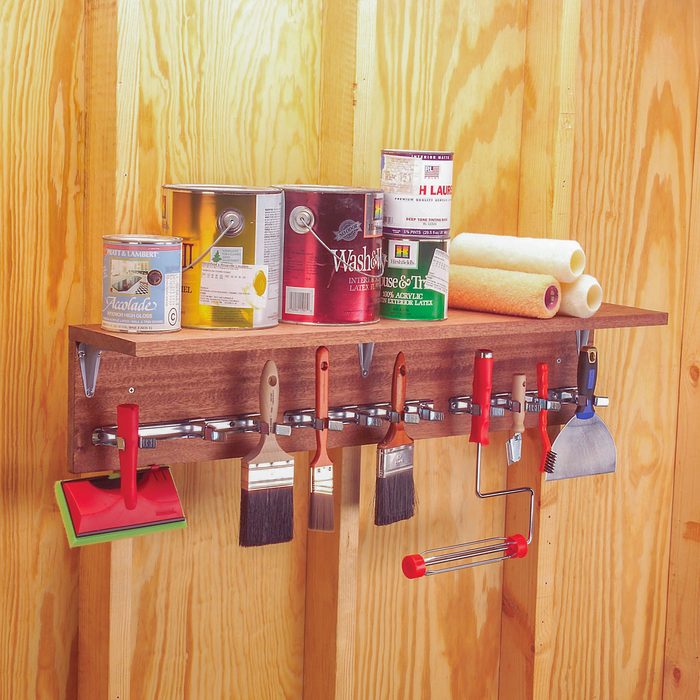
Painting Gear Hangout
Organize your paint brushes, scrapers, roller frames, rags and paint cans with this shelf made from two 1×8 boards screwed together and reinforced with metal shelf brackets. We built ours 38 inches long to fit three brackets of sliding spring grips that we mounted under the shelf for tool storage. Build and attach this shelf to a shop or basement wall, and you’ll enforce orderly storage on all your far-flung painting paraphernalia.
17
/
21
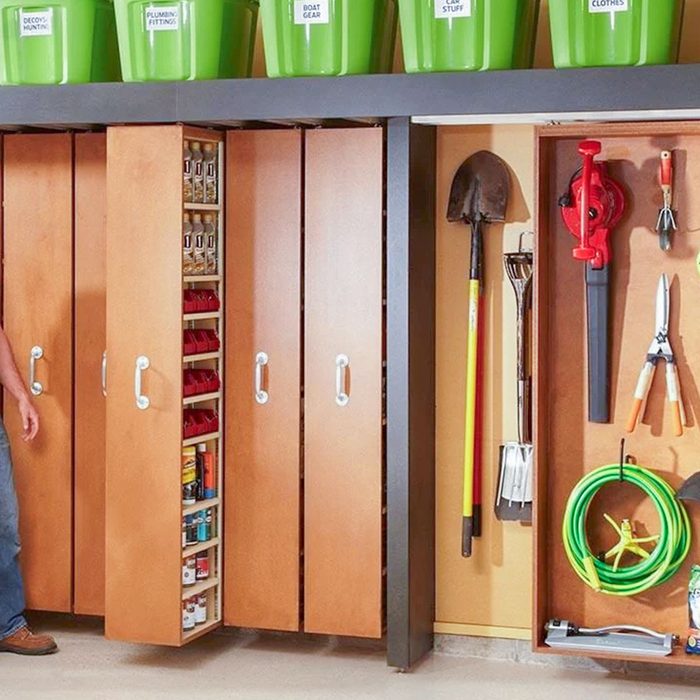
Space-Saving Sliding Shelves
Rollout shelves and sliding bypass units can make more efficient use of the sidewalls of your garage. The bypass unit adds 50 percent more storage for long-handled tools and all sorts of items that take up too much wall space. You simply slide the shelves to either side to access the stuff behind.
18
/
21
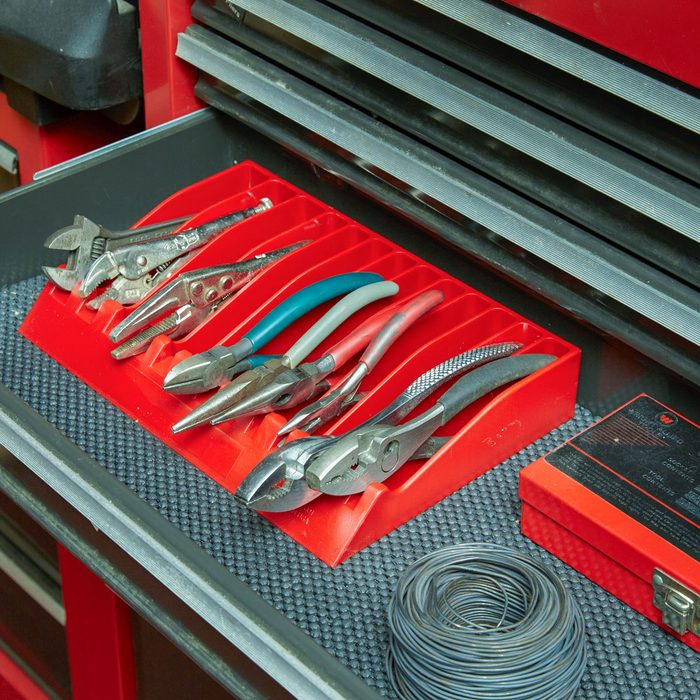
Pliers and Wrench Rack
Drop this nifty rack in a deep tool chest drawer and fit more pliers and wrenches in less space by storing them on their side. The Lisle No. 404090 storage rack holds up to 13 tools and has two different size slots. You can also build your own with custom measurements if you prefer.
19
/
21

Gutter Shelving
Vinyl rain gutters make great storage shelves for long, thin items such as molding, light lumber, pipe and certain tools. Simply screw the wraparound support bracket to each stud and snap the gutter in place.
20
/
21

S-Hook Hang-Up
Add S-hooks to wire shelving to turn any closet into a useful hang-up storage space. This provides tidy storage for mops, brooms and other cleaning tools.
21
/
21
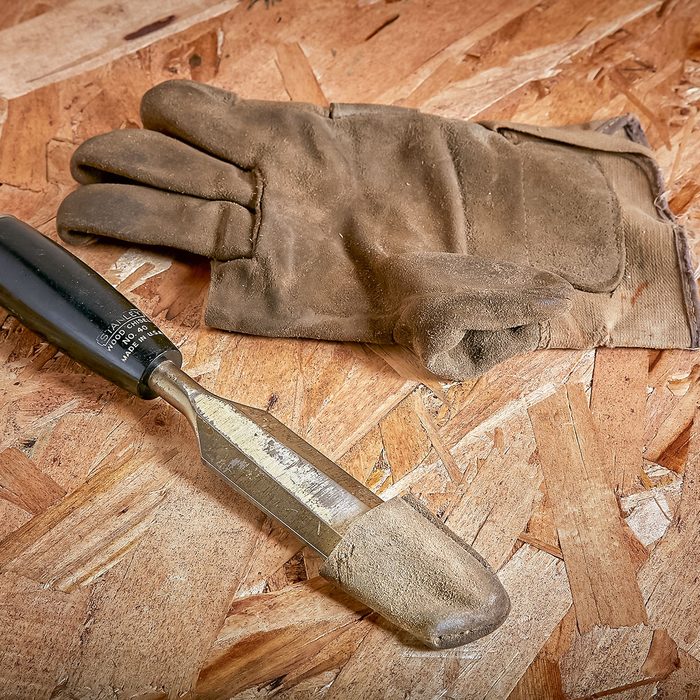
New Uses for Old Glove Fingers
Don’t throw out your old work gloves. Cut the fingers off, and you’ll find lots of uses for them. They can protect the tips of chisels when you need to carry them, and they’re also good for softening the grip of pliers.