


A drill press is a simple, one-job tool, right? Some might even call it “boring.” But as is often the case with tools, many tinkering minds have come up with clever ways to use this humble shop staple. Here’s how to use your drill press to its full potential.
How to Get the Most From Your Drill Press

Updated on Dec. 01, 2023
1
/
14

Set the Drill Press Table for Perfect “Perpendicularity”
A drill press can only drill perfectly straight holes if the table is perfectly perpendicular to the spindle. Here’s an old machinist’s trick to make your table spot-on:
- Make about a 30-degree bend in a 1/4-in. steel rod about 2 in. from the end.
- Cut it to a length that will reach the outer edges of your table when the short end is in the chuck.
- Chuck in the rod and then turn the chuck so that the rod’s end is oriented toward either edge of the table.
- Raise the table until the rod just touches the surface and then lock the table.
- Turn the chuck to position the rod on the opposite edge of the table.
- Adjust the tilt of the table until the rod touches both edges equally.
- Lock the tilt adjustment nut and never adjust it again.
2
/
14
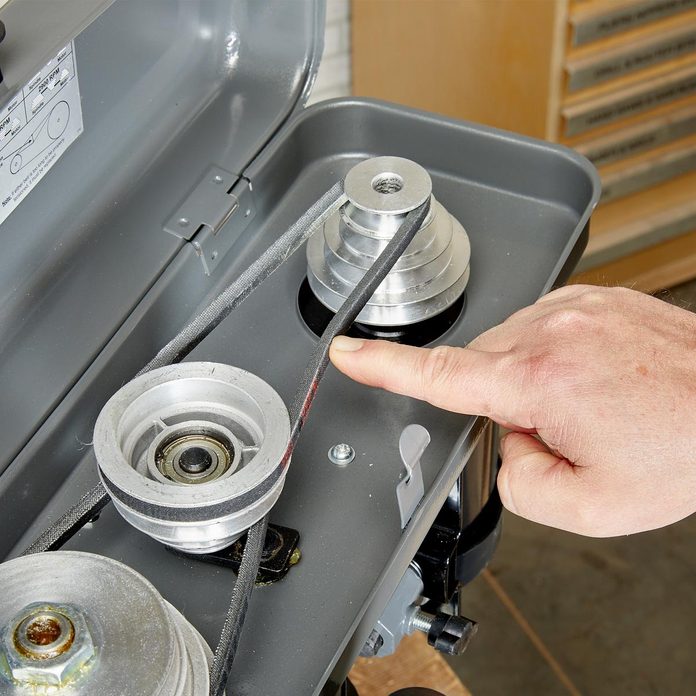
Adjust Belt Tension to Limit Vibration
After you’ve changed speeds, or if your drill press has excessive vibration, check the belt tension. You should be able to deflect the belt with your finger no more than 1/2-in. midway between pulleys. To adjust the tension, loosen the motor lock, move the motor forward or backward, and then tighten the lock again. Some drill presses have a tension adjuster lever to move the motor.
3
/
14
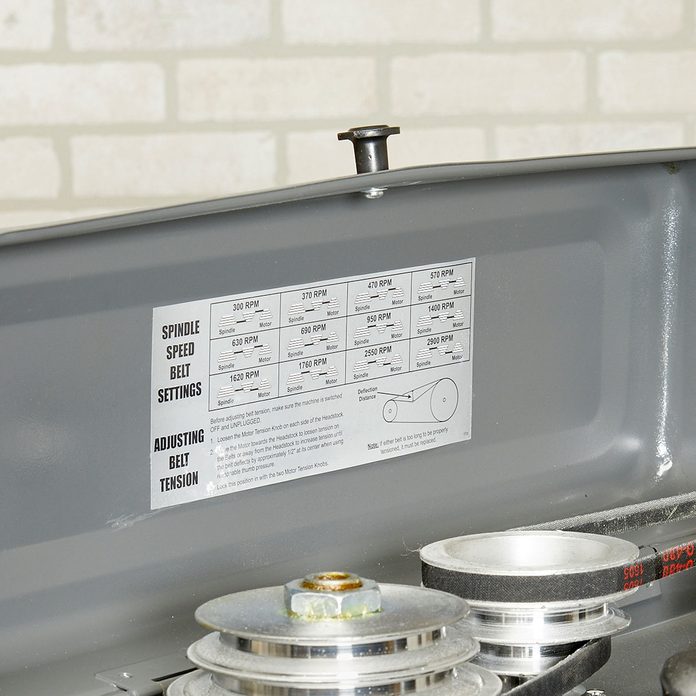
Check Your Speed for Effective Drilling
Detailed charts are available online with information about speed, bit types, diameters and the material being drilled. But here are two general rules: Decrease speed as the bit diameter increases, and slow way down for steel.
Some high-end drill presses have a variable-speed dial on the front. Otherwise, you’ll change speeds by changing the belt position on the pulleys located under the top cover. On most drill presses, a graphic under the lid shows the speeds associated with different belt positions. To change the belt positions, first release the motor lock to take the tension off the belts.
4
/
14
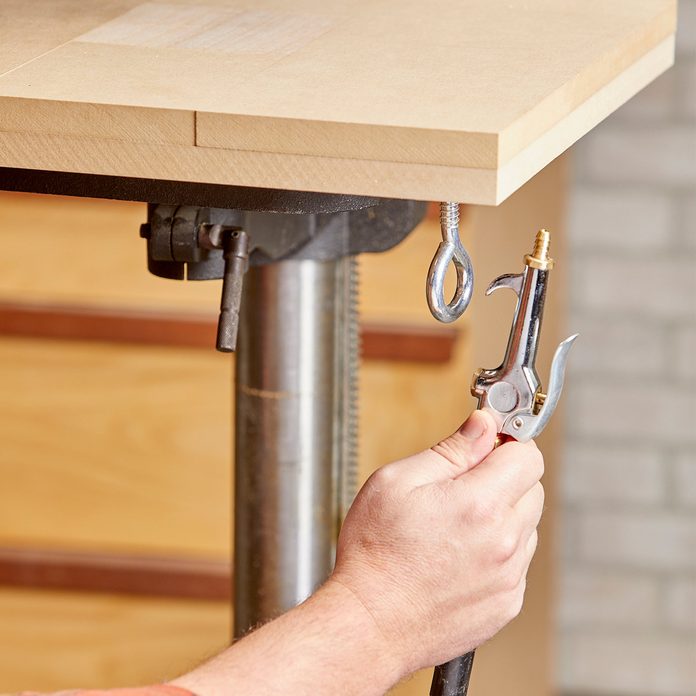
Clear Debris Quickly With an Air Nozzle
The best thing for clearing dust off the table and out of the bit’s flutes is compressed air. Hang an air nozzle from an eye screw on the underside of the table for easy access to quick cleaning.
5
/
14
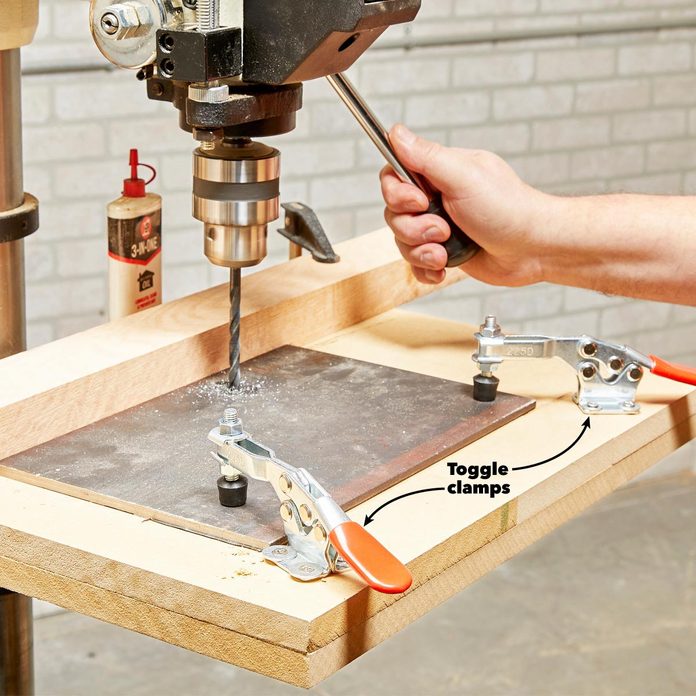
Secure Workpieces With Toggle Clamps
Sometimes—such as when you’re drilling steel—you need to firmly clamp your workpiece to the table. Use a pair of toggle clamps and just screw them directly to the table where needed.
Plus: Check out 28 more secret clamping tricks from woodworkers.
6
/
14
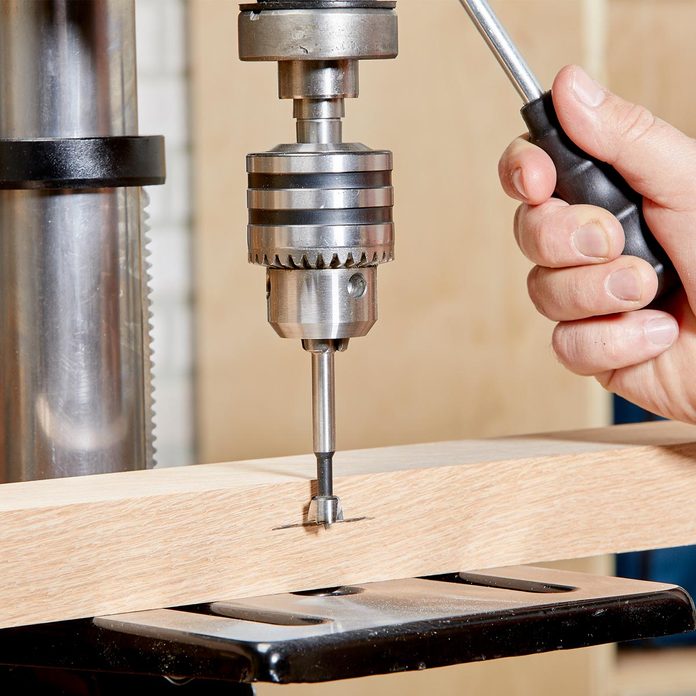
No-Fuss Depth Setting
Mark the desired depth on the edge of your workpiece. Lower the spindle until the bit reaches the mark, and then set your depth stop.
7
/
14
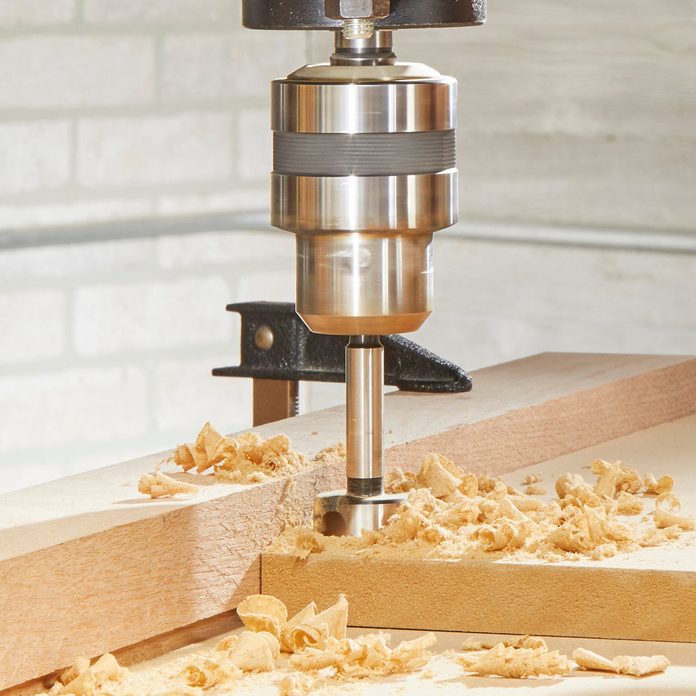
Plunge and Release to Clear the Flutes
Don’t bore a hole in a single plunge. The bit’s flutes will fill up with sawdust, create heat, slow down drilling and dull the bit prematurely. Instead, drill in small increments, raising the bit often to release the sawdust. If the sawdust doesn’t come out on its own, blow it out.
Put your drill press skills to use with these amazing outdoor woodworking projects for beginners.
8
/
14
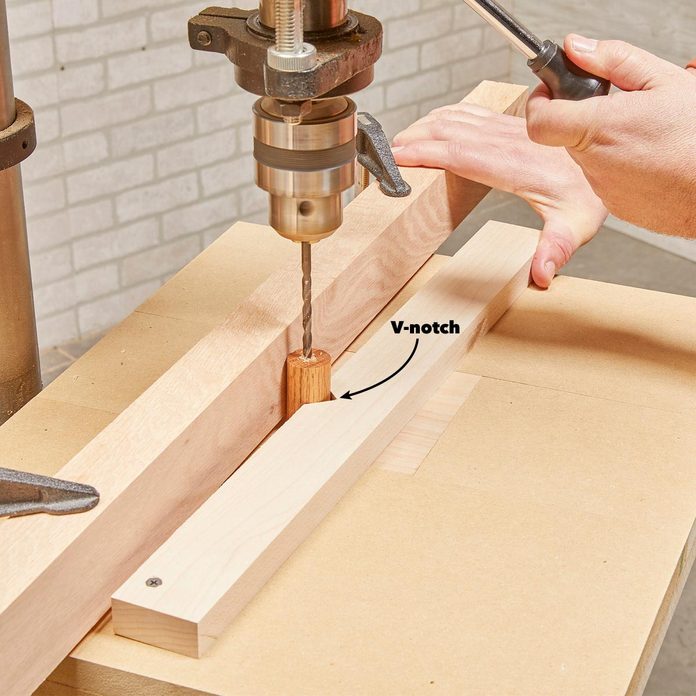
Make a Clamp Bar for Small Parts
To safely drill small parts, you need a way to hold them. A clamp bar is a fast solution. Predrill a screw hole in the end of a 1×2, and then screw it directly to the table where needed, according to the size of the workpiece. This pivoting bar lets you squeeze the workpiece against the fence while keeping your hands out of the way. For dowels, cut a V-notch in the bar to keep them from sliding. A hand screw clamp also works well for small parts, again with a V-notch for dowels.
9
/
14

Drill Evenly Spaced Holes
One of many ways to drill evenly spaced holes is to use a shelf standard attached to a fence. Tap a finish nail into the edge of your workpiece and clip off the head so that no more than 1/8 in. is left protruding. Mark your starting hole on the workpiece and drill it with the nail engaged in the shelf standard. Move the workpiece however many spaces are needed on the shelf standard for each consecutive hole.
10
/
14
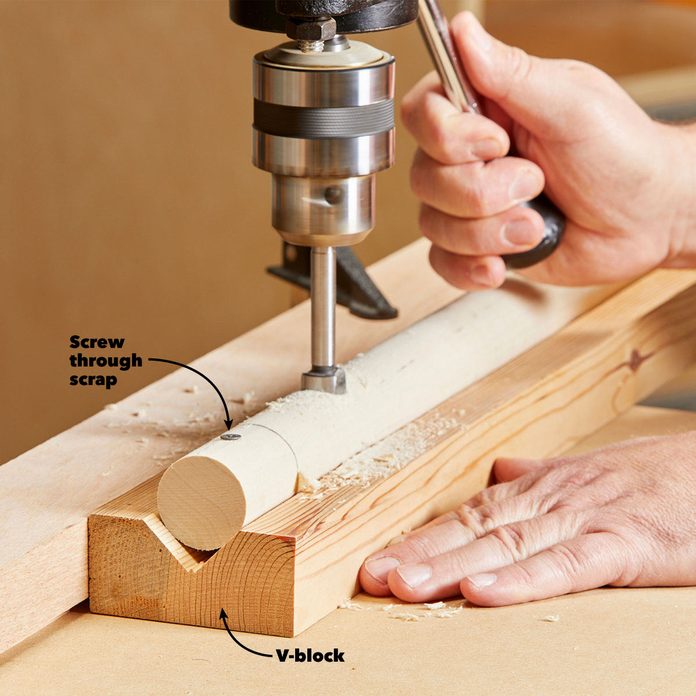
Stabilize Round Stock With a V-Block
To drill a hole or a straight line of holes in a cylindrical object, use a shop-made V-block. To make one, set your table saw or circular saw blade to 45 degrees, and then make two passes to create the “V.” Leave a little extra length on the dowel, screw the end of the dowel to the V-block and cut that end off later when you’re finished.
11
/
14

Make a Dust Channel for Accurate Drilling
When you’re drilling, sawdust collects between the fence and the workpiece, preventing your workpiece from registering against the fence for subsequent holes. Make a 1/4-in. x 1/4-in. rabbet on the fence’s bottom edge so the dust has a place to go and won’t interfere with drilling accuracy. Likewise, when you’re clamping stops to the fence, leave them 1/4 in. above the table’s surface.
12
/
14
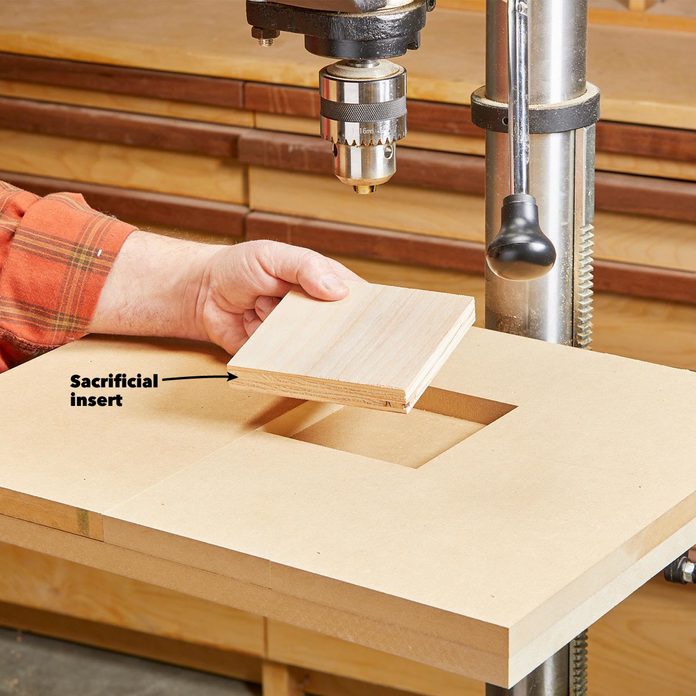
Add a Bigger Table for Better Support
Most drill press tables are small and not ideal for woodworking, so add a larger table. Two thicknesses of MDF will suffice. On the table shown, the top layer of MDF is assembled as a frame. This allows for a replaceable sacrificial insert where all the drilling happens. The insert is offset so that only one quadrant is centered under the chuck. This lets you use all four quadrants of the insert before it needs replacing.
13
/
14

Drill Angled Holes With a Hinged Table
To drill shallow angles, don’t tilt the table. Instead, make a hinged platform. Join two pieces of MDF together at one end with a piano hinge. The platform is 3-in. narrower, centered on the base. The fulcrum is 1-1/2 in. tall, and its length is the same as the platform’s width. Fasten a 1-1/2-in. angle bracket to each end of the fulcrum. To use, slide the fulcrum to create the desired angle, and then clamp or screw the angle brackets to the base.
14
/
14
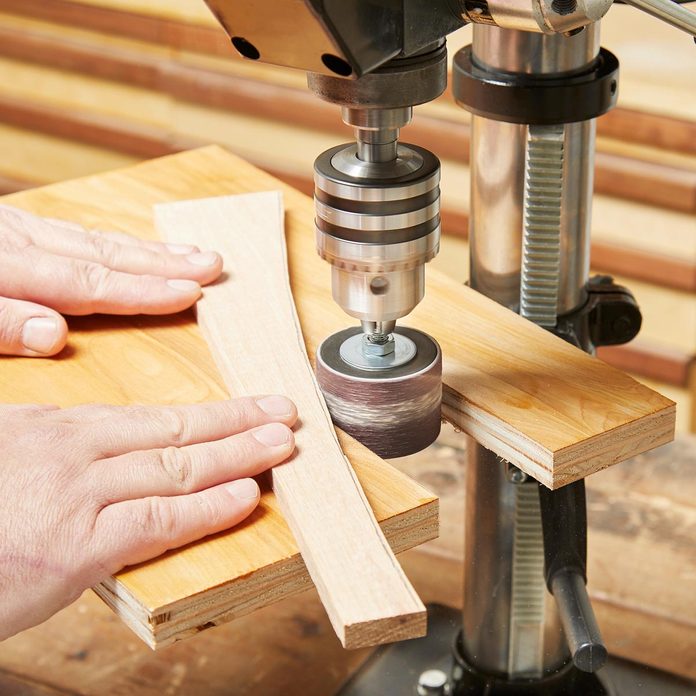
Build a Sanding Table in 5 Minutes
A set of sanding drums is a handy addition to your drill press. One advantage this setup has over a spindle sander is that you can set the height of the drum to utilize the entire sanding surface. All you need is a piece of plywood with a cutout sized for the sanding drum you’re using. Swing the table off to one side and clamp the sanding platform into place. Get cracking in your shop with these awesome indoor woodworking projects.