


If you want to upgrade your kitchen without spending a lot of money, knowing how to paint kitchen cabinets is the perfect DIY solution.

24 DIY Kitchen Cabinet Painting Tips and Techniques

Updated on Oct. 07, 2024
1
/
24
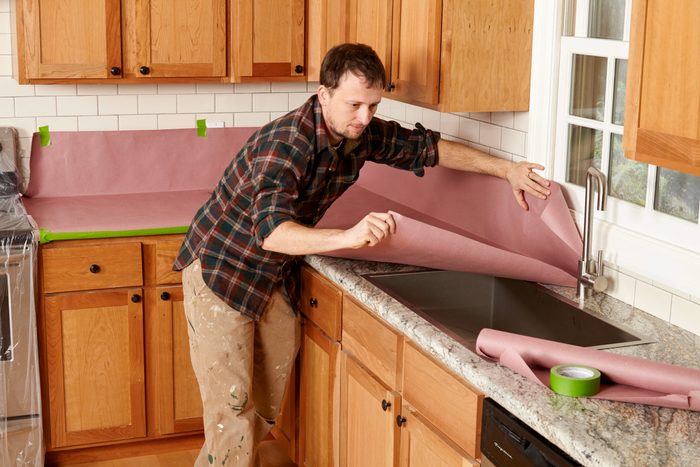
Protect Countertops With Rosin Paper
Painting cabinets is messy, and the last thing you want is paint all over your countertops. An easy way to protect your counters, backsplash and floor is to cover them with inexpensive rosin or brown builder’s paper.
A common roll size is 35 inches wide by 140 feet long. Simply measure and cut pieces to size, then keep them in place with painter’s tape. When you’re done in the kitchen, you’ll have plenty of paper left for future painting projects.
2
/
24
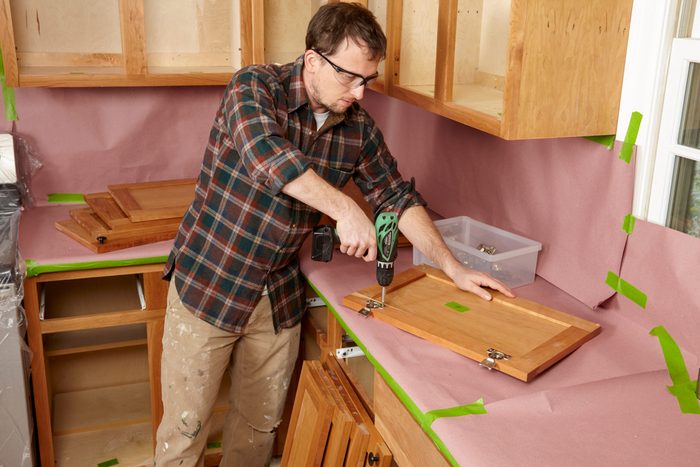
Remove Doors, Drawer Fronts and Hardware
It’s tempting to leave the doors in place for painting as you begin painting kitchen cabinets. However, you’ll get a much neater look by removing them, as well as all the hardware. “Do not skip this step,” Thorman says. “You will not get a professional result if you do not remove your cabinet doors and hardware.”
On many modern cabinets, drawer fronts can be removed from the drawer by backing out a few screws.
3
/
24

Label Doors
Start by making a quick sketch or two showing all the doors and drawers. Assign a number to each door and drawer, so you know exactly where to put everything back when you’re finished.
Label the doors and drawers with the corresponding number when you remove them. Write the number on the back of the door under the hinge locations where it won’t be visible. Then cover the numbers with masking tape to protect them while you’re painting.
4
/
24

Get the Grease Off
Even the best paint for kitchen cabinets won’t stick to greasy cabinets. So the first critical step is to clean them with a grease-cutting solution. Dishwashing liquid will work, but Otto recommends using a stronger product like Trisodium phosphate (TSP). “Kitchen cabinets can get really greasy, so you’ll want to give them a good cleaning,” she says.
Mix according to the instructions and scrub the cabinets. Then rinse them with clear water and wipe them dry with a clean rag.
5
/
24

Fill Any Holes, Dents or Dings
The first paint-prep step after cleaning grease from cabinets is usually filling unwanted holes, dents and dings with wood filler. “If you’re changing hardware, you’ll need to fill these holes as well,” Otto says. She recommends a product like Minwax Stainable Wood Filler.
Use a putty knife to apply a smooth layer of filler over the hole or dent. Let it dry, then apply a second coat. Sand smooth when dry.
6
/
24
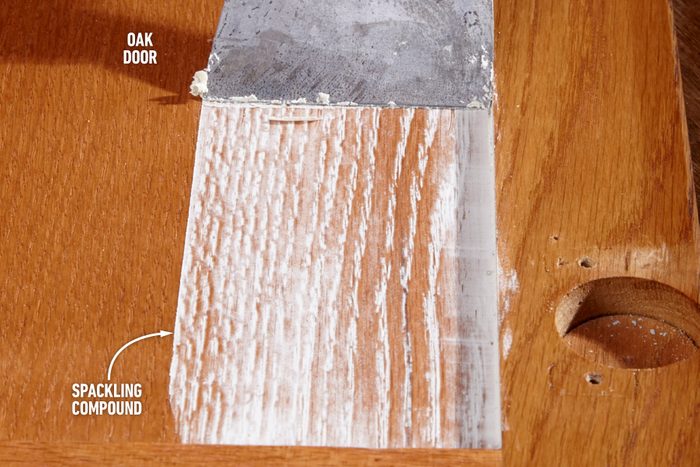
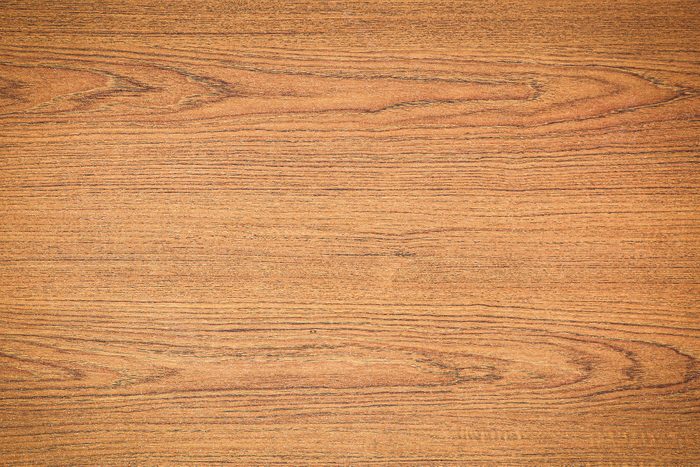
Consider Filling Open Grain
Some types of wood, like oak, have grain with many open pores that are especially noticeable under paint. It’s OK to leave the grain showing, but if you prefer to not see it, you’ll have to fill the pores before painting. “It’s up to you whether you want a smooth, clean look,” Otto says. “It really comes down to aesthetics.”
There are several methods for filling open grain. You can apply several coats of a high-build primer or fill the grain with spackle or wood filler, as shown here.
7
/
24

Support Doors on Standoffs
If you don’t mind a few barely visible dimples on the back of your doors, you can paint both sides of a door at once using standoffs or plastic painting pyramids.
Paint the back of the door first, leaving the edges unpainted. Then flip the door over and rest it on the screw tips or pyramids. Paint the front of the door, then the edges.
When the paint dries, you can spot tiny indentations where the screws contact the wet paint on the door backs, but they’re inconspicuous.
8
/
24

Sand All Cabinet Surfaces
You should sand or strip cabinets before painting. “This is especially true if your cabinets have any sort of factory varnish finish on them,” Otto says. “Getting them down to bare wood is key to a successful project.”
For intricate surfaces, use a chemical stripper in a well-ventilated area. Sand flat surfaces by hand or use an orbital sander.
If the surface has previously been painted, lightly scuff sand it with 120-grit sandpaper, then clean and apply primer.
9
/
24

Vacuum, Then Use a Tack Cloth
To ensure a smooth paint job and good adhesion, it’s critical that you remove all the sanding dust from cabinet surfaces.
Start by vacuuming everything using a soft bristle brush attachment. Then, use tack cloths to remove the rest.
To use a tack cloth, completely unfold it and loosely bunch it up. Wipe it gently over the surface to pick up dust. Shake it out frequently and re-form the bundle to use it again.
10
/
24

Avoid Self-Priming Paint
Always apply a dedicated primer when painting cabinets for ultimate adhesion on high traffic surfaces. A paint and primer in one may save you time, but will not hold up as well over time.
“It’s best to always use a separate primer, especially in places where you’ll be cleaning all the time,” Otto says. “I love the Insl-X Stix primer. It adheres to everything and can even be used on metal cabinets.”
11
/
24
Choose the Right Paint for Kitchen Cabinets
Read the label and choose a paint formulated for woodwork and cabinets. “My go-to is Cabinet Coat by Benjamin Moore. It’s great for trim, doors and amazing for cabinets,” Otto says. “It cures as a hard enamel that withstands dings and traffic very well.”
And remember, glossier surfaces highlight imperfections, so unless you’re a very meticulous painter, consider an eggshell or a satin sheen.
12
/
24

Double-Check for Defects After Priming
After sanding, getting rid of dust and priming the cabinets, it’s a good idea to check everything with a bright light to spot and fill any remaining holes or dents with additional filler. It’s usually easier to spot these problems after priming.
The downside of this additional round of spackling is that you’ll have to reprime the patched areas.
13
/
24
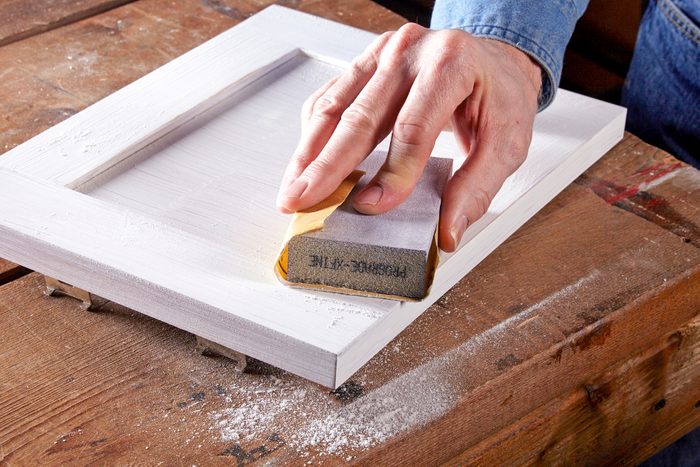
Sand Lightly Between Coats
Dust can settle in the paint or primer as it dries. For the smoothest final coat, sand between coats of primer or paint with 220-grit sandpaper or an extra-fine sanding sponge. Then vacuum and tack as usual before recoating.
“Make sure your paint has ample time to dry to ensure you aren’t taking it back to the wood, but just removing any texture or bumps,” Thorman says.
14
/
24
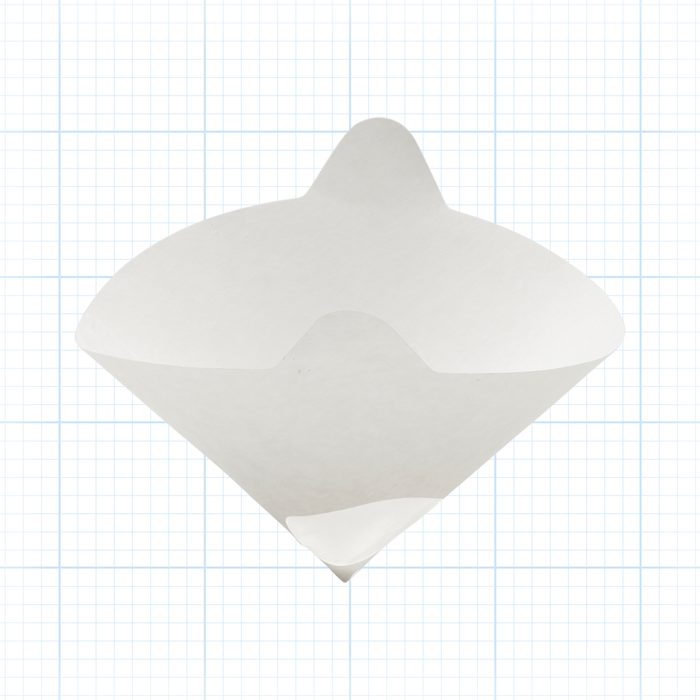
Strain Your Paint
Even fresh paint should be strained before use to remove any small lumps that could mar the paint job. If you don’t want to go to this extreme, at least filter any leftover paint.
Place a mesh bag paint strainer over a bucket and fold the edges over the top. Slowly pour the paint through the strainer to remove any impurities.
15
/
24
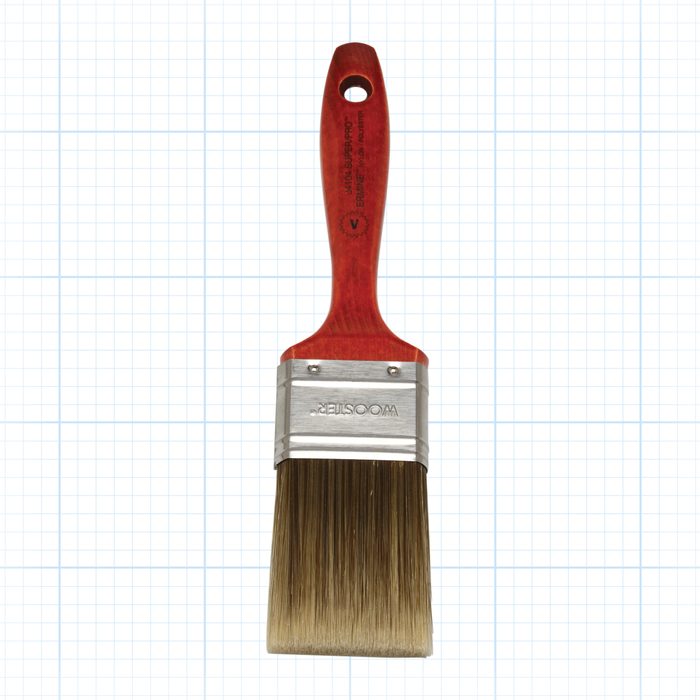
Use a Top-Quality Brush
If you decide to paint with a brush, splurge on a good one. A 2-in. sash brush like the one shown here is just about perfect for cabinets. Keep it clean, and it will last for many paint jobs. Paint stores usually offer the widest selection and the best advice.
- Pro Tip: It’s easier to clean your brush if you dampen it with water (for water-based paints) before you start painting.
16
/
24

Keep the Edges Clean
When painting the edge of a cabinet door, it’s easy to apply too much paint and create a buildup along the edge.
To avoid a dried ridge of paint along the door edge, smooth out any paint that’s lapped over onto the adjoining surface with a paintbrush or small sponge brush.
Stop and check periodically for excess paint so you can remove it before it begins to dry.
17
/
24
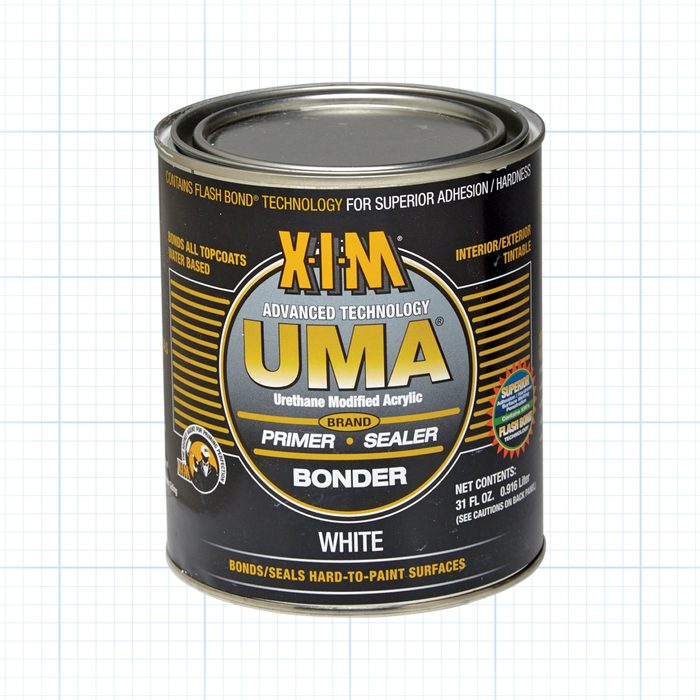
Worried About Adhesion? Try Acrylic Urethane
Acrylic urethane has many properties that make it a perfect primer for cabinets. First, it sticks tenaciously to almost any surface. You could even paint over plastic laminate cabinets with acrylic urethane.
Acrylic urethane also cures to a very hard and durable finish. You can use acrylic urethane primer and cover it with your choice of paint, or you can use acrylic urethane paint as the final coat.
18
/
24
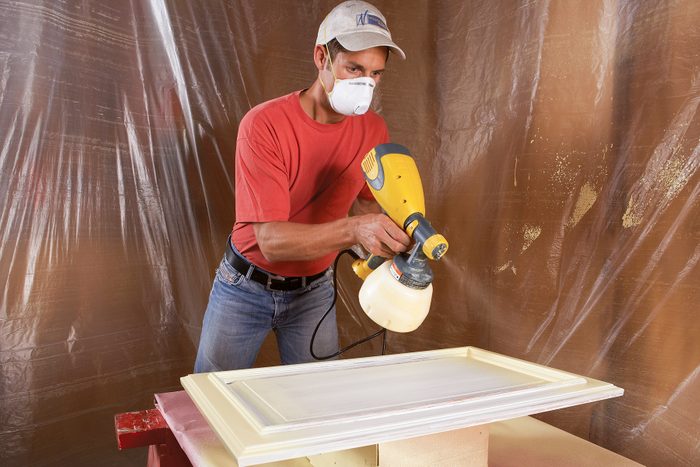
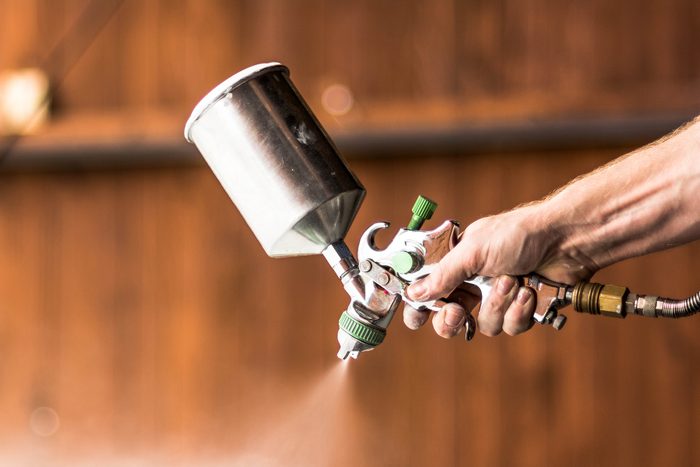
Consider Spray-Painting the Doors
With a little practice and a good sprayer, you can spray your doors to achieve factory-finish quality. A pro-quality airless sprayer will work best for unthinned water-based finishes, but you can also get great results with a high-volume, low-pressure (HVLP) sprayer.
“I prefer to use an airless paint sprayer like the Graco Magnum X5,” Thorman says. “It’s perfect for the DIYer. Use long, even strokes and keep your sprayer moving to avoid drips or heavy coverage.”
19
/
24

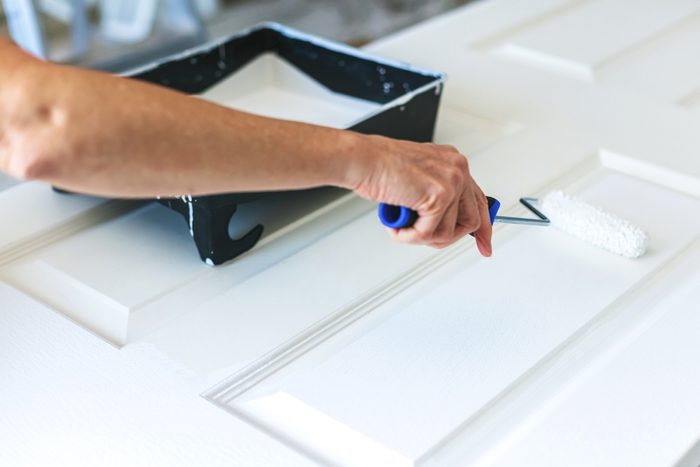
Paint with a Mini Roller
A mini roller is another great option when painting kitchen cabinets.
There are many roller sleeves available, but when learning how to paint cabinets, microfiber or foam sleeves are good choices. Foam sleeves will leave the smoothest finish, but they don’t hold much paint, so consider using them in conjunction with a brush.
“I like to use a brush for a first pass and then go over it with a foam roller to give it an even look,” Thorman says.
20
/
24
Follow the Wood Grain
If you’re painting frame-and-panel cabinet doors with a brush, follow the direction of the wood grain with your finishing brushstrokes. This gives the cabinets a more professional final look.
Paint the open panel first, using vertical finished brush strokes. Next, paint the horizontal stiles following the grain. The vertical stiles should receive the last brush strokes running from top to bottom.
21
/
24
Roll, Then Brush
If you prefer to paint with a brush, you can speed things up by first applying the paint with a mini roller. Roll on the paint, then drag your paintbrush bristles lightly over the surface to even out the coat and eliminate roller marks.
This is one of my favorite time savers when using a brush to paint cabinets. Work in small sections that you can roll and brush before the paint begins to dry.
22
/
24
Spot-Prime With Shellac
Pigmented shellac in a spray can (BIN is one brand) is perfect for spot-priming areas you may have missed or areas you have patched and sanded after priming.
Shellac sticks well to most finishes, dries quickly and covers well. It has a watery consistency, so apply in thin coats and be vigilant for drips. Shellac primer will also require acetone or denatured alcohol for cleanup.
23
/
24

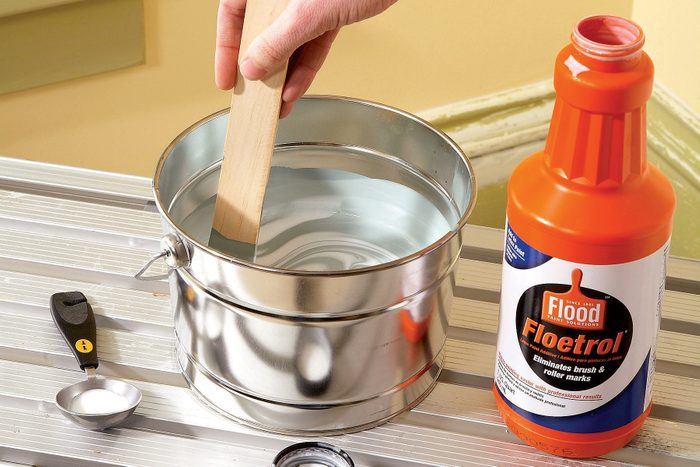
Add a Paint Conditioner
If your paint seems too thick and isn’t leveling out after it’s applied, try mixing in a paint conditioner like Floetrol. Read the instructions for the correct proportion of conditioner to paint.
Conditioned paint is often easier to apply and dries to a smoother finish. It can be used with brush, roller or sprayer applications. Take care if mixing it with high-gloss paint, as it can reduce the sheen in these paints.
24
/
24

Set up a Dedicated Workspace
“Since you will need to account for multiple coats and drying time, this project will take place over a few days,” Thorman says, “I suggest you set up a workstation somewhere else in your home, so you can still access your kitchen to prep and cook your meals.”
Consider painting your cabinet doors in your garage or basement where they will be out of the way for the duration of the project.
About the Experts
- Rachel Otto is the paint department manager at Fleury Lumber in Easthampton, Massachusetts, specializing in Benjamin Moore products. She has 10 years of industry experience.
- Jeff Thorman, the host of Home RenoVision DIY, has 25 years experience as a contractor. Painting is his favorite home renovation task. With his tutorials on YouTube, he aims to teach and empower homeowners to renovate and remodel their homes.