
Despite the obvious drawbacks-it's messy, sticky and impossible to remove once it cures-there's nothing better than spray foam for sealing energy-wasting air leaks (an so much more!). These are our best ways to use spray foam around your home.

Step Up Your Spray Foam Game With These 17 Hacks and Tips

Published on Feb. 13, 2025
1
/
17

Stop Drafts—and Mice!
Plugging holes on the exterior of your house with foam sealant is a great way to stop air infiltration, but it may not keep out pests. Mice can and will chew right through the regular expanding foam, but there are formulas that stop insects and rodents. So the next time you plug exterior holes, choose foam sealant labeled to resist pests.
2
/
17

Add an Extension Tube
The short, stiff straw on cans of expanding foam sealant makes it difficult to reach some areas. The solution is to buy a length of 1/4-in. tubing at the home center and use it to extend the straw. With this setup, you can reach almost anywhere.
3
/
17
Dampen for Fast Curing
Expanding polyurethane foam sealant requires moisture to expand and cure. If you’re applying foam to dry wood or other dry surfaces, or working on a day with little humidity, misting the area first will help the foam expand and cure faster. Be careful, though; you want to dampen the area, not wet it. Foam sealant won’t stick well to a wet surface. You can also mist the foam after it’s applied to maximize expansion and speed up the curing process.
4
/
17
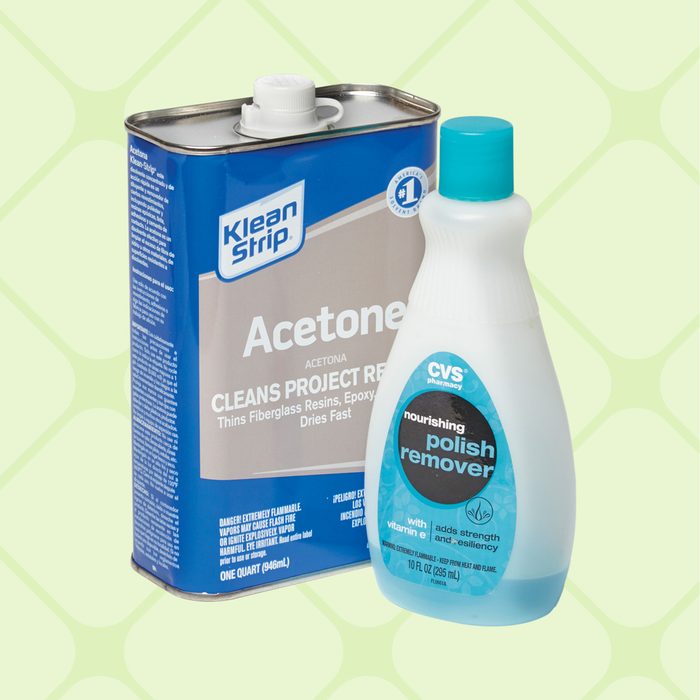
For Pre-Cure Cleanup
Acetone is a solvent that dissolves uncured polyurethane foam and can be used to clean up foam before it cures. Acetone-based nail polish remover will also work to remove uncured foam. Unfortunately, these products don’t have any effect on cured foam. Once it cures, you’ll have to scrape or sand off unwanted foam.
5
/
17
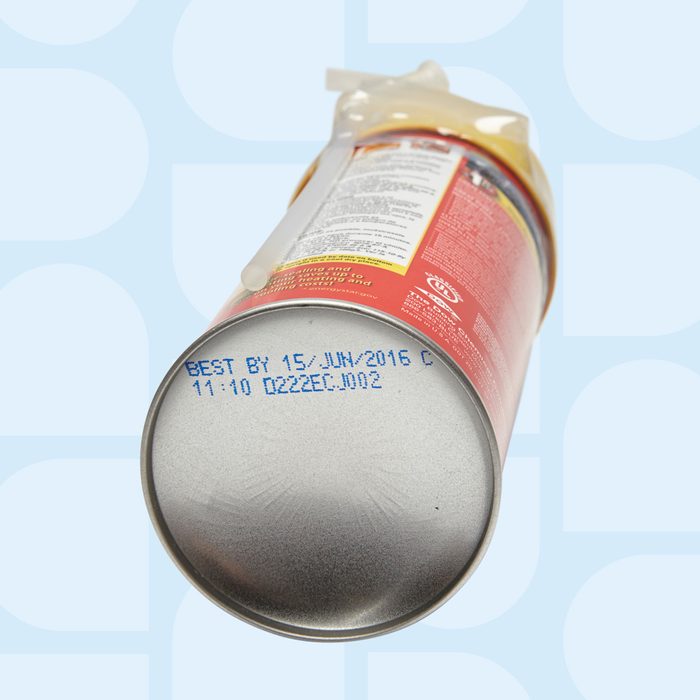
Check the Expiration Date
Like food, expanding foam sealant is best when it’s fresh, or at least not expired. So always make sure you’re getting a fresh batch by checking the ‘best by’ date on the bottom of the can before you purchase it.
6
/
17
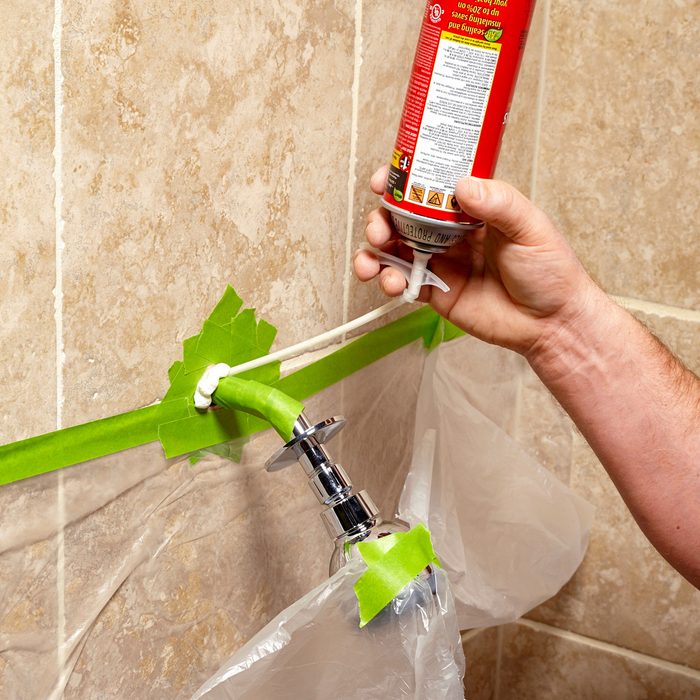
Firm Up a Wobbly Showerhead
Squirt a little expanding foam around a loose shower arm, and it’ll be solid as a rock. Let the foam set up until it’s stiff and carve off any excess around the shower arm. Slide the cover plate tight to the wall and you’ll never know there’s foam holding things together. This same trick firms up any other loose or wobbly pipe.
7
/
17
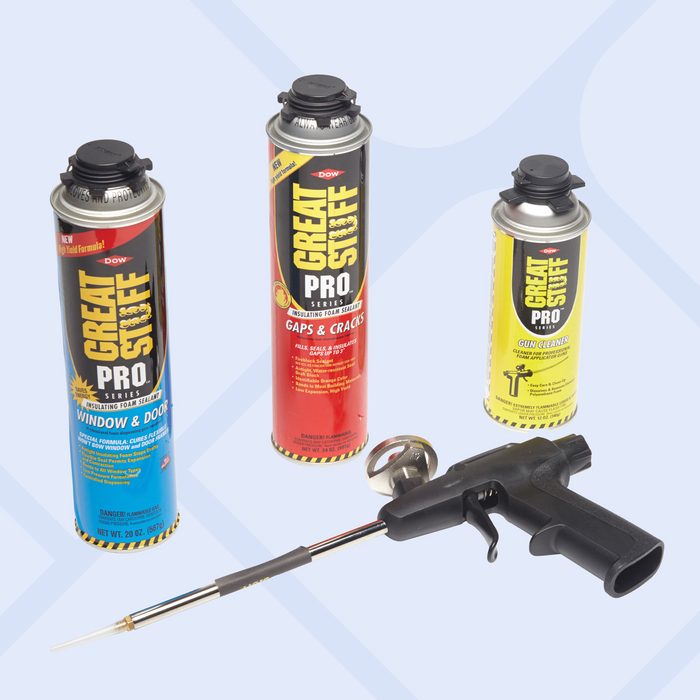
Splurge on a Gun—You Won’t Regret It
If you’ve got more than a few windows or doors to seal with foam or are planning to make the whole house airtight, you should consider investing in a gun to dispense the foam. A basic model like the one shown here costs about $30. Guns have several advantages over cans with plastic straw applicators. First, turning the knob on the back adjusts the flow rate, so you can dial in the size of the foam bead to match the project. The long, rigid tip gives you better control and access, especially with the added disposable tip attached.
When you’re done using the foam for the day, just wipe off the tip and set the whole works aside. A ball in the tip seals in the foam so it won’t cure in the gun. You can leave it like this for up to a month without cleaning. When you do want to clean up the gun, buy a can of cleaner, screw it on, and spray until the gun is clean. You can also buy cans of urethane adhesive and use the gun to apply it.
8
/
17
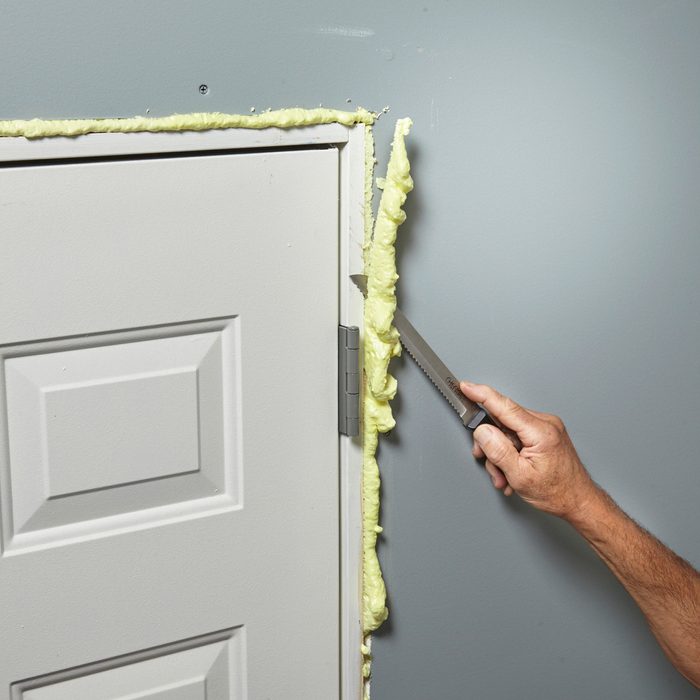
Cut Cured Foam With a Bread Knife
A serrated knife with a flexible blade is perfect for cutting off excess foam. Just make sure the foam is completely cured and firm all the way through or it’ll stick to the blade.
9
/
17
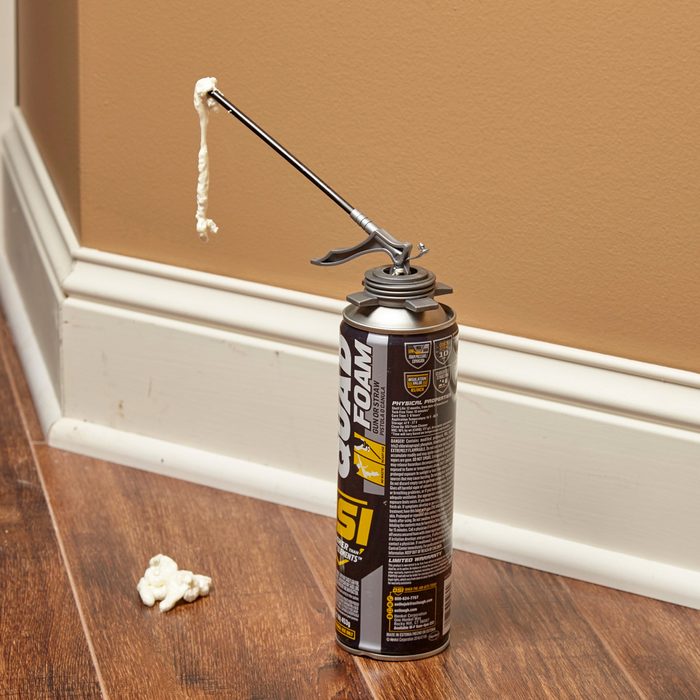
Be Careful Where You Set the Can!
A problem with expanding foam is that sometimes it expands when you don’t want it to, like when you’re done foaming and set the can down. One way to avoid this is to keep a cardboard box handy and always set the foam can in the box to catch the drips.
10
/
17

Seal Foam With Foam
Basement or crawl space rim joists are a major source of energy loss in a house, so it’s well worth the effort to add insulation and seal any cracks and gaps. A good DIY approach is to cut rigid foam insulation to fit between the joists. Cut it about 1/2 in. undersized so it’s easy to fit in. Shim the rigid foam in place with little chunks of foam. Then fill the space around it with expanding foam. Don’t forget to caulk or foam the joint between the sill plate and the foundation too.
11
/
17
Leave Accidents Alone
When foam goes where you don’t want it, you’ll be tempted to wipe it up. DON’T! You’ll only spread the goo and make the mess worse. Instead, let it harden completely and then scrape or sand it off.
12
/
17

Black Foam Hides in the Shadows
What’s special about ‘landscaping’ foam? It’s black, so it disappears in the shadows. And just like other canned foam, it expands to fill irregular spaces, sticks tenaciously to almost everything including stone, and cures to form a waterproof barrier, making it ideal for plugging holes in water features or retaining walls and even gluing wobbly stones in place. You’ll find this black expanding foam at garden centers, home centers and some hardware stores.
13
/
17
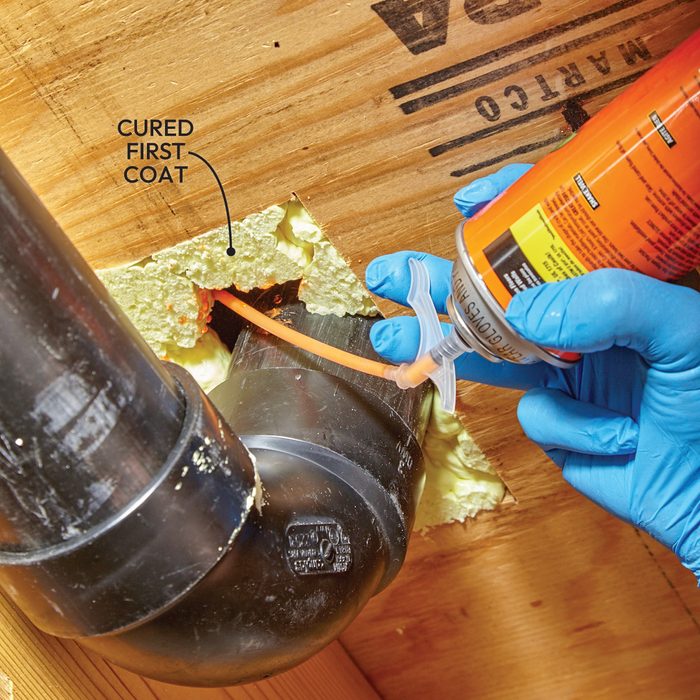
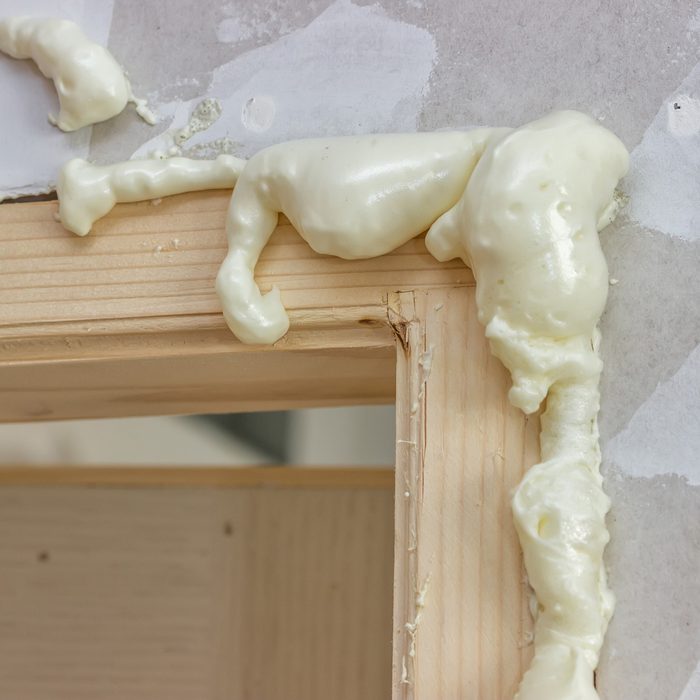
Big Holes Need a Double Dose
Some holes are so big that the foam starts to sag. For large holes like this, the trick is to fill the perimeter, let the foam cure and carve it off. Then add another layer to finish the job.
14
/
17
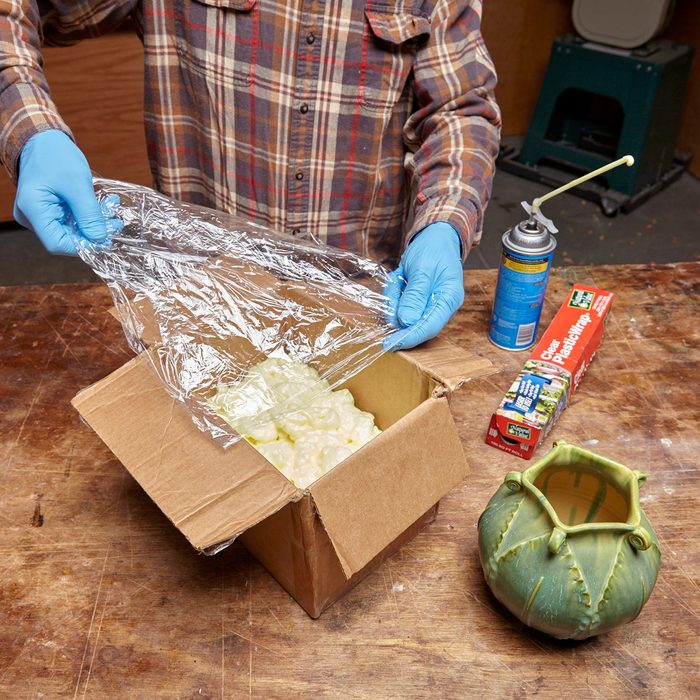
Protect Fragile Stuff
Got a fragile vase to ship? Encase it in foam to keep it in one piece. Start by lining the box with plastic wrap and filling it about a third of the way with foam. Let the foam stiffen enough to support the vase. Place a layer of plastic wrap on the foam. Wrap the vase in plastic wrap too. Set the vase on the foam and add a layer of plastic wrap on top. The two layers of plastic will allow the foam to separate into two pieces for easier unpacking. Now fill the rest of the box with foam. Remember, the foam will expand, so don’t fill it to the top. When the foam has cured, carve off any overflowing bits and seal the box for shipping.
15
/
17
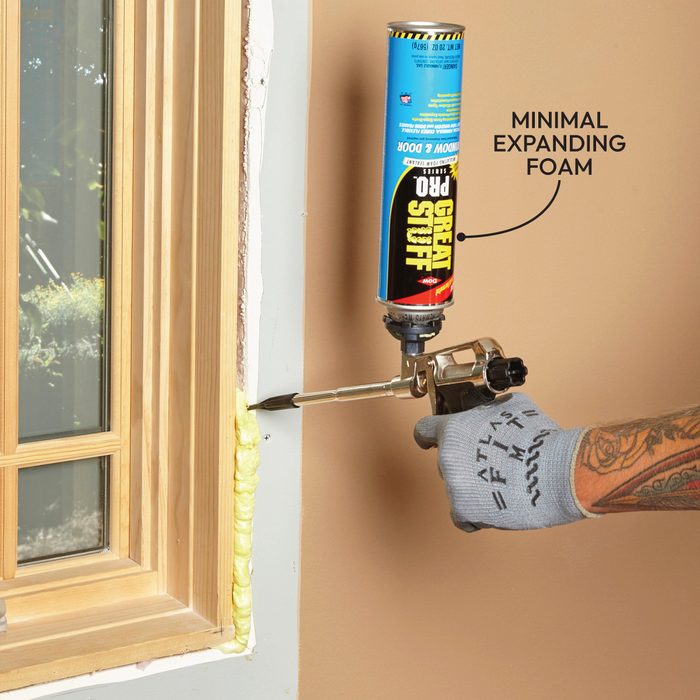
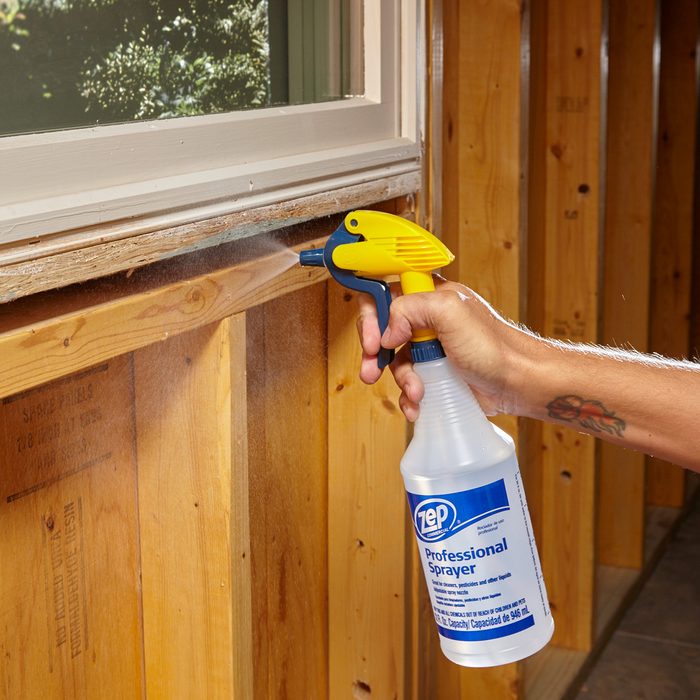
Play It Safe Around Windows and Doors
Sealing around windows and doors is one of the most common uses for expanding foam. But it can actually push the jamb inward, making them impossible to open. Avoid this by using minimal expanding foam. It’s formulated to fill the space around windows and doors without excess expansion. Look for cans labeled for use on windows and doors. Another good idea is to fill the space with two layers. Push the applicator tip all the way to the back of the space and move it quickly along as you pull the trigger. Let this first layer expand and cure. Add another if necessary.
16
/
17
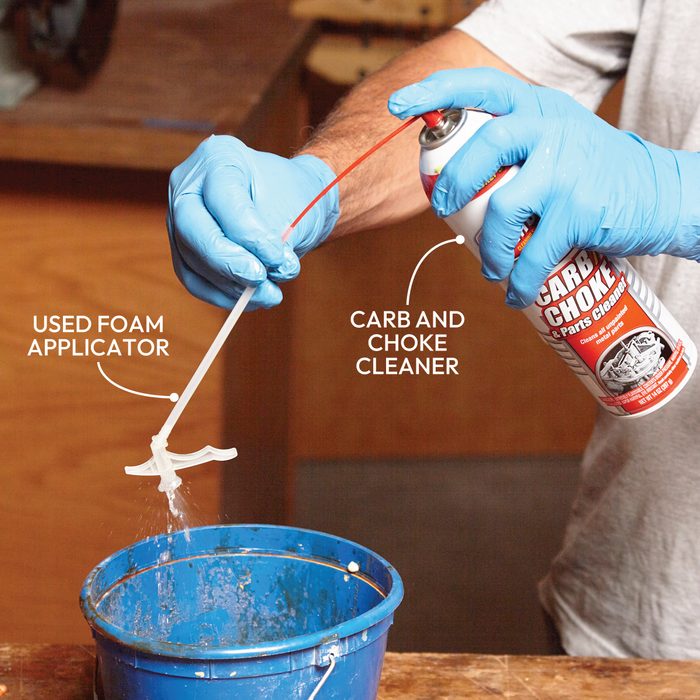
Reuse the Straw
One of the biggest complaints about cans of expanding foam is that if you don’t use the whole can, cured foam clogs the applicator tip and you can’t use it again. There are several solutions to this problem, but the slickest we’ve found is to buy a can of carb and choke cleaner (at auto parts stores) and use it to clean uncured foam from the tube and trigger immediately after you’re done applying foam. The acetone in carb cleaner works perfectly on expanding foam. And the straw included with the carb cleaner is just right for inserting into the foam applicator straw. Be sure to wear safety glasses because the pressurized cleaner can blow back when you’re cleaning the straw.
17
/
17
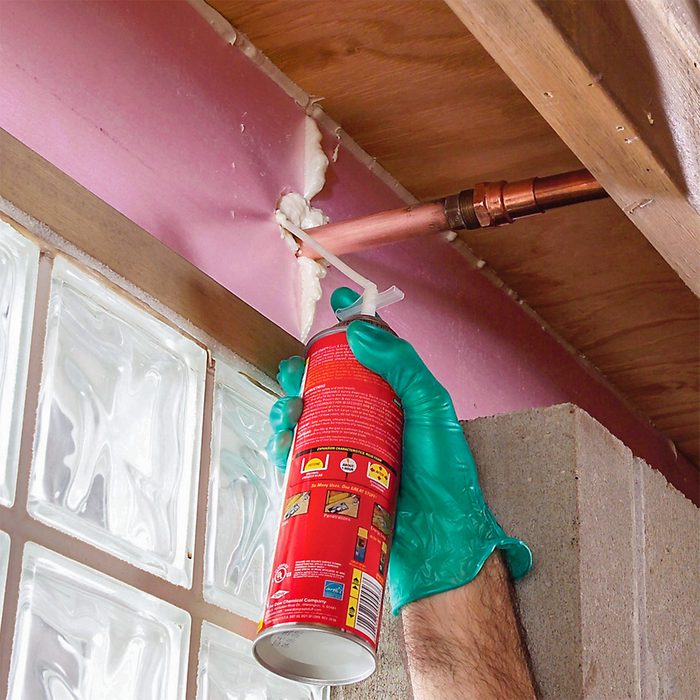
Wear Gloves—or Wear Stains
Expanding foam sealant is nearly impossible to keep off your hands, and once it’s there, it’s equally hard to get off. So unless you want to wear the foam until it wears off, put on gloves. Disposable vinyl or nitrile gloves are a good choice. And make sure to wear old clothes because you’ll probably get foam on those, too.