


Family Handyman reader Christopher Rings sent us photos and drawings of his incredible workbench. We just might need to build one of these for the Family Handyman shop, too. Check it out!
Reader Project: Mobile Flip-Top Workbench
1
/
35

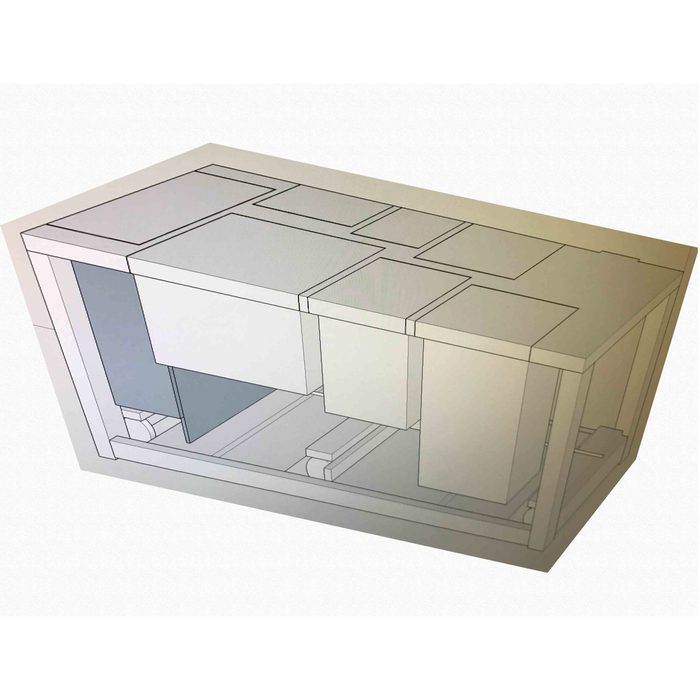
So after a long seven months, to the day, my mobile flip-top workbench is finally completed. This bench holds a planer, jointer, oscillating sander, drill press, bandsaw, bench grinder and a belt sander. – Christopher Rings
2
/
35

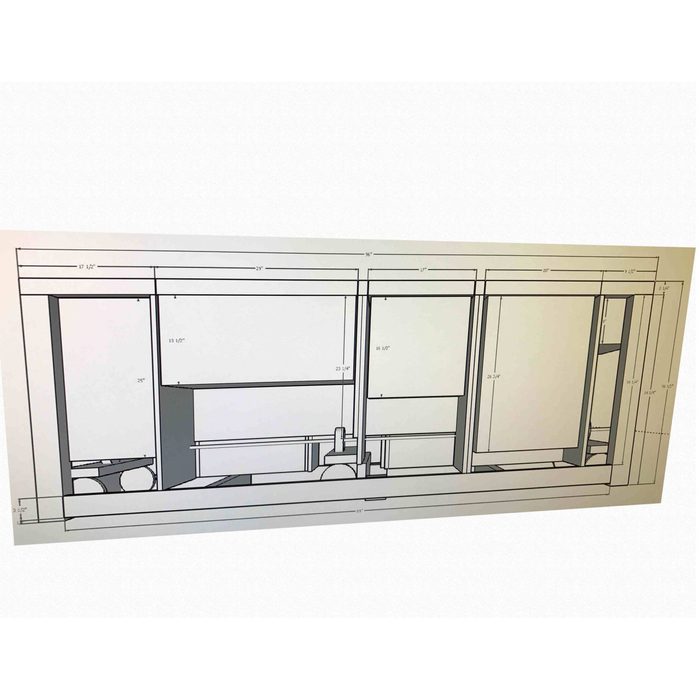
To get started, I created the following plans for my workbench in SketchUp. Here are my construction drawings.
3
/
35

4
/
35
5
/
35
6
/
35
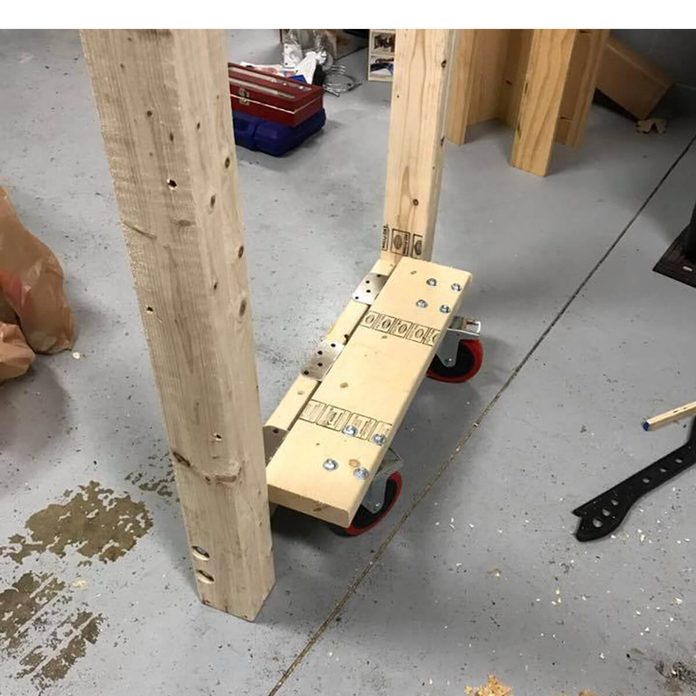
Here is the first side support with casters.
7
/
35
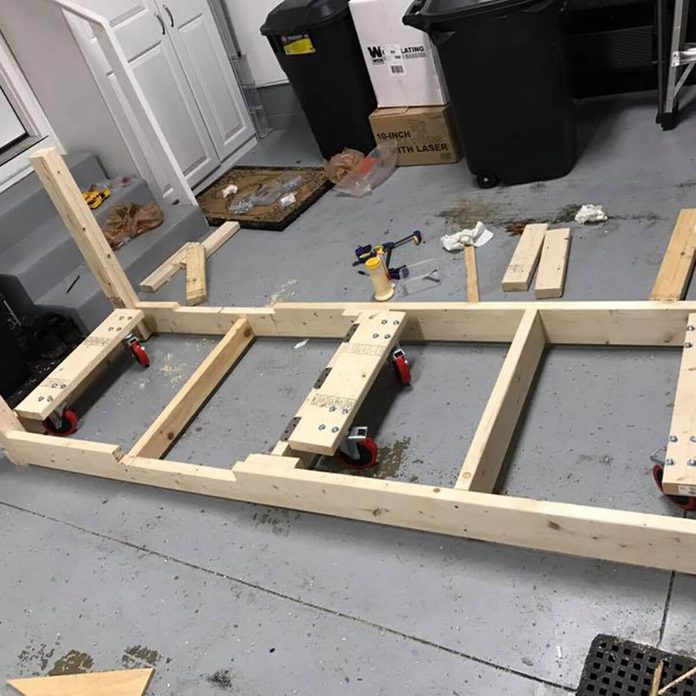
This is the base of the workbench with casters.
8
/
35

9
/
35
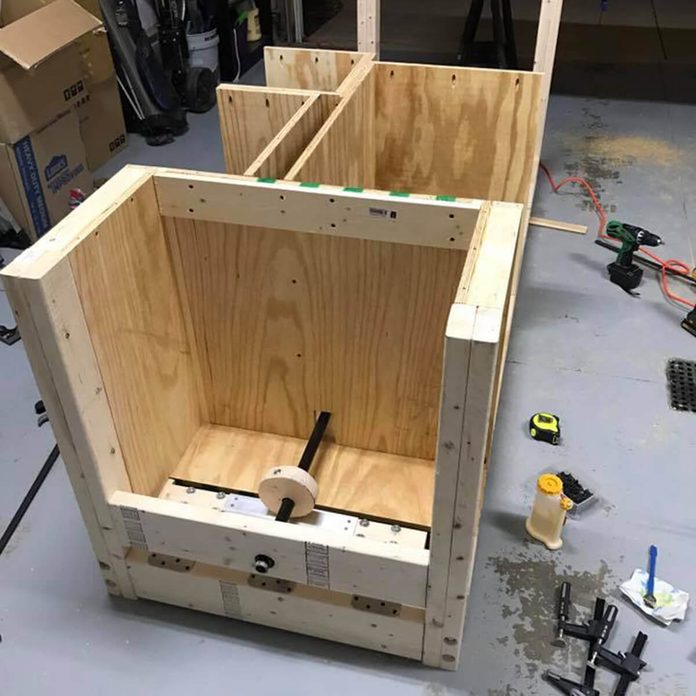
Cam and rod installed to move casters.
10
/
35
Another view.
11
/
35
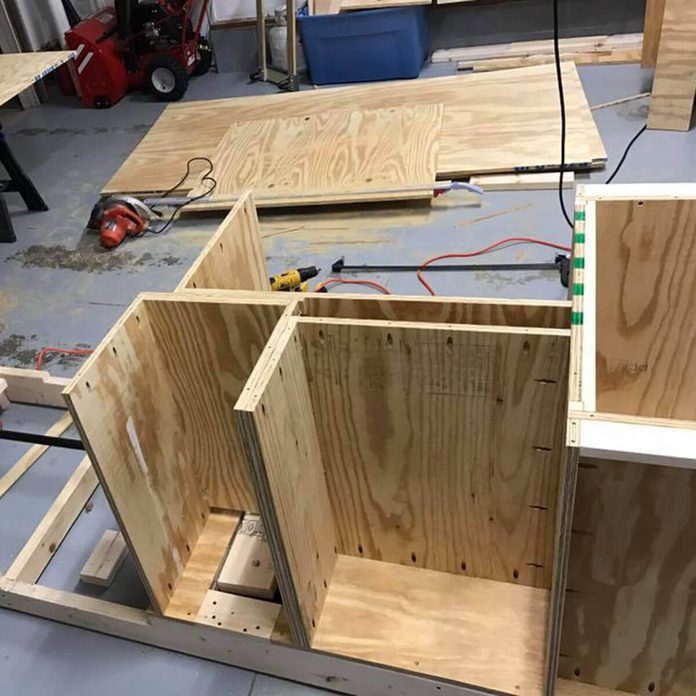
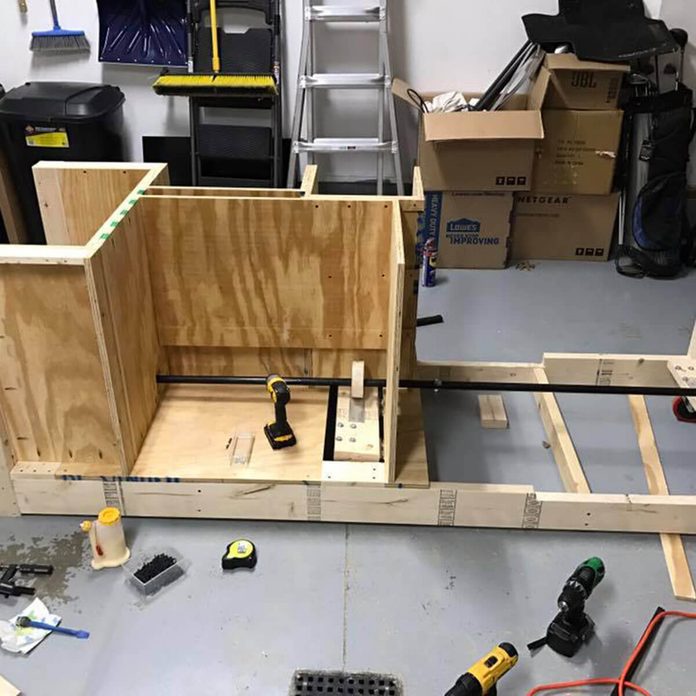
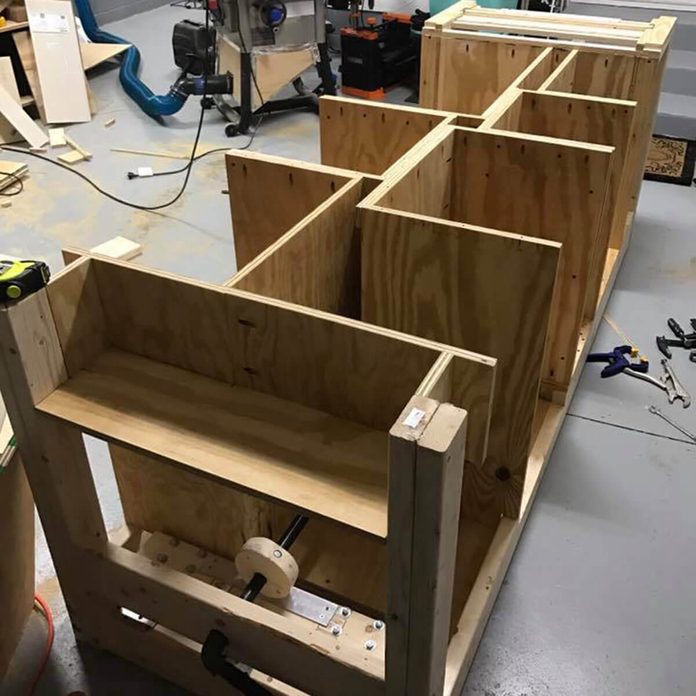
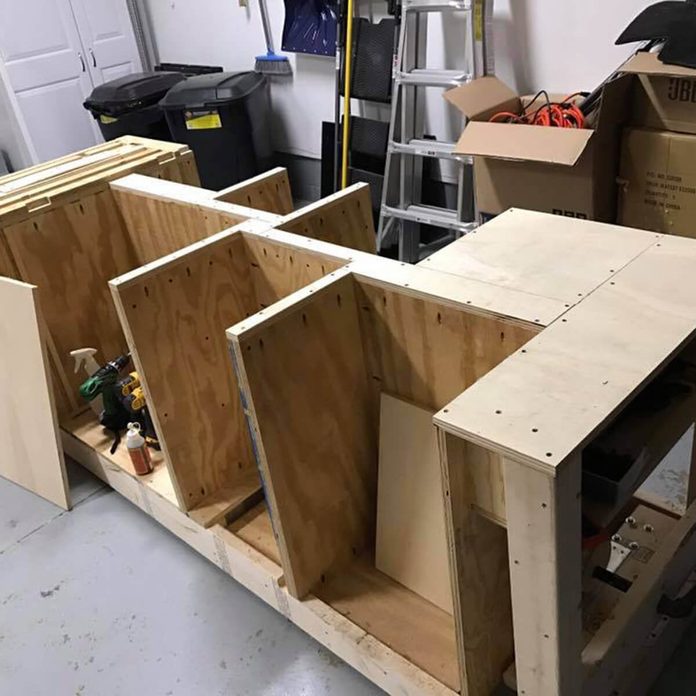
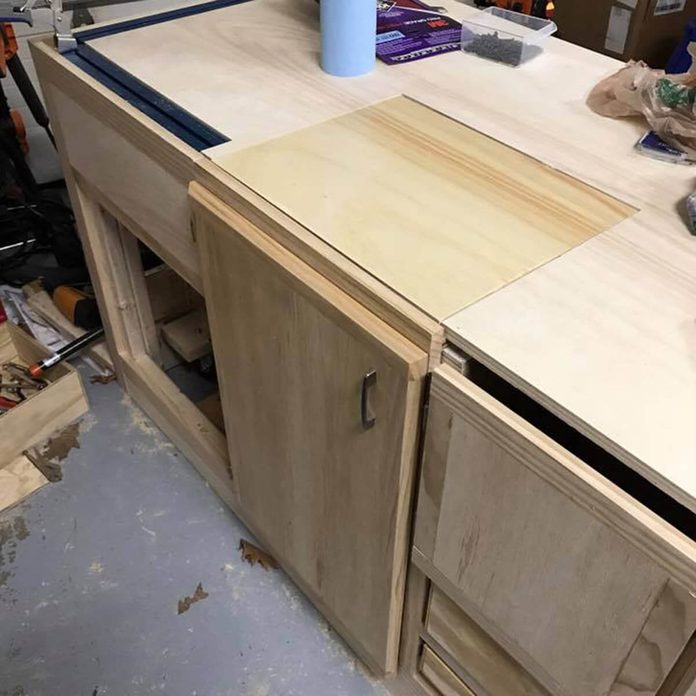
Construction of the cabinets.
12
/
35
13
/
35
14
/
35
15
/
35

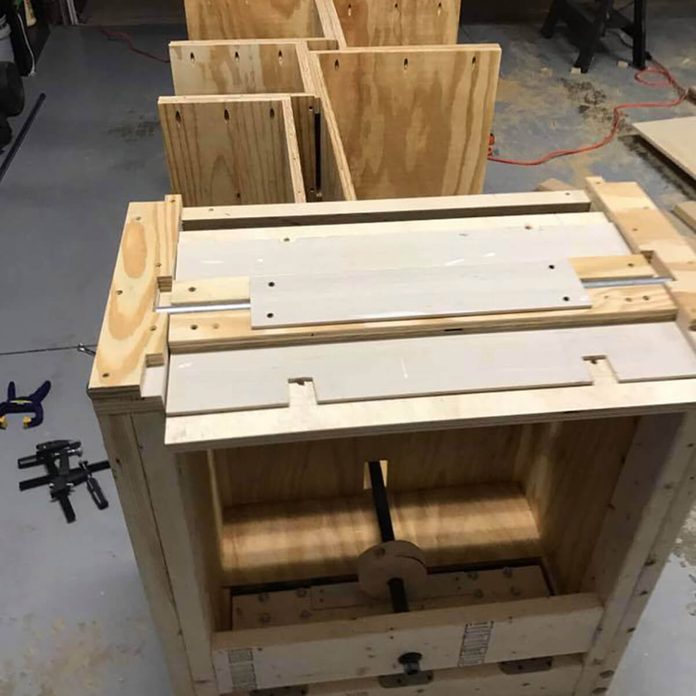
Gluing up the bars for the flip-top.
16
/
35

17
/
35

18
/
35

Drill press flipped down in storage.
19
/
35

Drill press flipped up for use.
20
/
35

21
/
35

22
/
35
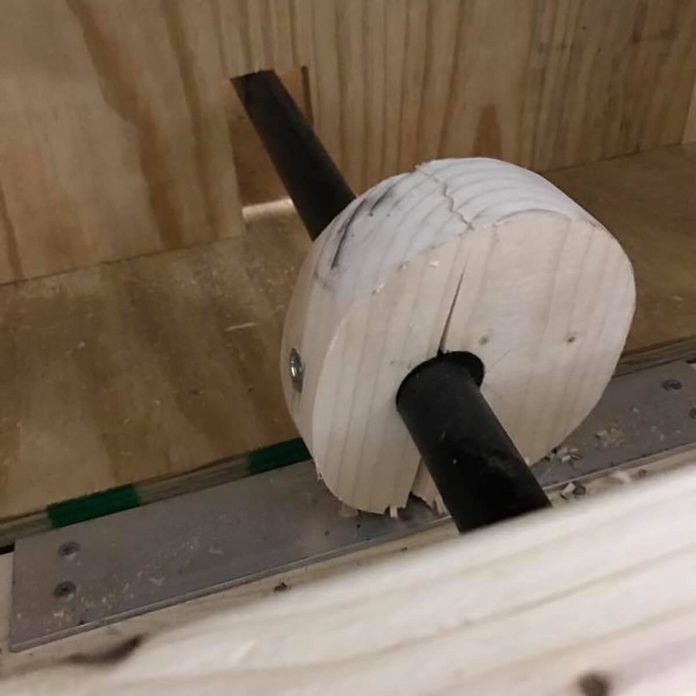
Once all the tools were added, I discovered it was too much weight for the wooden cams.
23
/
35
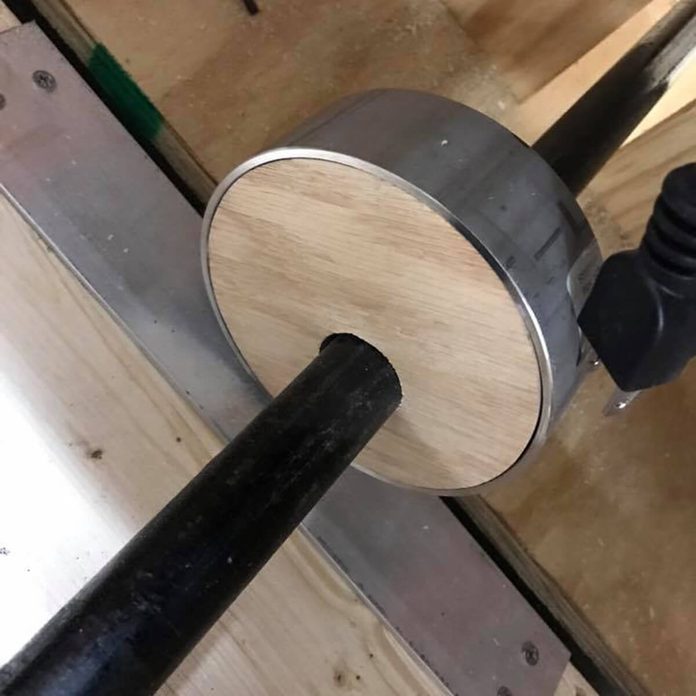
So I decided to reinforce the cams with oak pieces, alternating the grain and encasing each cam in a 4-inch steel pipe.
24
/
35

Close-up of lever for casters.
25
/
35

Most importantly, while the bench is normally stationary, with the pull of the lever the bench is forced up onto six casters so that I can move this extremely heavy bench wherever I want.
Also, I added a dispenser at the end of the bench for a roll of kraft paper. It can be easily rolled out on to the bench for staining and glue-ups.
26
/
35

A view of kraft paper rolled out on to bench top.
27
/
35

Next I added a Kreg Clamping system.
28
/
35

29
/
35
First coat of polyurethane on workbench.
30
/
35

This workbench has tons of storage.
31
/
35

The other side of the workbench, featuring all the storage available.
32
/
35

This shallow end cabinet is devoted to sandpaper storage.
33
/
35

Nail gun storage.
34
/
35
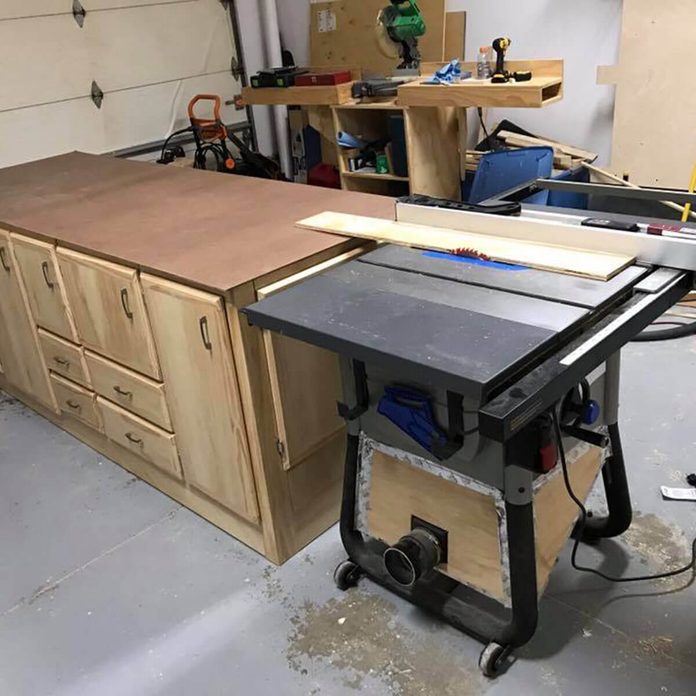
The workbench is a half-inch shorter than my tables saw, so it can also be used as an out-feed table for the table saw.
35
/
35

Here is the finished workbench with all tools flipped down and in their storage cabinets.