


When you're painting wood siding, some tips that go beyond the basics can help you work safer and get great results. We've got you covered.
8 Tips for Painting Wood Siding

Updated on Oct. 05, 2024

If you’re getting ready to paint the wood siding on your house, you probably already know the standard advice. Brandon Walker, who does home restoration work in Phoenix, AZ, summarizes it this way:
- Clean your siding, pressure washing with a soap base first and then a clean wash.
- Scrape off any old paint that survives the pressure washing. Use an orbital sander to get the best sanding results on both old pre-painted wood siding and raw wood siding that hasn’t ever been primed or painted.
- Scuff raw wood for the best adhesion on the primer coat, and don’t skip the primer. “My favorite primer,” says Walker, “is XIM primer, since it has never failed me, and it works with pretty much every kind of paint you’d want to use in a home renovation situation.”
- Add two coats of primer. If the siding were plastic, you could get away with a single coat of primer and a single coat of new paint, but since it’s wood, you will have to do at least two coats.
- Don’t back-roll on wood, since you’ll be able to see it. Spray the siding, not just for efficiency but also because it produces a more consistent look.
If you follow these pointers, you’ll do a good job, but if you want to do a first-class one, you need some insider advice from pros like Walker, remodeling specialist Carol J Alexander and myself, an experienced house painter. Here are eight tips to help you get great results with the least amount of effort.
1
/
8

Use the Right Pressure-Washer Nozzle
There’s no doubt about it: Pressure washing is the best way to remove dirt, mold and old, flaking paint. But be careful. Too much pressure will gouge wood siding and could crack windows, while insufficient pressure won’t get the job done. You can use either a gas or electric machine that generates up to 3,000 psi — no more than that — and remember to always keep the nozzle six inches or more away from the surface.
The nozzle you use matters. Generally, the best one for cleaning siding has a 15-degree aperture (it’s the yellow one that comes in the nozzle set). The green one with a 25-degree aperture is safer to use if the siding isn’t too dirty and the existing paint is intact or if the siding is an easily-gouged softwood like cedar. Never, under any circumstances, use the 0-degree red nozzle. It’s for cleaning concrete and metal, not wood.
Point the nozzle away from the edges of trim to avoid getting water behind it. If you’re washing clapboard, point the nozzle slightly downward to avoid getting spray behind the boards. This can be difficult when working on a ladder (more on that later).
2
/
8
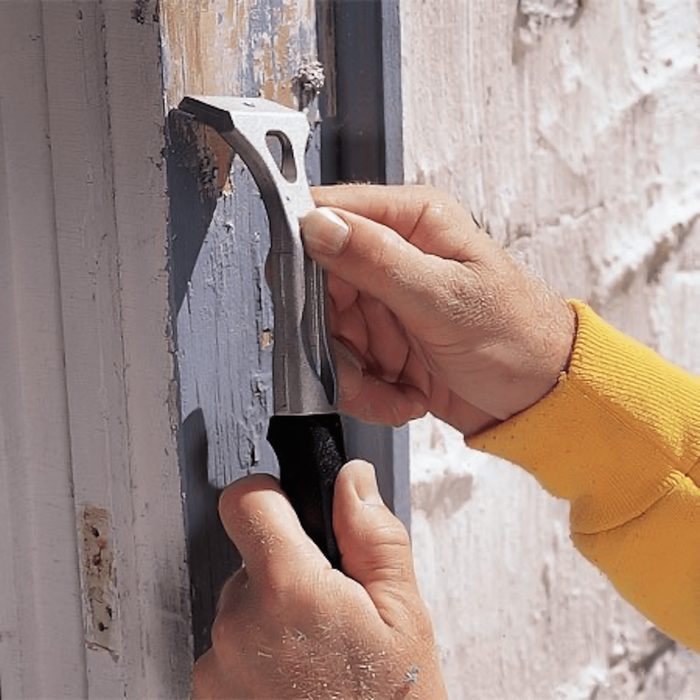
Scrape, Fill and Sand
After you’ve finished pressure washing and the wood has dried, you’ll probably have to scrape off old paint that the pressure washer didn’t remove. Pound down any protruding nails first.
- Whenever possible, use a hooked scraper rather than a straight one. It’s a more effective tool and requires less effort.
- Keep the blade sharp. I usually do this with a belt sander and a 150-grit sanding belt. Set the sander on a bench with the belt facing up, lock the switch in the on position, and run the blade lightly over the belt. One or two passes is all it takes.
- Scrape with the grain, never against it. Cross-grain scratches will show up under the paint, and they aren’t pretty.
Fill holes with a high-quality exterior patching compound. Durham’s Water Putty is a good choice, an epoxy-based wood filler like Minwax is even better, especially for parts of the wood that have rotted. It will never crumble and fall out.
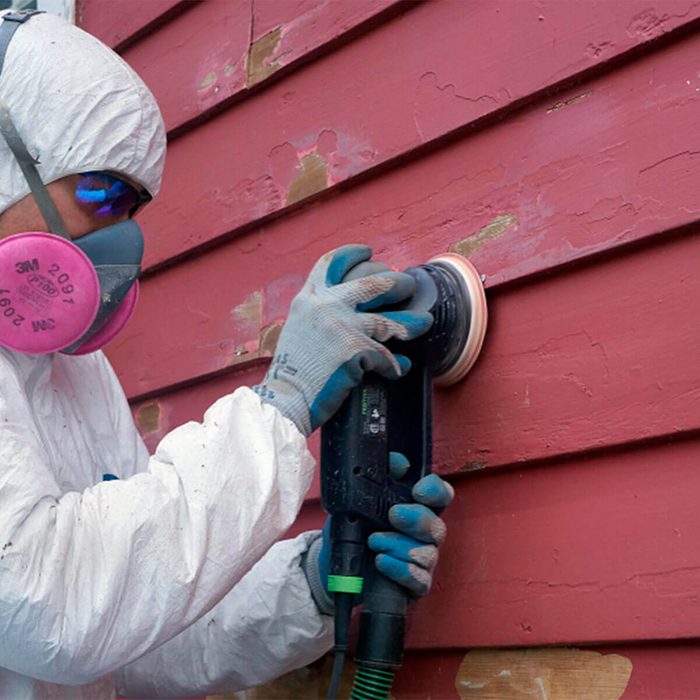
Sand areas you’ve scraped with an orbital sander and 100-grit paper to flatten the edges of the paint that’s still there. Don’t forget to sand down the areas you’ve filled. If your siding is brand-new, you usually don’t have to sand it, but scuffing it by hand is never a bad idea.
- Extra tip: If you’re faced with having to strip the siding, consider doing it with an infrared stripper. It’s cleaner and faster than using chemicals.
3
/
8

Prime Bare Wood
If the existing paint is in good condition, and none of it flaked off while washing, you might be able to skip the primer, but always prime bare wood. It contains tannins that can bleed through and discolor the paint, and a good stain-blocking primer will prevent that.
On siding with existing paint, some spot priming may be all you need to do. But if you’re painting (not staining) entirely new siding, give it a full primer coat before you paint, or you’ll be sorry. The final color won’t be uniform, even if you paint multiple coats.
The best time to caulk trim and other areas that need it is after you prime and before you paint. You can use acrylic caulk for this, but siliconized acrylic is more weather-resistant. Both are paintable.
4
/
8

Choose Color Carefully
Unless you live in a clearing in the woods, you’ve got neighbors, and the color you choose for your house will matter to them, too. Alexander’s advice is to check with your homeowner’s association before choosing a color because some HOAs have restrictions on paint colors.
When you close in on your final choice, she has some more advice: “Test the colors on all four sides of the house. Purchase sample jars of various colors for this. The sun and shadows could make a color look different, and it could change by the hour. When you paint a test swatch on each side of the house, you can watch it for a couple of days before making a final decision.”
5
/
8
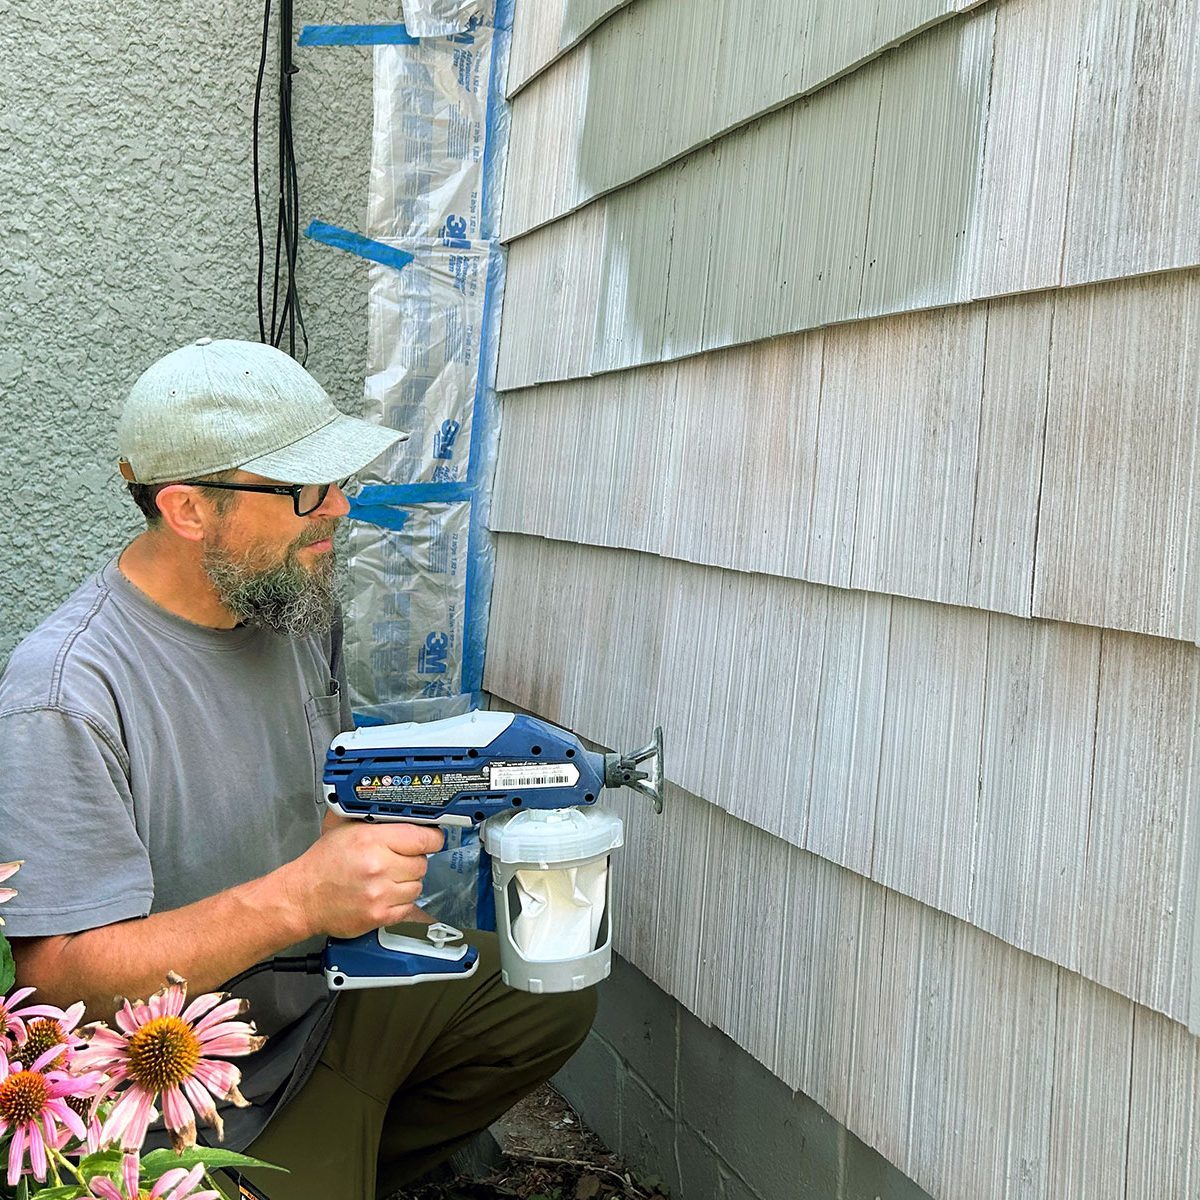
Spray, Don’t Roll
No matter what kind of wood siding you have — clapboard, board-and-batten, shingles or T1-11 — it will have grooves and crevices you can’t reach with a roller. That means you’ll have to go over the areas you roll with a paintbrush, which is extra work. That’s one reason Walker recommends skipping the hassle and using an airless sprayer.
Feel intimidated by a gas-powered rental machine? Use an electric handheld sprayer instead. Many models hold only a quart of paint, so they need frequent refilling, but they’re easier to control and don’t produce as much overspray. And if you use a battery model, you won’t have to worry about a cord getting in your way.
6
/
8
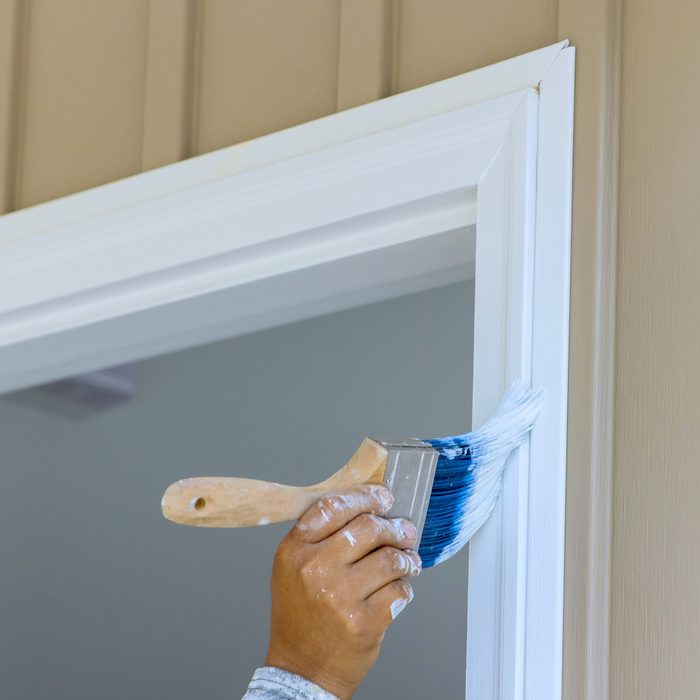
Paint the Base Color, Then the Trim
The main drawback of spraying is that it involves masking. “Your trim quantity, complexity, and location will dictate your masking of primary and secondary colors,” says Walker. “DIYers might not realize that they can reduce their workload by doing a little planning.”
Of course, you have to mask windows, doors and other parts of the house you don’t want to paint, but when it comes to the trim, don’t bother. Walker recommends spraying the entire wall, trim and all, then going back and doing the trim later. All you have to do to safeguard against brush slips is to mask off the primary color with tape and paper, or you can just use a cardboard shield.
7
/
8
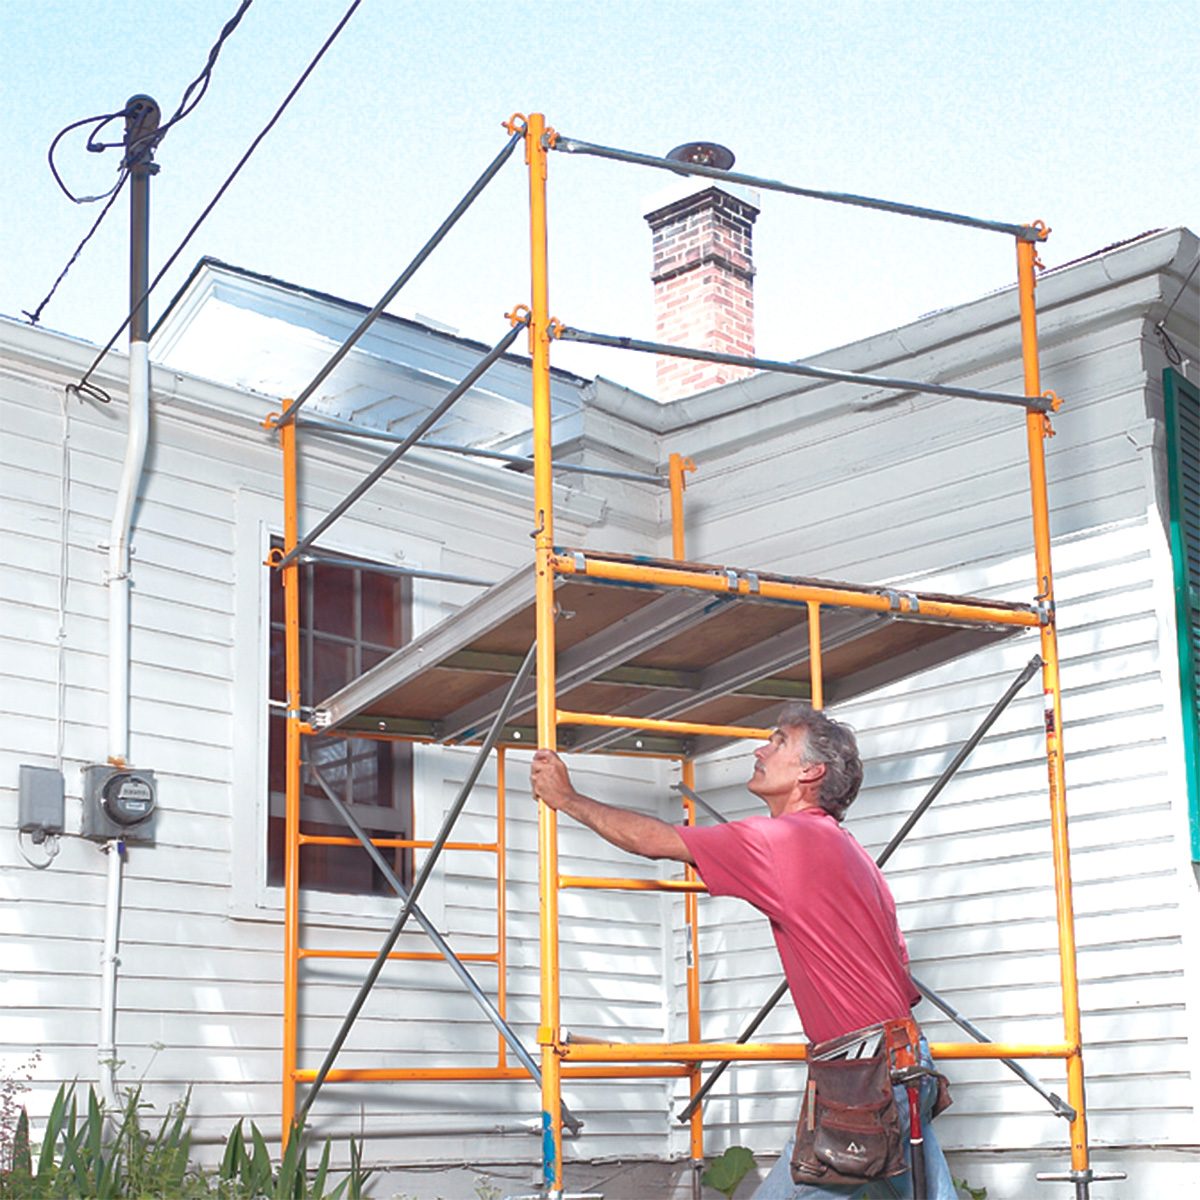
Consider Erecting Scaffolding
Every aspect of exterior house painting, including cleaning, prepping and painting, is easier and safer if you do it from scaffolding. Yes, you have to rent it, and yes, you have to spend an hour or two to put it up, but the investment in time and money is worth it.
You’ll be able to prep, prime and paint an entire wall simply by rolling the scaffolding from place to place on its casters, and you’ll have complete access to the wall without having to lean from a ladder and risk falling. Moreover, you won’t get to the top of a ladder and discover you’ve forgotten something because you’ll have the necessary tools and supplies right at your feet.
8
/
8

Understand the Paint You’re Using
“This sounds obvious,” says Alexander, “but read the paint can. The label will include important information like dry time, the best temperature to work in, and how to clean your tools.”
Exterior paint products are more varied than interior ones. Most are water-based, but some are not and require a solvent that you’ll also have to buy. If you need to control mold, the label may indicate that the paint already contains a mildewcide, so you don’t have to add any. The label also indicates the expected coverage, and if you’re getting much more or less than that, you’re probably spreading the paint too thick or too thin.
You’ll find one more thing on the label: the minimum temperature at which to store the paint. If you store it at a lower temperature, it could freeze, and if that happens, it’s ruined.
About the Experts
- Carol J Alexander is a remodeling content specialist with more than 15 years experience, during which time she has interviewed countless industry experts. She currently works with Fixr.com.
- Brandon Walker is a Superintendent with ASAP Restoration in Phoenix, AZ. He has been in the painting and construction industry for more than 20 years.