


Installing garage door openers may sound like a daunting task, but it's actually DIY-able. You just need to follow the instructions closely.
What To Know About Installing Different Kinds of Garage Door Openers

Updated on Sep. 10, 2024

Installing Garage Door Openers
A garage door installation is no job for a DIYer, as I found out the hard way when I remodeled my mother’s garage.
The door tracks must be precisely aligned and secured with strong fasteners, and the torsion bar needs to be properly tensioned. Then there’s the door itself, heavy and unwieldy. I gave it a shot, but I gave up and called a pro when I realized I lacked the skill and tools to do the job.
Garage door openers are a different story entirely. A dedicated DIYer can install pretty much any model out there, although some are easier than others.
A typical kit contains a lot of parts, and figuring out what to do with each one can be challenging. But if you follow the detailed instructions that come with the kit, it’s hard to go wrong.
YouTube videos can be a big help, but you can do the job without them. After all, people did manage to get things done before YouTube came along.
There are six main types of openers, and the power of the motor you’ll need depends on the size and weight of the door. A 1/2-horsepower (HP) motor can handle most single-wide doors as well as double-wide doors made of a light material like aluminum or vinyl. If your double-wide door is made from wood or fiberglass, however, you’re better off with a 3/4- to 1-1/2-HP motor.
Also, you’ll need an extension kit if your door is higher than a standard one (seven feet), so you can place the opener farther from the door. Extension kits cost extra, but they’re easy to assemble and don’t add much time to the project.
1
/
6
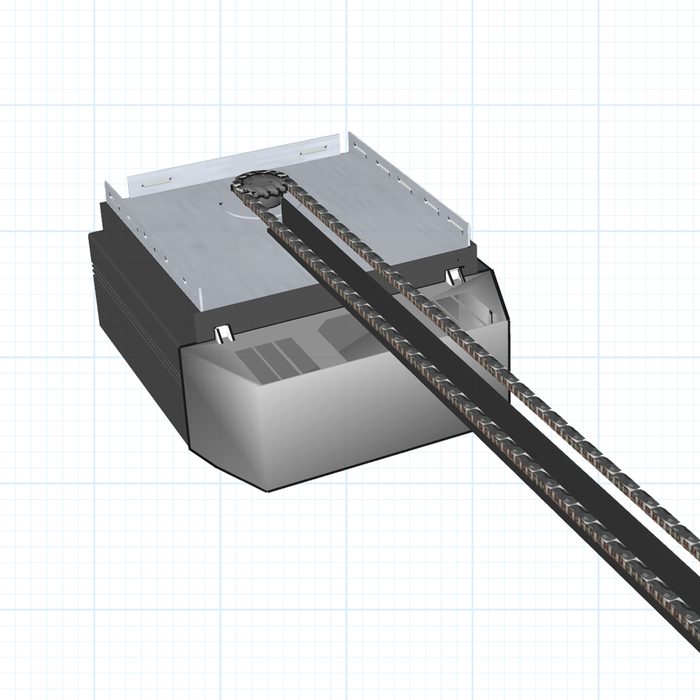
Chain-Drive Opener
This is a type of “draw bar opener,” so named for the bar that connects the door to a trolley that rides along a ceiling-mounted track. It comes with a chain similar to a bicycle chain that connects the trolley to the motor. This type is usually inexpensive but noisy, because the chain rattles.
The draw bar connects to a bracket attached to the top center of the door, and the motor mounts to a bracket securely fastened to ceiling joists. The key is aligning these two brackets exactly perpendicular to the plane of the door. After that, the rest is straightforward — assemble the track, thread the chain onto the motor gear, attach the trolley, affix the motor and overhead track to ceiling brackets, and connect the draw bar to the trolley.
If you support the motor from the top of a ladder while you attach it to the bracket, installation is a one-person job.
Also, check out these six best Wi-Fi garage door openers to retrofit your old opener.
2
/
6
Belt-Drive Opener
A belt-drive opener is virtually identical to a chain-drive one, with one important difference: It’s a whole lot quieter. That’s because the metal-reinforced rubber belt doesn’t rattle like a chain does.
A belt-drive opener also has a draw bar, ceiling track and trolley. To install, you thread a belt (which has notches like the timing belt in a car) around the motor gear instead of a chain.
You do most of the assembly on the ground, including putting the track together, attaching it to the motor and installing the trolley and belt. Then you attach brackets to the door and ceiling, hoist the motor and secure it, then connect the draw bar to the door.
Belt-drive openers tend to be premium products compared to chain-drive ones. Many include wireless and Wi-Fi functionality that may require a few adjustments during installation. Just follow the instructions in the installation manual.
3
/
6
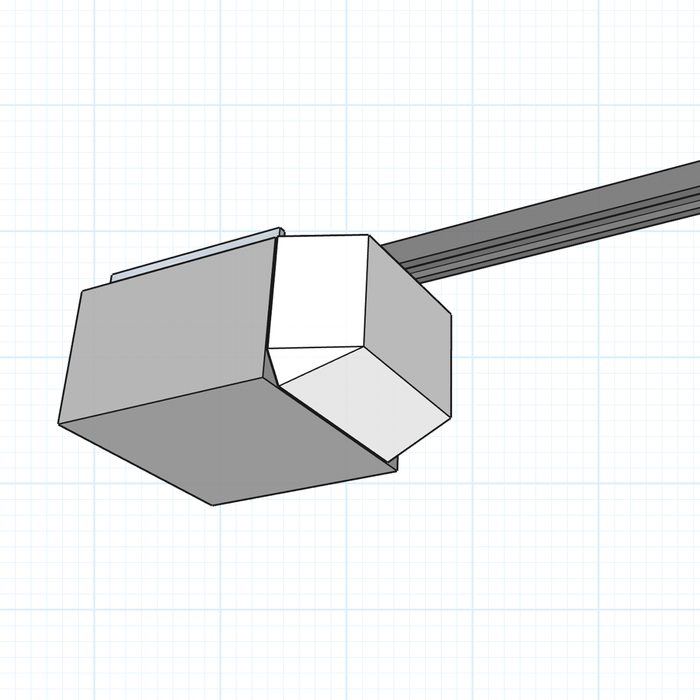
Screw-Drive Opener
A screw-drive door opener, like chain-drive and belt-drive, features a draw bar and a trolley that moves along an overhead track. But a threaded rod drives the mechanism.
The trolley comes with gears that match the threads on the rod. When the rod rotates, the trolley moves back and forth, depending on the direction. This type of mechanism can handle large and heavy doors effortlessly.
The worm-drive action of the screw rod makes the door open and close faster than with a chain or belt drive. The action also is quiet, and the rod never wears out. All that is why screw-drive openers are generally more expensive.
You may find more parts to assemble, but installation is generally the same as for chain- and belt-drive models. The drive rod attaches directly to a spindle on the motor rather than being threaded around a gear wheel, which simplifies things.
4
/
6
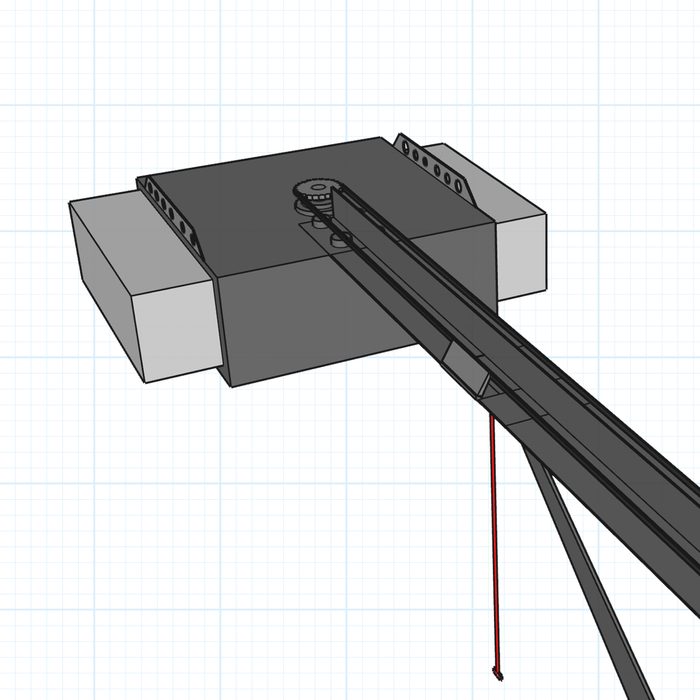
Direct-Drive Opener
The direct-drive opener differs from other draw bar types in a crucial way: The drive motor is inside the trolley, which moves back and forth along an overhead track. Its gears engage with a stationary chain inside the track.
Because there’s no moving chain or belt, direct-drive is the quietest out there. It’s also easier to install than other ceiling-track openers.
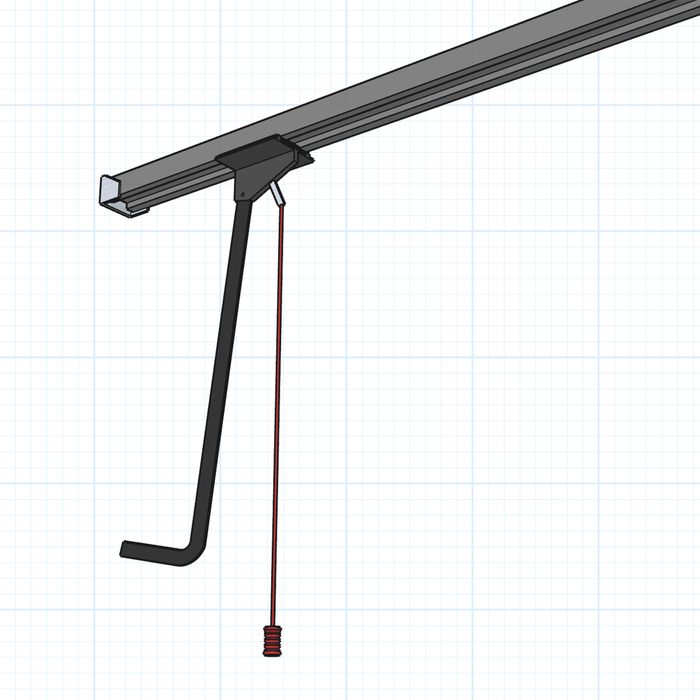
This type has a controller that sits at the far end of the track. But because the controller lacks a motor, it’s light and easy to hang from brackets well-secured to ceiling joists.
The track connects to the controller and a bracket mounted on the door header above the torsion spring. The draw bar connects to the trolley and another bracket mounted on the door. The wiring for the wall switch and photo eye safety sensors connects to the control unit, which also houses light bulbs and the Wi-Fi controller.
5
/
6
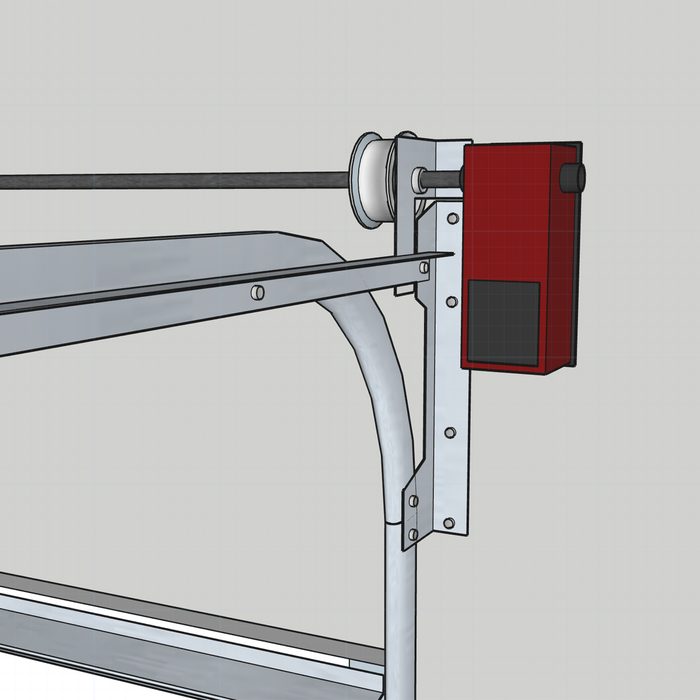
Jackshaft or Wall-Mount Opener
Jackshaft door openers mount on the wall beside the door and connect directly to the torsion rod, so they don’t require an overhead track. If you have a tiny garage or want to conserve overhead space for storage, this is the door opener for you. Because there’s no overhead track, it’s also the easiest to install.
You can mount the smallish, easy-to-handle opener on either side of the door. It’s usually best to choose the side closest to a power outlet. The kit includes a coupler to connect the opener to the shaft that extends out from the torsion spring. After making this connection, secure the motor to the wall studs with the brackets provided.
Except for aligning the photo eye, making electrical connections to the wall switch and programming the remote, that’s pretty much all there is to it.
6
/
6
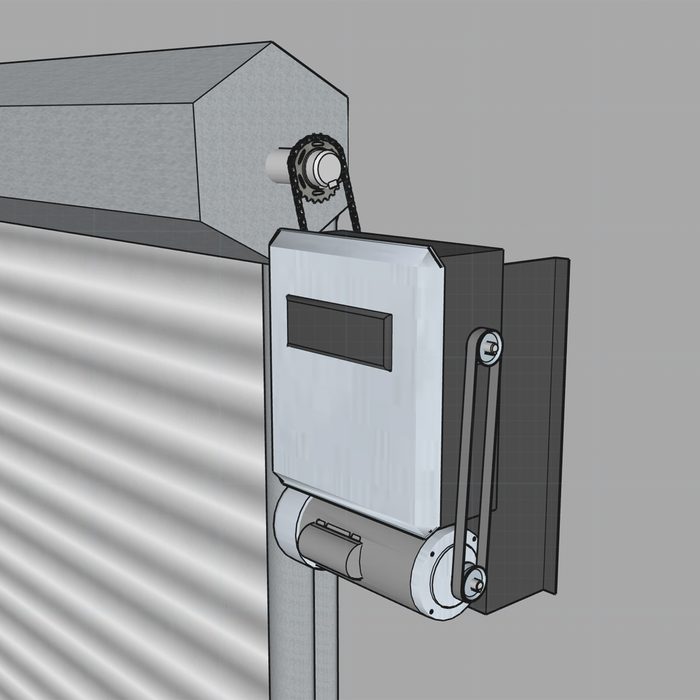
Hoist Opener
This type of jackshaft opener can handle more weight, and it includes a chain that lets you open and close the door manually if there’s a power outage. This opener is best for large industrial doors. It’s not one you would normally install in a residential situation.
Because it mounts on the wall and connects to the torsion rod, the installation procedure is the same as a smaller jackshaft unit. But it can be much more involved, because you need to connect the torsion rod to the motor with gears and chains.
Of all the door openers listed here, this is the one least suitable for DIY installation. You won’t ever need one for your garage. But if you happen to own a warehouse that needs a door opener, don’t mess with this yourself — call a pro.