
Many exterior issues with your home don't require a professional. You can do all of these maintenance and repair projects yourself — we'll show you how.
The Expert Guide for Exterior Home Repairs
1
/
41

Replace a Damaged Shingle
Asphalt shingles withstand years of abuse from wind, rain, sleet and snow, but they can tear like cardboard when struck by a falling tree limb or branch. Replacing the shingle only takes about 10 minutes — just be careful not to damage any other shingles. Stay off the roof in hot weather when the shingles tear easily and walking on them can strip off the coating.
2
/
41

Replace Vent Flashing
All-metal plumbing vents present two opportunities for leaks — first, where the flashing meets the roof, and second, where the vent pipe meets the flashing. When the latter situation occurs, caulking and similar fixes will prove to be only temporary cures. You’ll have to replace the flashing, either with a rubber-sleeve version or the telescoping two-piece type. Here’s how to replace vent flashing.
3
/
41
Fix a Patchy Lawn
Achieving a lush lawn doesn’t have to be a constant struggle. And you don’t have to pay big bucks for a lawn service to douse your yard with chemicals, either. A lawn full of healthy, green grass results mainly from knowing what to give your lawn and when to give it. Follow this advice from a pro to get your lawn shipshape before summer.
4
/
41

Repair Windows
Obviously, you can’t glue broken glass back together. But, for windows that get stuck, let in drafts or have moisture issues, DIY solutions abound. Fix old windows, double-hung windows, window glass glazing and screens. You can also stop window drafts and learn how to avoid and remove window condensation. If you want to take on a larger task, you can even replace your windows!
5
/
41
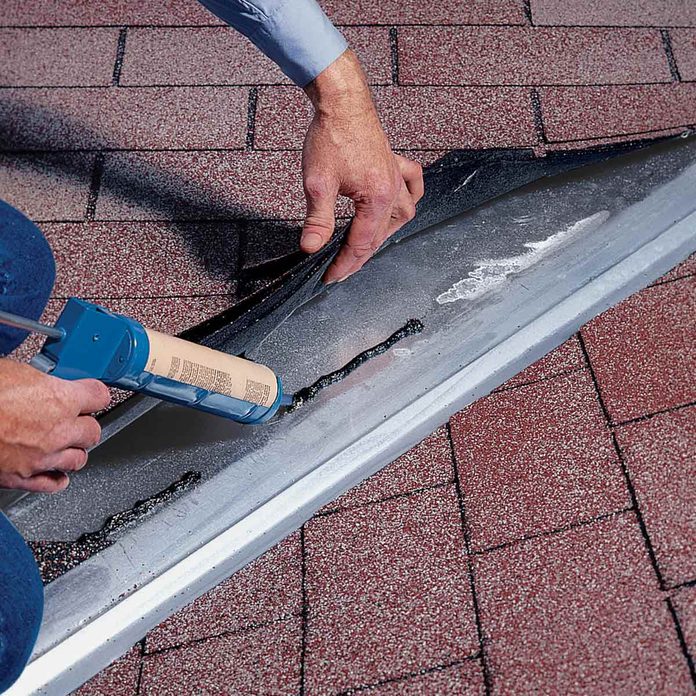
Seal a Valley Joint
Occasionally, intact flashing can still allow water passage; and you see it more often when the valley flashing doesn’t have a raised fin or ridge in the center to help prevent fast-moving water from sloshing. If the roofer didn’t cement the joint — and many don’t — the shingles can curl up at the edge and eventually create a gap that water can easily penetrate.
Starting at the bottom edge, lift the shingle and apply a heavy, consistent bead of roofing cement along the flashing. Press the shingles down to seat them.
6
/
41

Apply New Weatherstripping
If you can see light creeping beneath exterior doors, air can also escape. Grab a few packages of self-adhesive, rubber-foam weatherstripping and go to town, sealing any and all doors that lead outside. Have weatherstripping already installed but still suffering from a high gas bill? It might be time to replace the strips installed by the previous owners. Check out this handy tutorial on installing weather stripping.
7
/
41

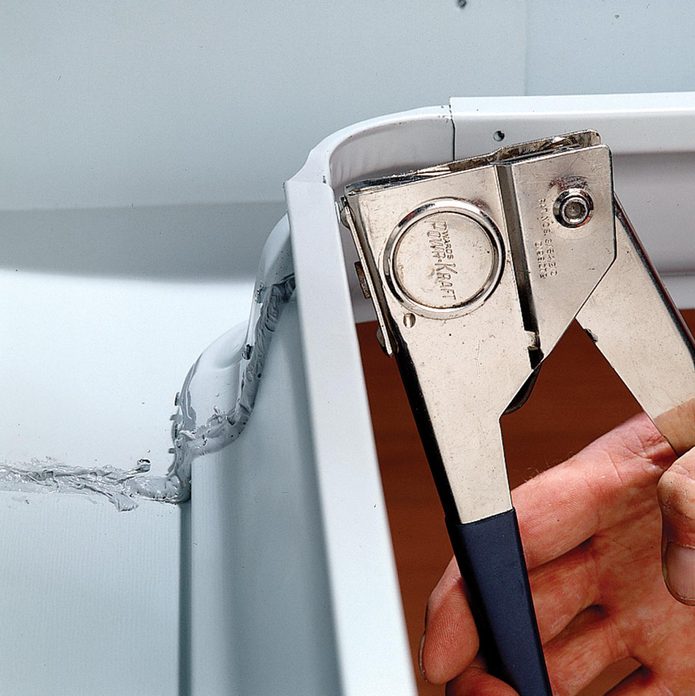
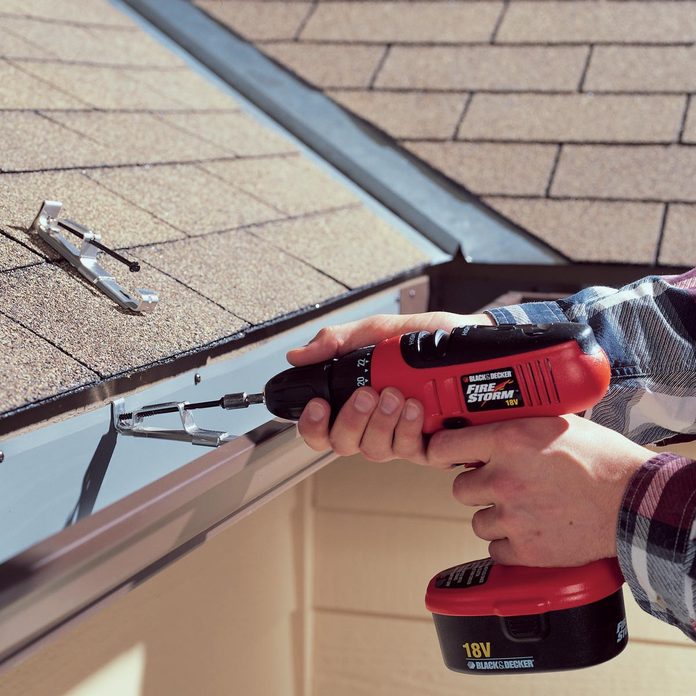
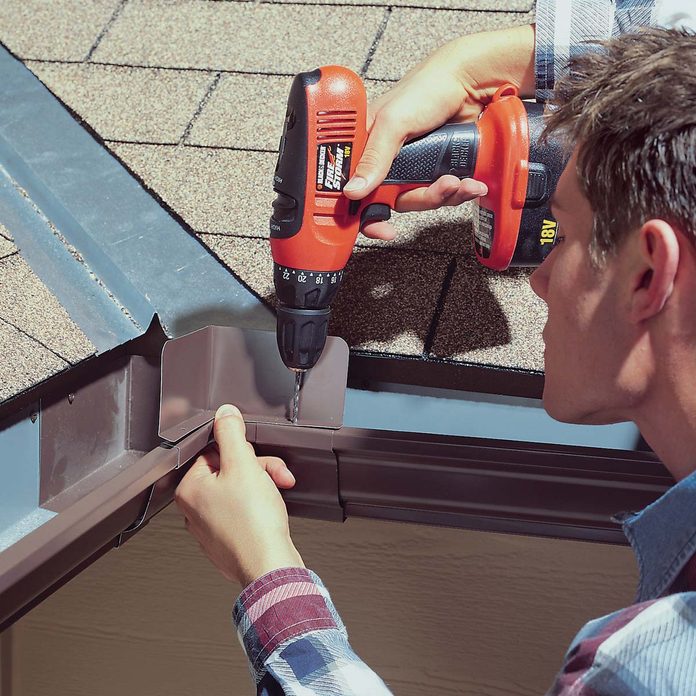
Reattach a Rain Gutter End Cap
For a long-lasting repair of those annoying gutter leaks, turn to silicone sealants. Silicone acts as an adhesive, to keep the end cap securely in place, as well as a sealant to stop leaks and drips. Attach the end caps using caulking and riveting techniques. Well-stocked home centers and hardware stores have everything you need. Check out these easy gutter fixes.
8
/
41

Clean Gutters Easier
An old, plastic spatula makes a great tool for cleaning debris from gutters! It doesn’t scratch up the gutter, and you can cut it to fit gutter contours with tin snips. Grime wipes right off the spatula, too, making cleanup a breeze.
Install your own gutter guards.
9
/
41
Repair Leaky Metal Gutter Seams
For water to make it to the downspouts and drain properly, it must stay in the gutter channel. When couplings or other fittings leak, the water drips right next to the foundation. A simple repair can stop the leak.
In most cases, you can apply a new bead of gutter sealant between the adjoining surfaces and use new pop rivets, that match the size of the old ones. Check the diameter and depth range to make sure they’ll fit the old holes and will cinch the joint tight.
Repair a leaking gutter with ease.
10
/
41
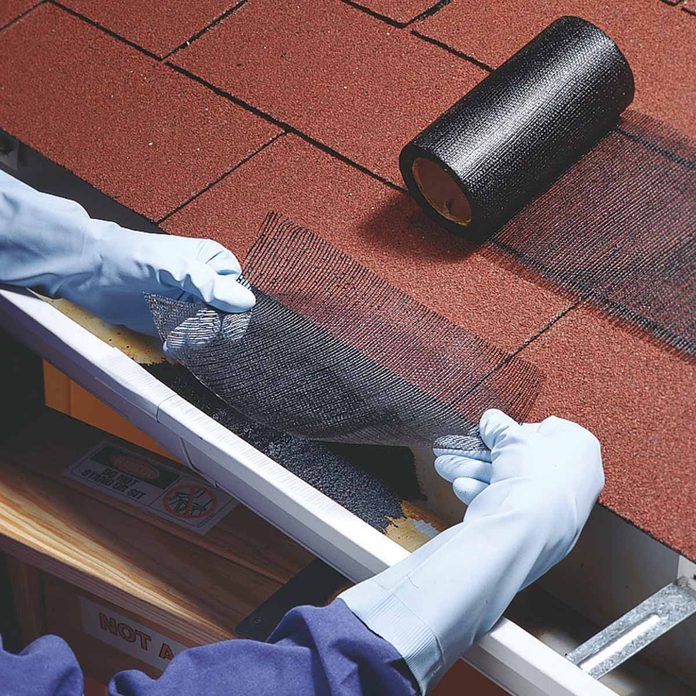
Patch a Leaky Gutter
Left unrepaired, leaks from your gutters can result in water damage to the house siding and eaves, as well as create drainage problems that affect the foundation or basement. Patch small leaks before they grow.
Remove any accumulated debris, and use a wire brush to clean off surface rust. Spread plastic roofing cement directly over the leaky seam or hole and at least 6 in. beyond in both directions. Next, embed a piece of repair mesh or a piece of pre-bent metal flashing in the roofing cement and press firmly to seat it. Then re-coat with a second layer of cement, and apply a coat of aluminum paint.
11
/
41
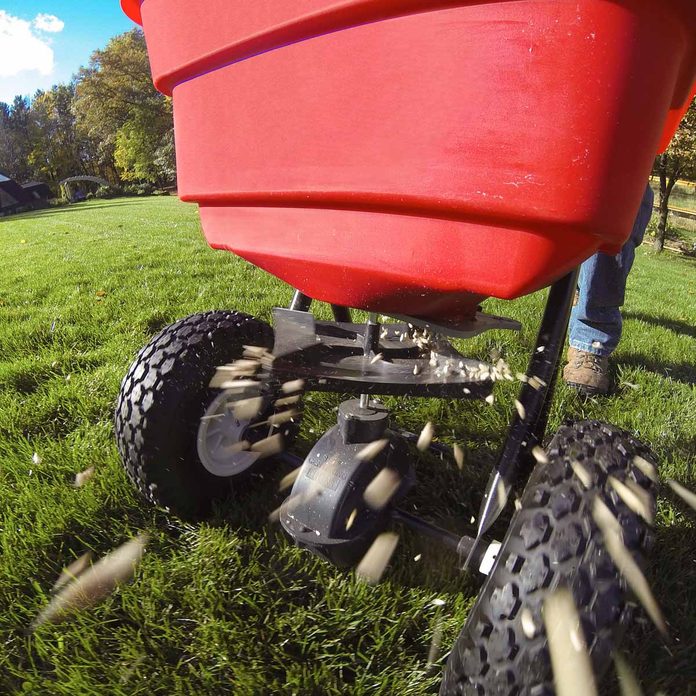
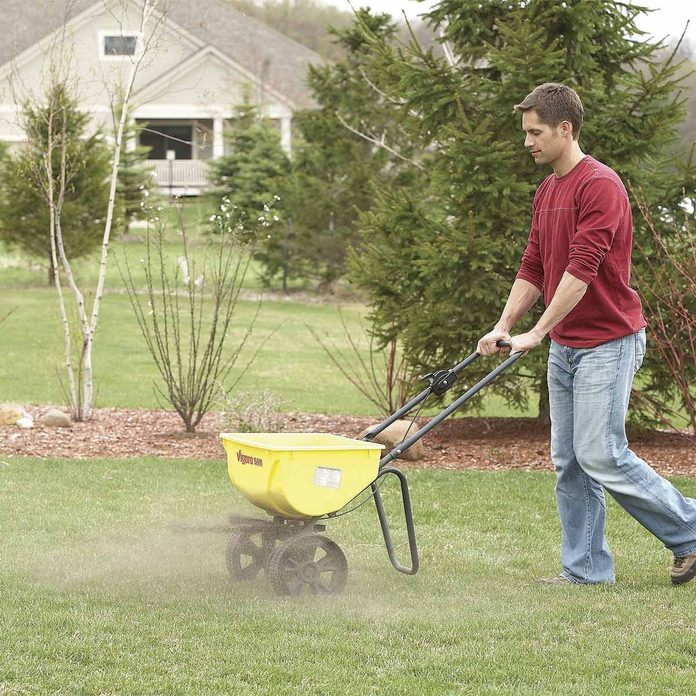
Feed the Lawn
If your yard is mostly grass with just a few weeds, forgo the expensive landscaper. With one trip to your local hardware store or plant nursery, you can purchase $25 to $50 worth of supplies, spend just a few hours on your lawn and simply wait for the grass to grow. Check out this easy guide on fertilizers and seed spreaders.
12
/
41
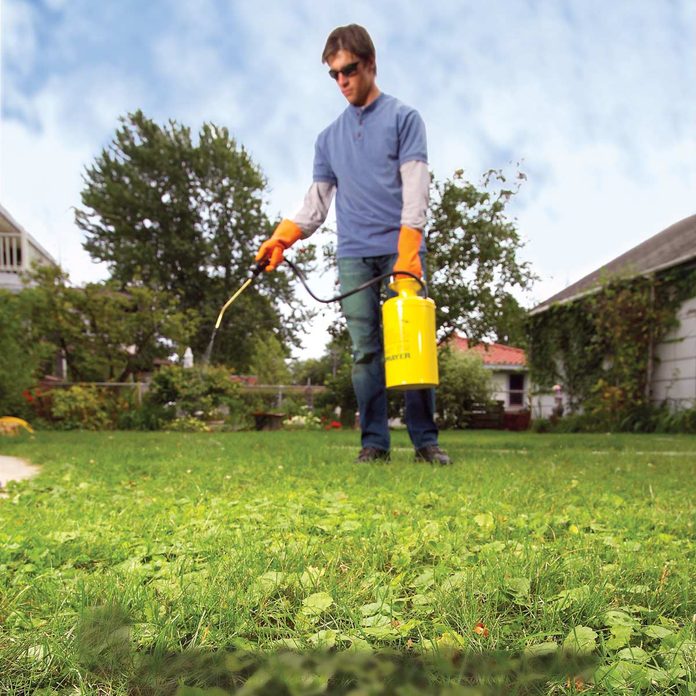
Eliminate Weeds From Your Grass
Eliminate weeds in your lawn and prevent their return by maintaining healthy grass, using a minimum of weed killers and good timing. We show you six strategies that simplify weed control and reduce your weed-patrol chore. Tips to eliminate weeds from your backyard grass.
13
/
41
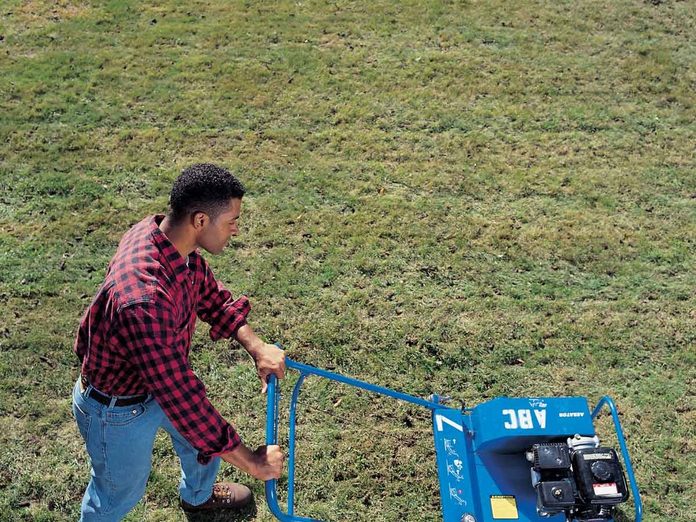
Revive a Thinning Lawn
Revitalize your lawn a weekend using just one or two tools. An aerator helps the soil breathe and a power rake gets it ready for seeding. Tips to reviving grass in a thinning lawn.
Learn about lawn aerator options and which one is best for your yard here.
14
/
41
Straighten Gutters and Add a Splash Guard
If your metal gutters have developed a middle-age sag, try giving them a tummy tuck! Look for some version of a gutter support bracket that works with your gutters to lift the low spots. Aligned gutters drain water better and prevent debris from accumulating. If your metal gutters show a middle-age bulge, get ’em back in shape with these easy-to-install gutter hangers.
15
/
41
Stop Overflowing Valley Gutters Quickly
If rainwater cascading down your roof valley causes a waterfall that washes out the petunias every time it storms, install a splash guard. It takes about 20 minutes to complete. Attach the guards with 1/2-in. sheet metal screws.
16
/
41

Seal Holes in Siding
Tough-to-repair nail holes in aluminum and vinyl siding may require replacing the entire piece, but a squirt of color-matched caulk from a siding supplier often solves the problem for a lot less money and aggravation.
17
/
41

Replace Broken Deck Boards
Don’t allow a split, rotted or otherwise ugly deck board to ruin the appearance of your deck. Simply replace it, and in a year or so, the replacement will blend right in.
18
/
41
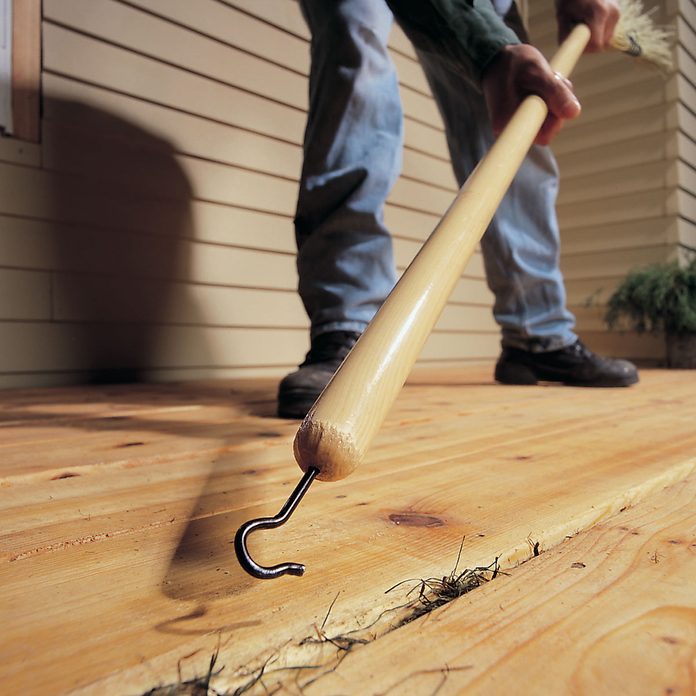
Clean Out Gaps
Cleaning the expansion joints in a sidewalk or the spaces between deck boards doesn’t have to be a tedious, on-your-knees job. Insert a screw-in hook into the end of a broom handle and drag the hook through the cracks. The hook pulls out the debris, and then you can sweep it away.
Find the best outdoor rugs for your deck or patio.
19
/
41
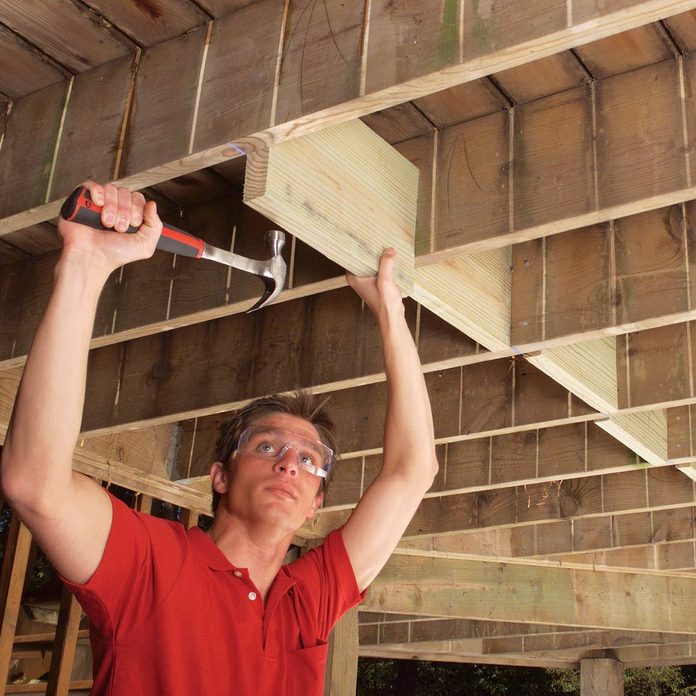
Stiffen a Bouncy Deck
A deck that bounces when you walk across it won’t feel strong and solid, even if it meets structural requirements. Long joist spans between beams or between a beam and the house usually cause this sensation.
20
/
41
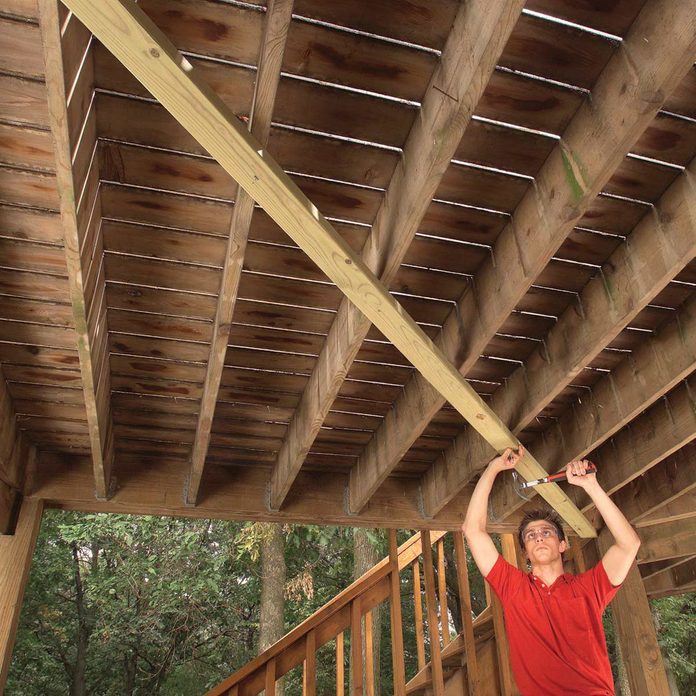
Take Out the Sway With an Angle Brace
Some otherwise solid decks tend to sway or wobble as you walk across them, particularly decks resting on tall posts 4 or more feet above the ground. Angle-bracing the posts offers one good solution to this problem, but the braces often look tacky. Instead, install an angle brace underneath your deck for a virtually invisible fix that all but eliminates sway.
21
/
41
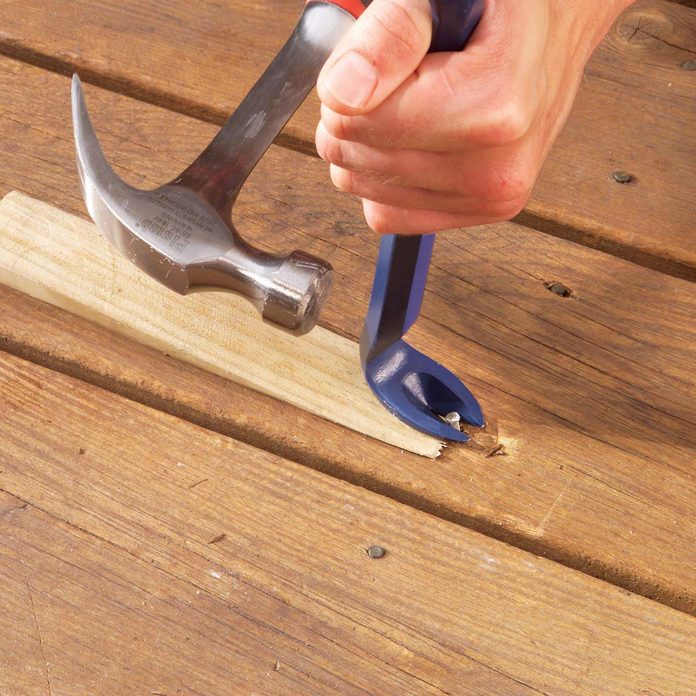
Replace Loose, Popped Deck Nails
Decking swells and shrinks as it goes through repeated cycles of wet and dry seasons. This frequently causes nails to loosen and pop up above the deck boards. You can drive them down again, but that provides only a short-term solution. They’ll probably pop up again after a few years. The long-term solution involves removing the popped nails and replacing them with deck screws.
Protecting the deck board with a shim or thin block, tap the claw of a cat’s paw under the nail head, and lever the nail up. Finish pulling with a hammer or pry bar.
Revive your old deck with the help of Family Handyman.
22
/
41
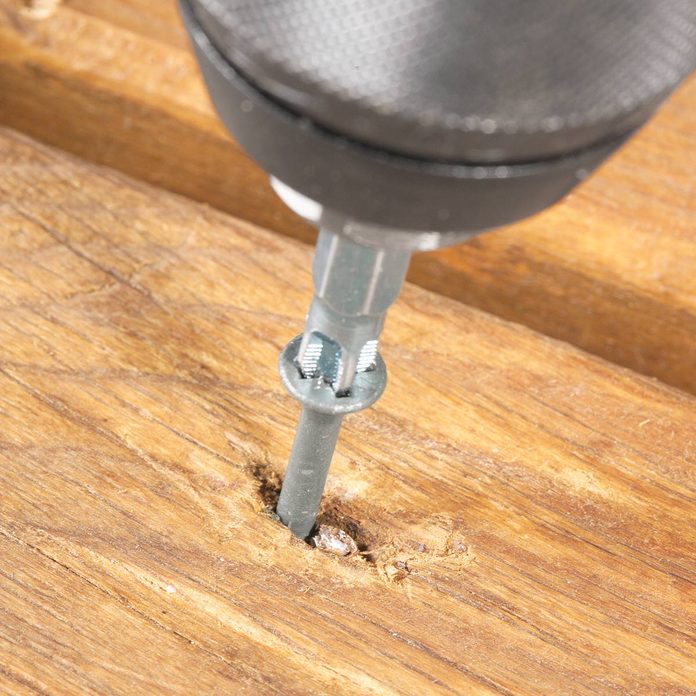
Remove or Hide Broken Nails
If the head breaks off a stubborn nail and you can’t get it with a pry bar, try pulling it with locking pliers. Grip the nail tip and roll the pliers over to get it going. If the nail shank breaks off, don’t worry. Just drill a pilot hole beside the nail and drive in a screw. The screw-head hides the nail.
23
/
41
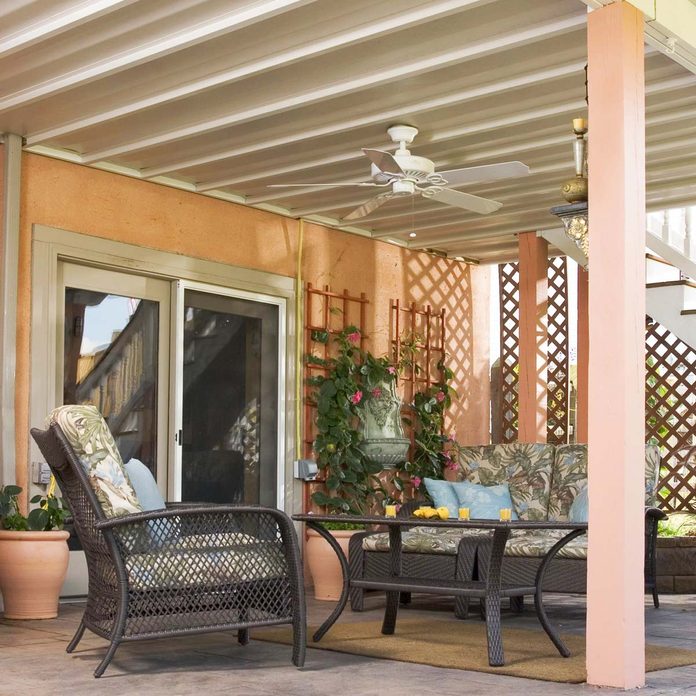
Add a Roof Under a Deck
This low-cost, easy-to-build system catches water dripping through the deck boards and redirects it to the outside of the deck. Now you can use the area under the deck as a covered patio and can enjoy warm summer rain storms without getting wet. Here’s our step-by-step project guide.
24
/
41

Clean and Refinish Your Deck
The basics of refinishing a deck remain pretty straightforward: Strip, clean, stain … repeat! This tough chore might take you several days to complete, but you have to do it every few years to keep your deck looking great. Here are some things to think about before tackling the job yourself.
25
/
41
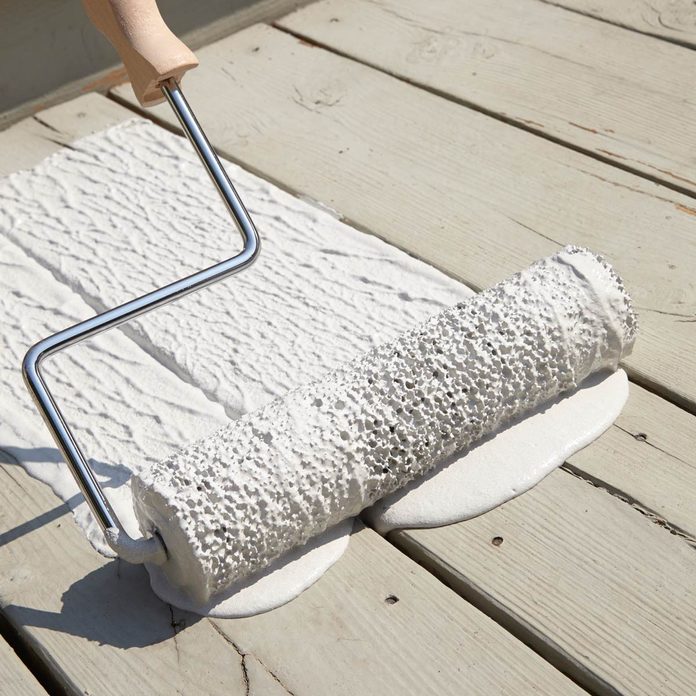
Apply a Deck Restoration Coating
Acrylic-based deck restoration coatings go on like really thick paint in two coats. Once dry, they form a coating similar in appearance to composite decking. Here’s how to apply this deck restoration coating.
A word of caution: Read the manufacturer’s instructions before use and contact the company directly if you have questions or concerns about suitability for your particular situation. Here are a few tips for fence restoration.
26
/
41
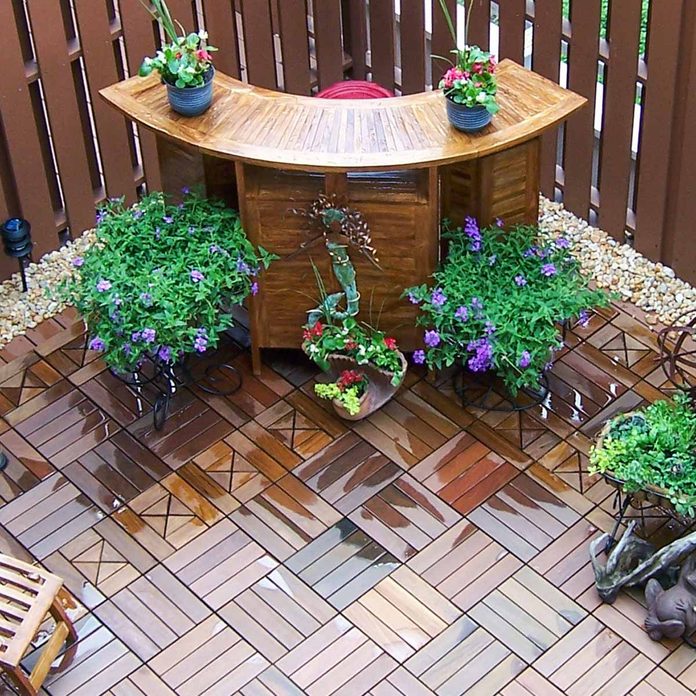
Install Deck Tiles
Think of this option as a slipcover for your deck. Instead of ripping out or recoating your old deck boards, place new wood or synthetic decking right over the old deck. Several companies make tiles out of composite or exotic woods, like ipe, that you just lay down and snap together. Plastic grids underneath the tiles allow for airflow, which helps prevent wood rot. Here’s everything you need to know about deck tiles.
27
/
41

Air Filter
Homeowners’ first instincts usually lead them to contact an HVAC tech when they notice irregularities in their cooling or heating system. These irregularities could stem from a dirty or clogged air filter. We encourage homeowners to check their filters and replace when necessary (if not regularly). Homeowners with pets, carpet or homes near either fields or construction zones can find it convenient to have extras on hand for a quick change-out.
Pro Tip: Mark your calendars! 1-in. filters should be changed every month, 2-in. filters should be changed every 2 months and 4 to 5-in. filters should be changed every 6 to 12 months.
28
/
41

Remove a Tree Stump Painlessly
We’ll show you how to remove a tree stump without breaking your back. This safe-and-effective method doesn’t require a lot of manual labor. But you have to be patient. The process can take several weeks.
29
/
41

Replace and Repair Wood Siding
Has some of your siding begun to rot while the rest remains intact? Don’t reside the whole house. Follow these easy steps and just replace the rotten boards.
30
/
41

Replace an Exterior Door
Replace a worn, drafty front door with a stylish, new energy-efficient one. Replacement doors come prehung in a weatherstripped frame, and it doesn’t require the skills of a master carpenter to do a first-class job. We’ll show you the techniques that result in a perfect, weathertight installation.
31
/
41
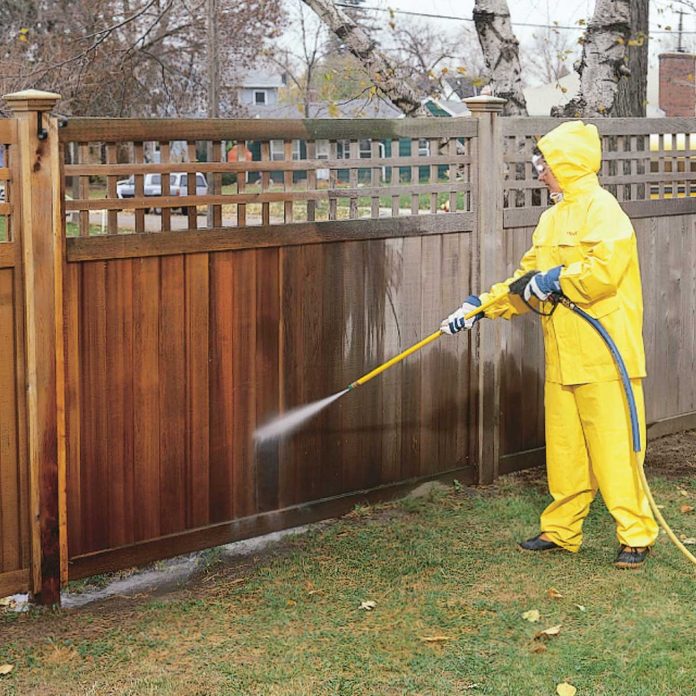
Power-Wash a Grimy Fence
Power washer aggressively strip wood as well as cleaning off the dirt and grime. You can also erode the wood too deeply, however, and ruin it. The key lies in using the right sprayer tip and technique. In any case, the power washer’s spray raises and roughens the grain slightly on smooth wood. That’s actually good — it allows more sealer to soak in and improves the finish. Here’s how to make a gray, sagging wood fence look new again.
32
/
41
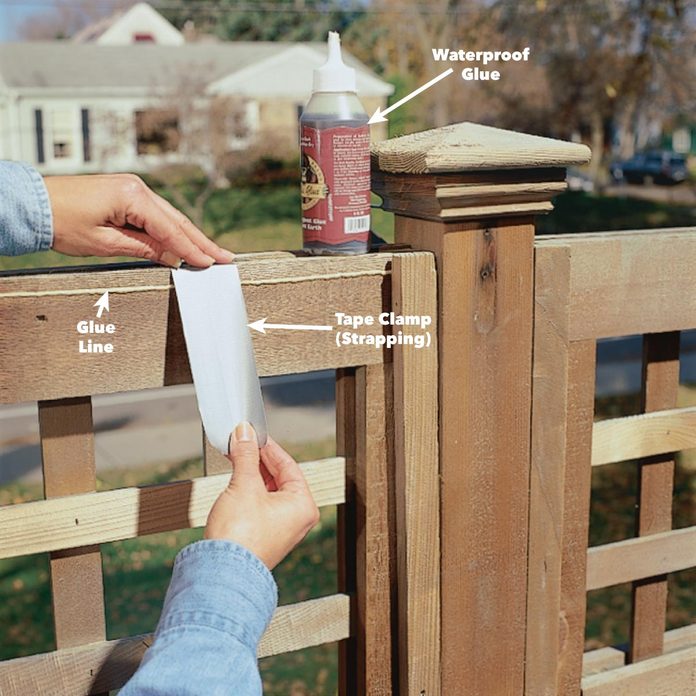
Make Simple Repairs to Your Fence
With the fence clean, you can move on to fixing or replacing damaged boards, refastening loose boards and countersinking any protruding nails. Use waterproof glue to repair split and broken boards. Drive corrosion-resistant screws — instead of nails — to pull loose pieces tightly together. For a sagging gate, straighten it with a turnbuckle support. Also, coat the posts where they emerge from the ground or concrete with a wood preservative. This area typically rots first.
33
/
41
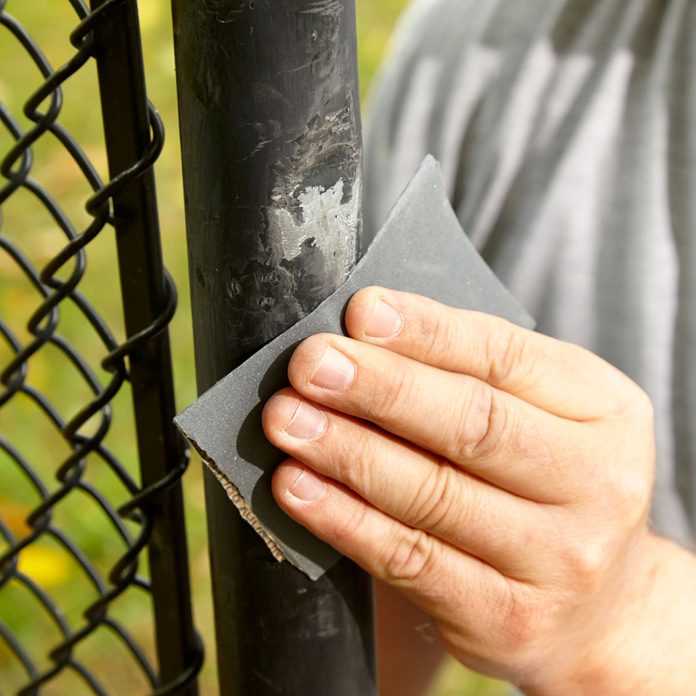
Touch-Up a Vinyl-Clad Fence
Vinyl-clad, chain-link fence keeps its appearance for a long time. But the vinyl can get scuffed and worn where the gate latch locks onto the post. The repair is a little tricky because you’re trying to paint over vinyl and metal. If you use a spray paint formulated for metal, it won’t bond well to the vinyl. Instead, coat the damaged area with paint formulated for plastic. Here’s how to do it.
34
/
41
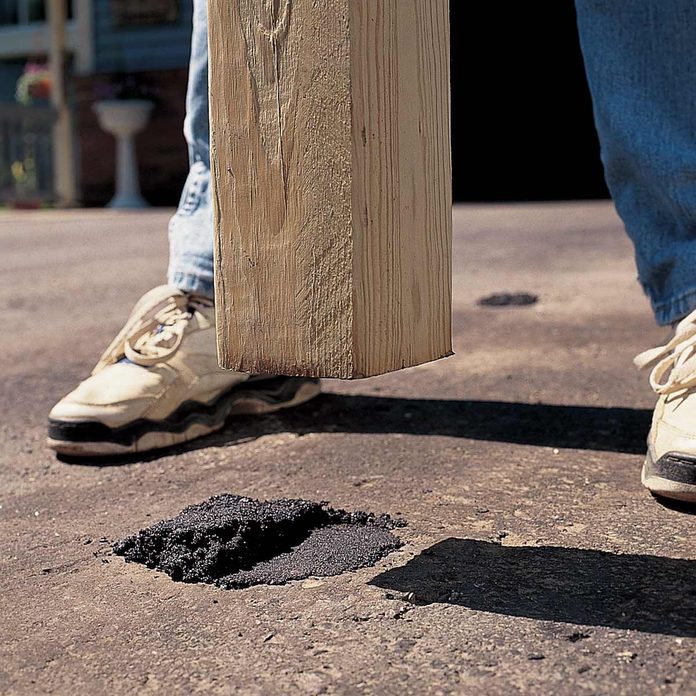
Repair Pitted Asphalt
Do tufts of grass protrude from your asphalt driveway? Well, if you don’t do something about the potholes and cracks in the pavement, they only get worse over time, particularly if you live in a cold climate where ice and freeze/thaw cycles reign. Fix the little problems now to extend the life of your driveway by years. Every asphalt driveway eventually develops cracks and pits. Here’s how to fight back.
Tamp asphalt patching material into the hole with a 4×4 post. If the tamped area remains lower than the driveway surface, build up the asphalt patch about 1/2 in. above the driveway surface and tamp again. Do this until the filled area becomes flush with the surface.
35
/
41

Repair Cracked Asphalt
Remove any vegetation growing from the cracks in your driveway. Pour filler into each crack until it becomes flush with or slightly below the driveway surface. If the filler settles, add a bit more. Follow the manufacturer’s instructions for drying time before applying sealer. Here’s how to do it.
36
/
41
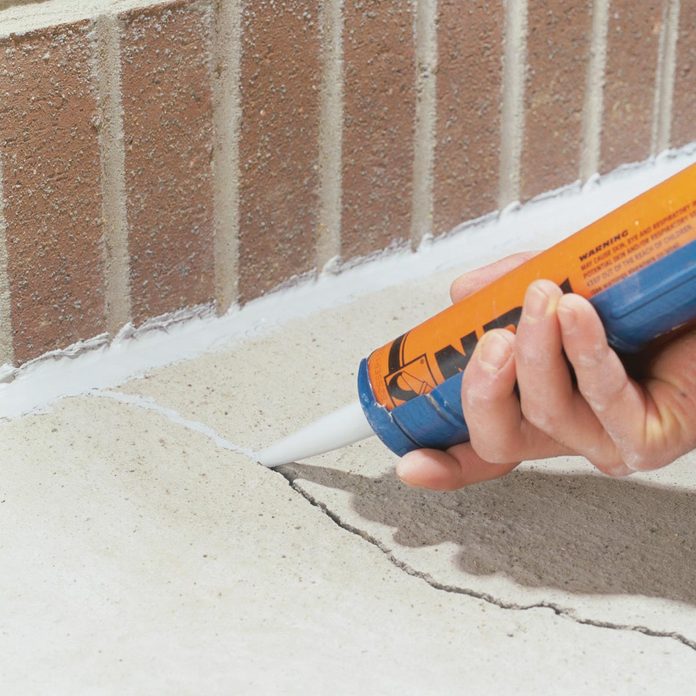
Caulk Cracked Concrete
Cracks and gaps in concrete represent more than just an eyesore. Water can get into the joints, freeze and then expand, making the cracks even larger. Gaps against a house can direct water against the foundation, leading to more problems. Once a year, go around your home and fill these gaps and joints with urethane caulk to prevent problems. Seal cracks in concrete with durable urethane caulk. You can do it in less than half an hour.
37
/
41

Fix a Chipped Step
Assemble an L-shaped wooden form, lock it into place with bricks and fill the void with concrete-repair mix. Repair mix bonds to the old concrete better than standard concrete mix. If you don’t want to buy a special edging tool to round the edges of the patch, carefully shape the edges with a putty knife.
Also, learn how to make your patio pavers perfectly smooth again.
38
/
41
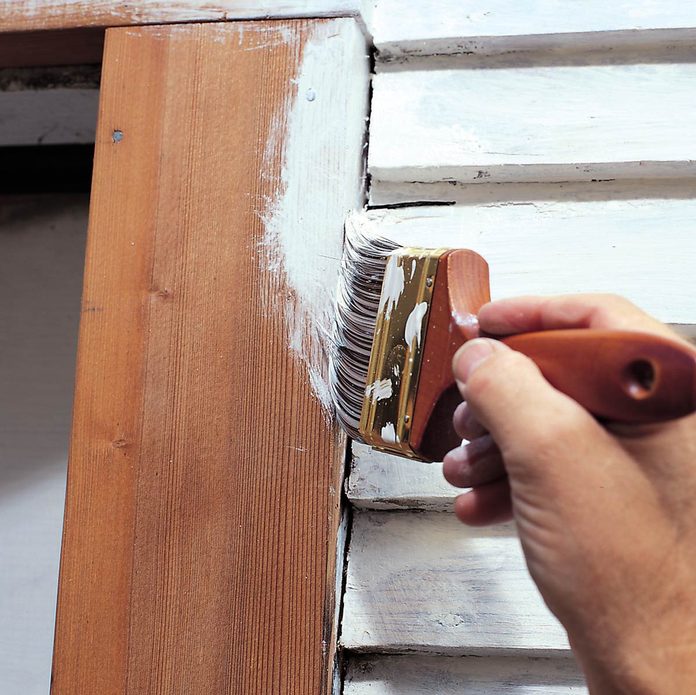
Prime Before You Caulk
When it comes to wood (or wood-based materials like hardboard), primer sticks better than caulk and provides a great adhesion surface for caulk. So if your exterior painting project includes caulking, prime the surface before you caulk. Work the primer into gaps, but don’t try to fill them with primer. Here’s how to make exterior caulk last longer.
39
/
41
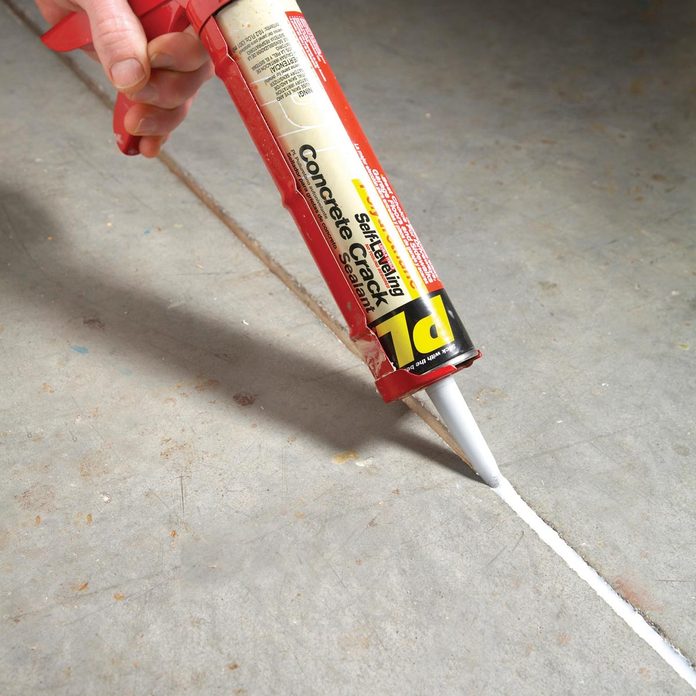
Get a Perfect Bead on Concrete
On horizontal concrete, you can skip the tooling mess and get a perfect bead by using a self-leveling polyurethane sealant. Just insert backer rod and inject the syrupy sealant. Resist the urge to tool the caulk; it slowly levels out and forms a neat seal. Be sure the backer rod completely seals the crack. If the caulk seeps past the rod, you’ll get an ugly sinkhole, a weaker seal and you’ll waste expensive caulk (this specialty caulk will cost you $8 or more for a 10-oz. tube).
40
/
41
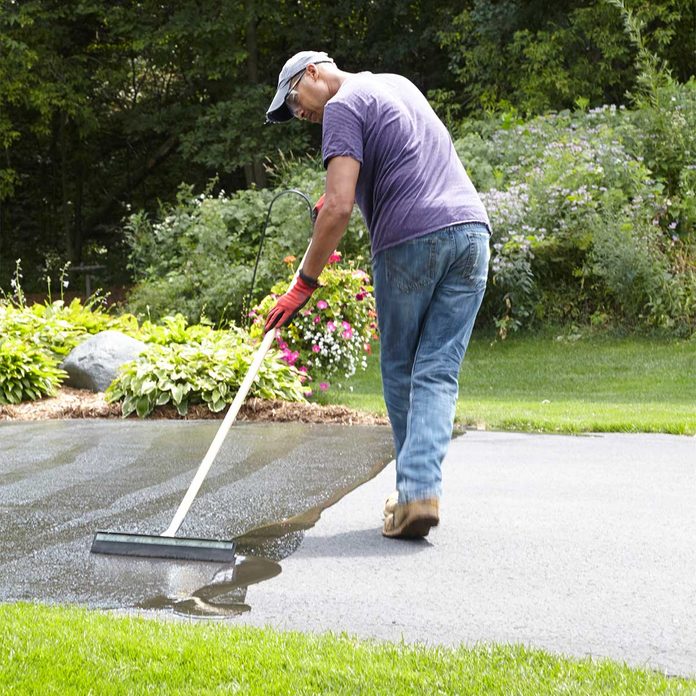
Seal a Driveway
An asphalt driveway can last almost 30 years. But you can’t achieve that long life span without proper installation and regular maintenance, like annually filling cracks and applying sealer when needed. Here you’ll learn how to clean and prepare the driveway so you get the longest life and best protection from driveway sealer.
41
/
41

Apply the Best Finish for Outdoor Wood
A spar finish looks and behaves almost exactly like the familiar interior polyurethane finishes. It forms a shiny coating that protects the wood while accentuating the color and grain. Apply it the same way you would interior polyurethane, too. The big advantage spar holds over interior poly is that spar stands up to exterior conditions. Its more elastic composition resists cracking as wood shrinks and swells from moisture changes. It also protects wood from sunlight’s damaging UV rays. Originally developed for boats, spar finishes now appear mostly on outdoor furniture and entry doors.
Make your exterior paint job last longer with these pro tips.