


These incredible tips from The Family Handyman readers and editors will help you complete your woodworking projects faster and better than ever before!
34 Clever Handy Hints for Your Woodworking Projects
1
/
34
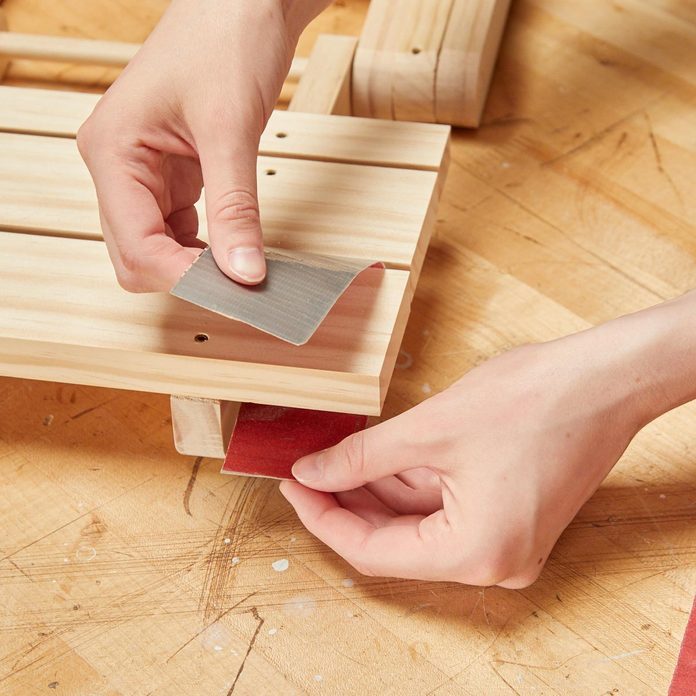
Super-Strong Sandpaper
“I do a lot of finish-sanding freehand, without a sandpaper block, so I can smooth edges and get into nooks and crannies. But the finer grits are usually bonded to thinner paper and, at least for me, the paper is too thin and ends up tearing long before the grit wears out. So I apply duct tape to the back of the sandpaper. The sandpaper is still flexible enough to sand a tight radius and it’s far more durable. You can use this super-strong sandpaper like a shoeshine rag.” — Chuck Merchant
2
/
34
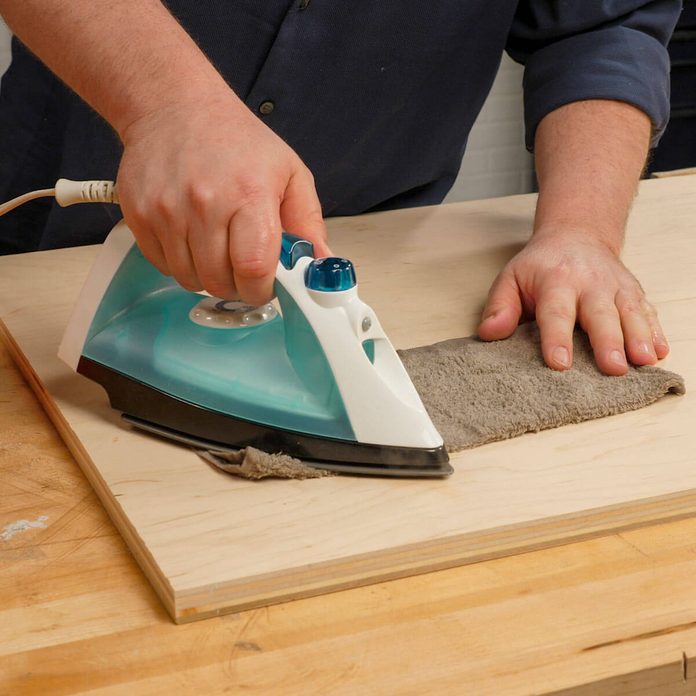
Get Dents Out of Wood
Dents in wood surfaces can be annoying. But fret not, they can be fixed! Simply soak a washcloth in water and ring it out a bit so it’s not sopping wet. Put the damp washcloth on the affected area. The water will wick through the wood, and that’s fine. Now, with your iron on its highest setting, place it on the damp washcloth over the affected area, and make small movements back and forth and in circles. Press down firmly and continue until your wash cloth is dry. It won’t take long to evaporate. At this point, the wood fibers are absorbing the water and should expand back to where they were originally. Continue this process and repeat by adding more water until the dents rise up to be flush with the rest of the material.
Here are more instant fixes for nagging problems around the house.
3
/
34
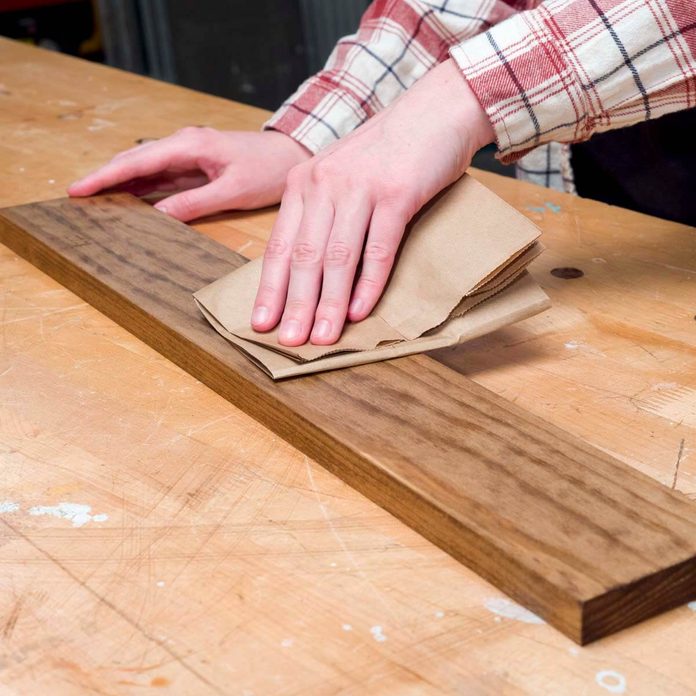
The Brown Paper Bag Trick
You can always make a finish smooth by rubbing with fine sandpaper and rubbing compounds, but that is a lot of work. And there’s almost always a little dust that settles onto the last coat of finish before it dries, even when you spray fast-drying lacquer. And with slow-drying varnish, there’s always dust stuck to the finish.
Unless you’re aiming for the ultimate in smoothness, rubbing the surface with a folded brown paper bag is usually sufficient. A brown paper bag is abrasive enough to flatten the dust nibs but not so abrasive that it scratches the finish—as long as the finish is fully dry. As long as the dust isn’t excessive and as long as the particles aren’t large, you can make the surface feel smooth with this paper bag trick. You’ll be amazed at how well it works.
4
/
34
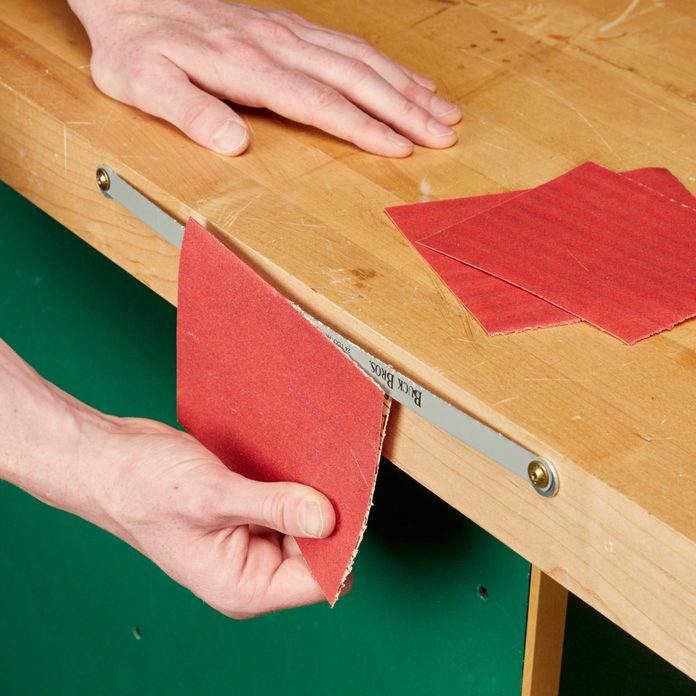
Sandpaper Cutter
Cutting sandpaper is a quick way to dull your scissors or utility knife blade. Instead, I fastened a hacksaw blade to the edge of my workbench. I slipped a washer behind the blade at each of the mounting holes so a sheet of sandpaper to easily slides in behind the blade. I fold the paper where I want to cut, just as a reference. — Kim Boley
5
/
34

Quick Miter Fix
Cutting a miter joint that closes up perfectly and maintains a 90 degree angle is really satisfying. Unfortunately, it doesn’t always happen. Here’s a quick fix for a slightly open miter joint; rub the shank of a screwdriver along the miter at a steep angle, from both sides of the joint. Chances are, you’ll be the only one that knows it wasn’t perfect to begin with!
6
/
34

Caulk Gun Clamp
Did you know that you can use a caulk gun as a clamp? It’s perfect for gluing up small projects such as a cutting board. Just place a couple of pieces of scrap wood or cardboard at the ends of the caulk gun and then squeeze the trigger to apply pressure.
7
/
34
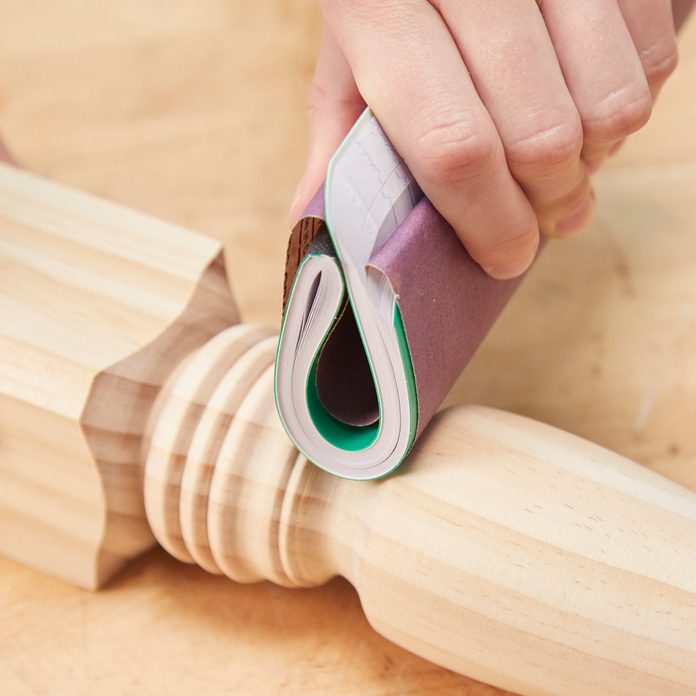
DIY Flexible Sanding Block
Sanding curves is tricky. Sometimes you need a sanding pad that’s both firm and flexible. A small notepad works great. Just wrap sandpaper around the pad and bend the pad to whatever arc you need. Slip the one end of the sandpaper between the pages to help hold it in place on the pad. Give this a try the next time you’re working on a project that has curves and tough to reach spots.
We asked our favorite woodworkers to share some of their favorite shop tips. Check out these 10 great woodworking advice to help you work faster and smarter in your own shop.
8
/
34
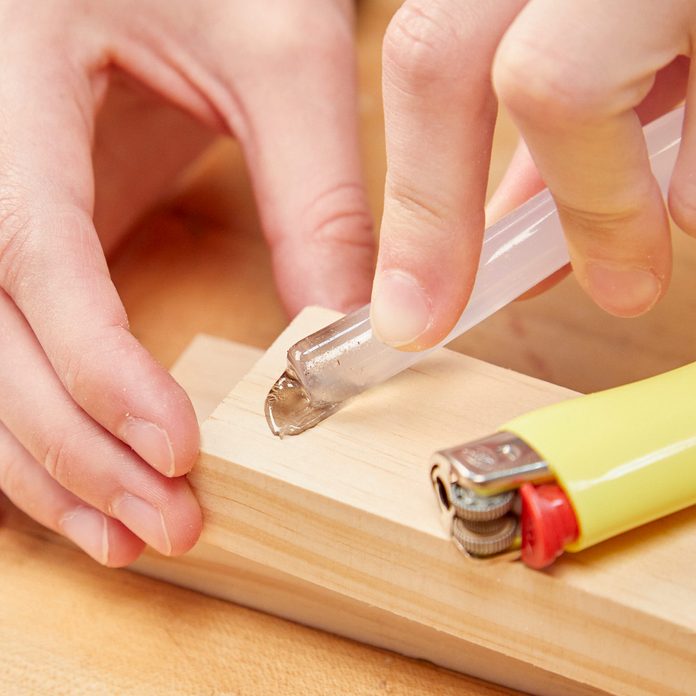
Hot Glue Whenever You Need It
I like to be ready for anything, including making a quick repair with hot glue. But there’s not always a handy outlet to plug in a glue gun. So I keep a lighter and a glue stick in my toolbox. I usually only need a little dab to fix something. Melt the tip of the glue stick with the lighter and dab the melted glue on your repair. So keep a lighter and a hot glue stick in your tool bag for your on-the-go, impromptu gluing needs.
Check out 45 of the most clever gluing tips and tricks from editors and readers of The Family Handyman. You’ll definitely want to keep these in mind during your next woodworking projects!
9
/
34
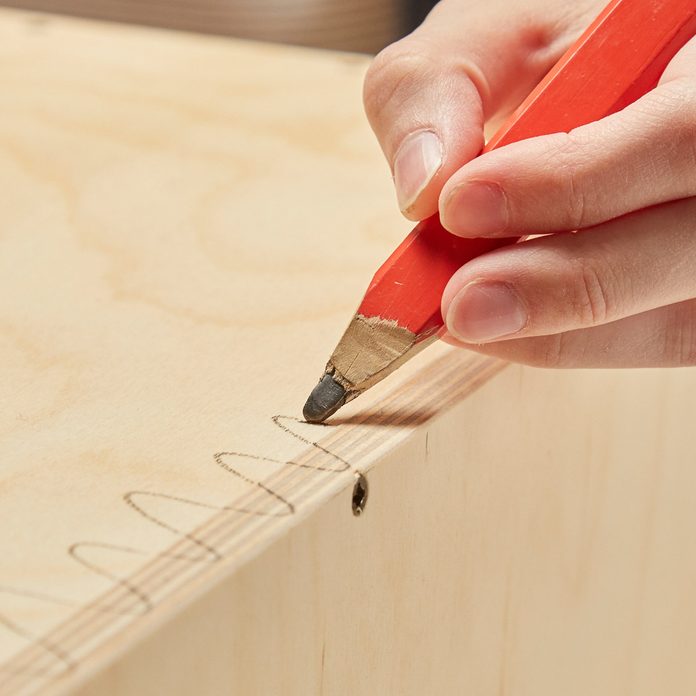
Sanding Even Surfaces
With an orbital sander and good sandpaper you can smooth wood evenly and easily with first-class results. When flush-sanding solid edge-banding, draw a squiggly line across the joint before sanding. The edge-banding will be slightly proud of the plywood veneer, so the pencil marks provide a visual aid to make sure that you’re sanding flat, and that you don’t sand through the plywood’s veneer. As you go, you can also test for a smooth, level transition by gently scraping your fingernails against the transition. If it’s smooth, your fingers will not catch on the seam between the two pieces
10
/
34
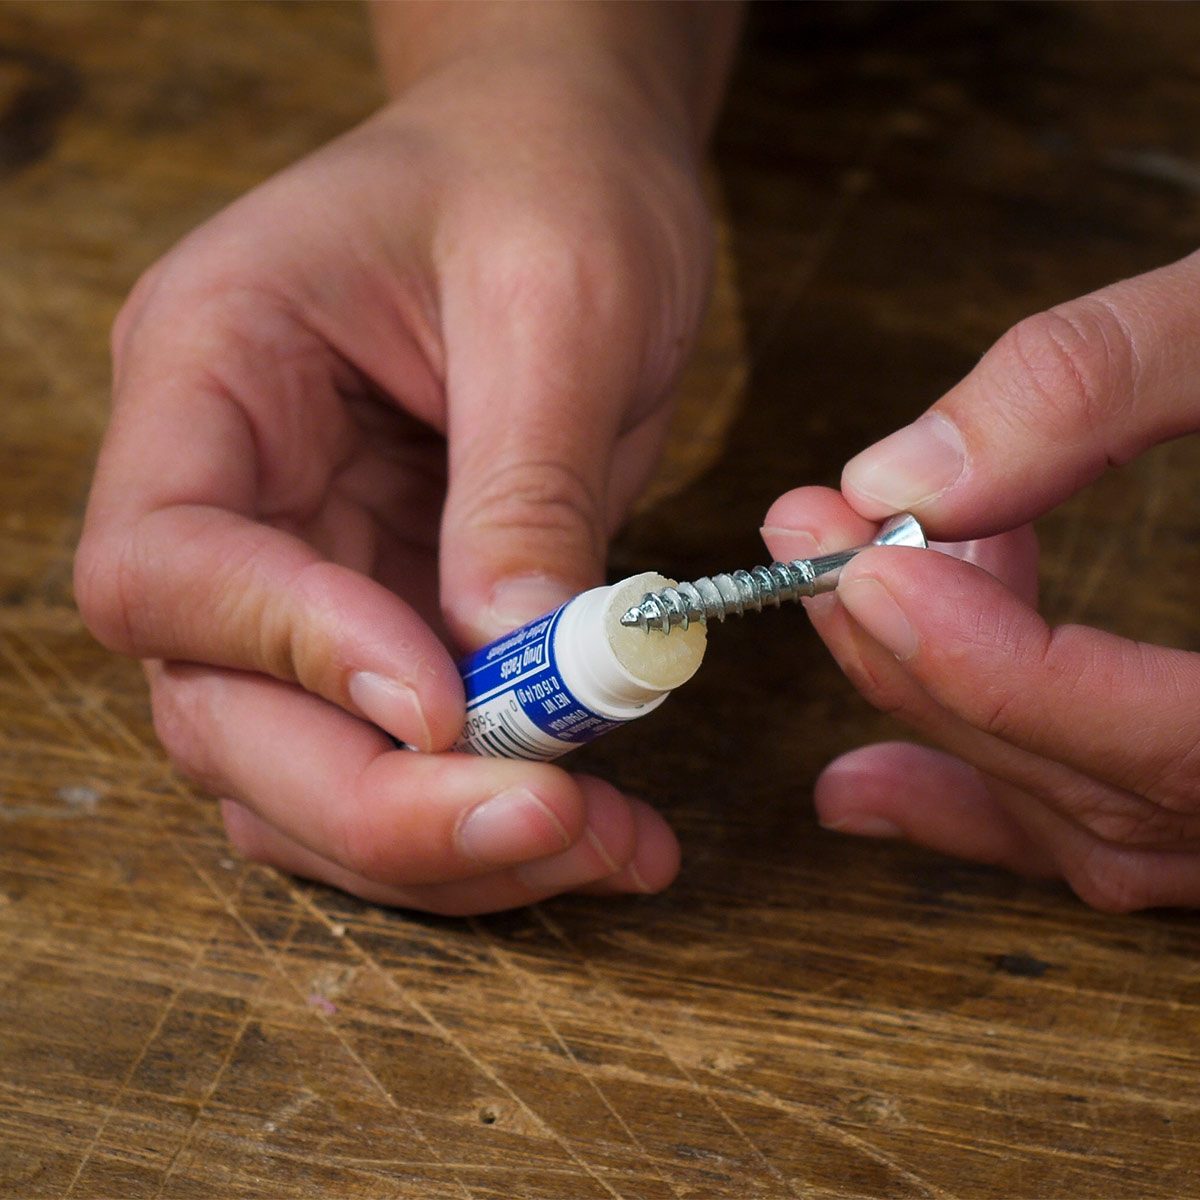
Chap Stick for the Toolbox
If you enjoy working with hardwoods, you know how important it is to lubricate screws. It’ll make driving the fasteners easier and reduces the amount of heat produced. But what if you don’t have a bar of soap or a pile of beeswax nearby? Reach for your tube of Chap Stick!
11
/
34

More Planing, Less Exercise
Planing boards with a portable planer can provide you with a lot of exercise. But rather than running from the infeed side to the outfeed side before the board flips your portable planer, try this instead: Attach your portable planer to a board; then fasten the board to a miter saw stand. Then planing boards won’t wear you out so quickly!
12
/
34
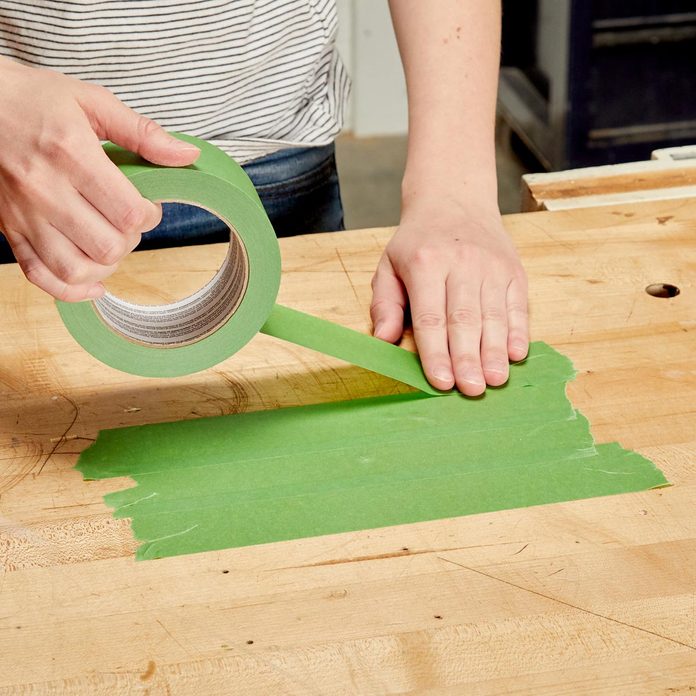
A Temporary Mixing Surface
Instead of using a container to mix a small amount of epoxy, just make a mixing surface on your workbench using painters tape. Simply lay down strips, overlapping the edges so the epoxy doesn’t get on your bench. When you’re done, peel off the tape and throw it away. This mixing surface will work for more than just epoxy, you can use it for wood glue or any other material you need easy access to while working on a project.
13
/
34
Improve Jigsaw Cuts
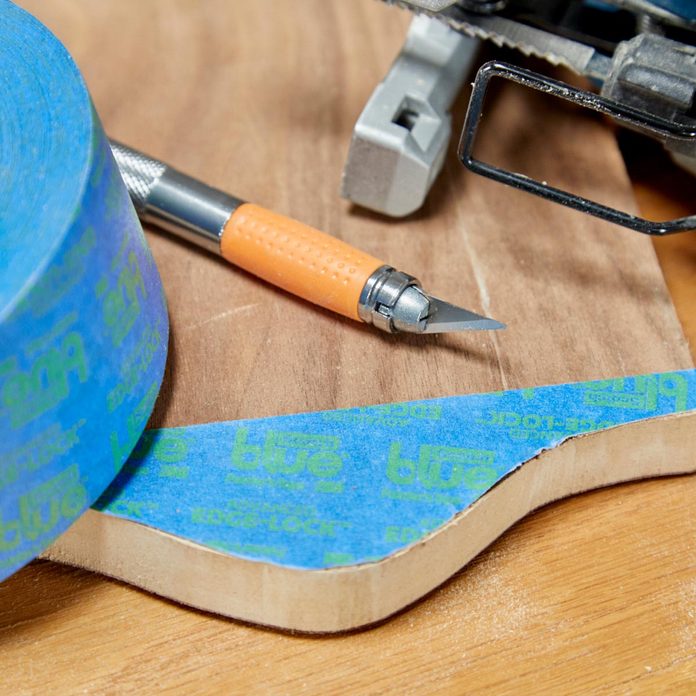
Attempting to cut a dark wood? No Problem! You can improve your jigsaw cuts by using painter’s tape as a guide rather than hard-to-see pencil lines. Painters tape is especially helpful when cutting dark wood because it is visibly clearer to see. Simply cut out your curved guide on the painters tape with a hobby knife and place it on the wood. Be sure that the curve is straight across the board!
When it comes to DIY experience and expertise, nobody can match The Family Handyman’s field editors. This crew is made up of homeowners from across North America, pros in every building trade you can name. Here are their best secret tool tips for DIYers.
14
/
34
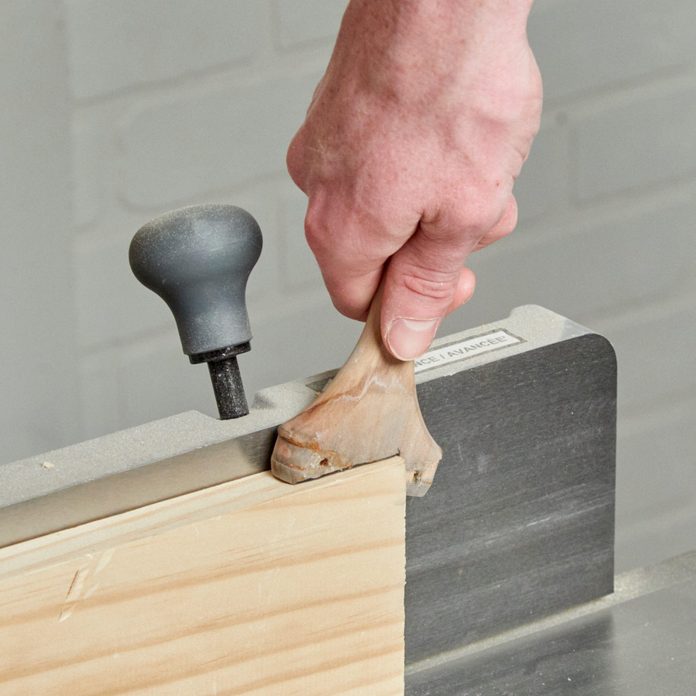
A New Use for an Old Paintbrush
After my paintbrushes wear out, I strip off the metal ferrule with a needle-nose pliers and some strength. I use the wood or composite handle for a table saw push stick, since I am frequently losing or misplacing mine, I figured it would be better to have more rather than less of these handy tools. I use a square to measure and mark and the angle I want to cut into the paintbrush. Next, I simply make two cuts on my band saw to make an angled notch in the bottom of the handle. Now it’s time to get to work! — Austin Garmo
Before you start your next painting project, check out these 14 Handy Hints for painting that will save you time, money and more.
15
/
34
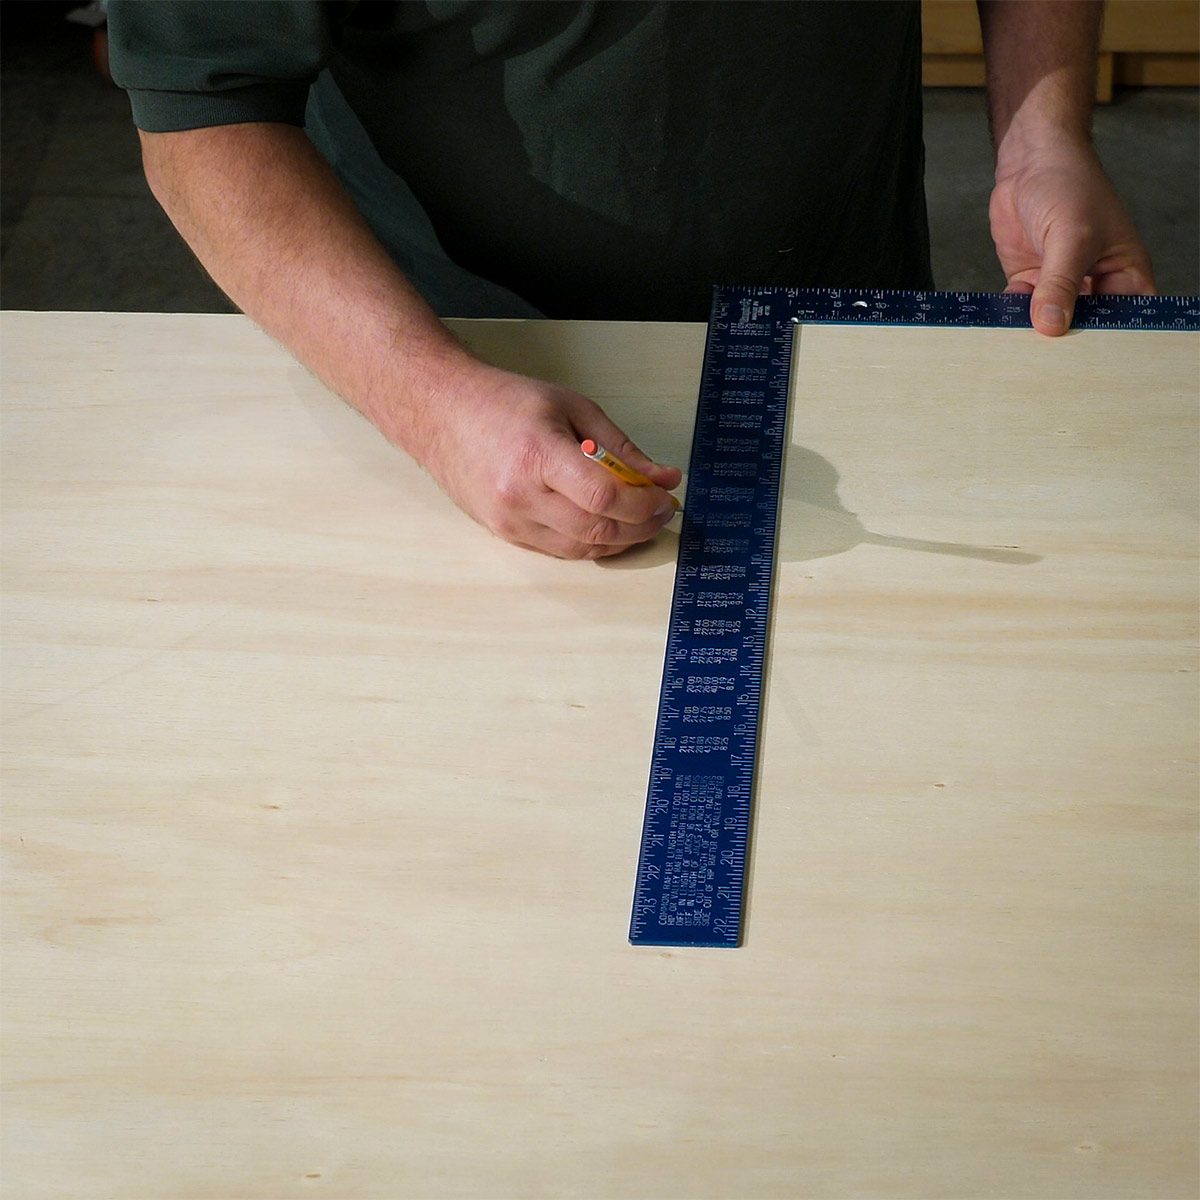
Check if a Square is Square
Follow these simple steps for ensuring that your square is square: Align the short side of the square with the factory edge of a piece of plywood. Draw a line along the edge of the long side of the square. Flip over the tool and align the base of the mark with the same edge of the long side of the square. Draw another line. If the marks do not align perfectly, the square is not square.
16
/
34

How to Fix a Square
Before tossing your off-kilter square and spending money on a new one, try fixing it with this simple process. Use a center punch, a hammer and an anvil. If the sides of the square are too close together, punch the inner corner. If the sides are too far apart, punch the outer corner. Check your progress, and repeat as needed until the square is square.
17
/
34

Use a Straw to Scoop Up Glue Squeeze-Out
When glue squeezes out on an inside corner like in a drawer or the inside any woodworking project, using a chisel has the potential to cause more harm than good. This is because the sharp blade can easily mark-up and scratch the adjacent surface. The solution is a simple drinking straw. We used paper straws because they can be recycled unlike plastic ones. The straw will conform to the shape of the corner and the excess glue will be collected inside the straw so it can’t get re-deposited anywhere else.
18
/
34
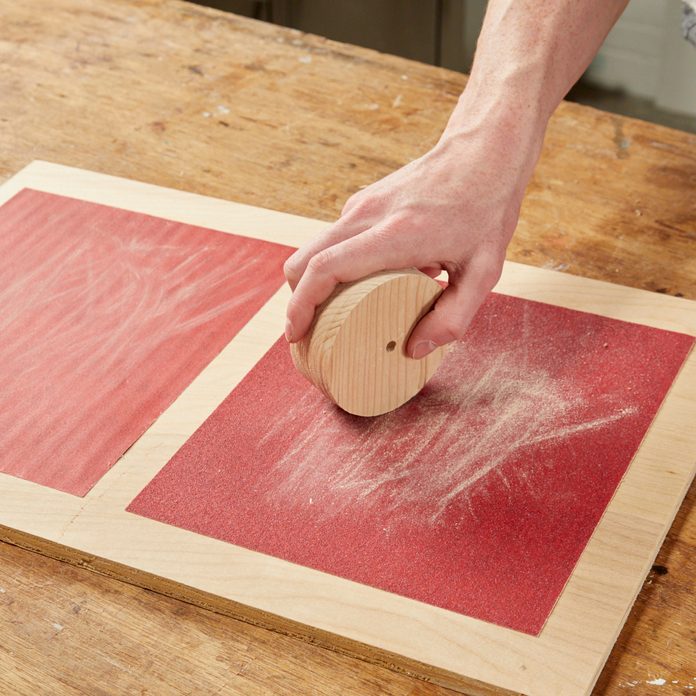
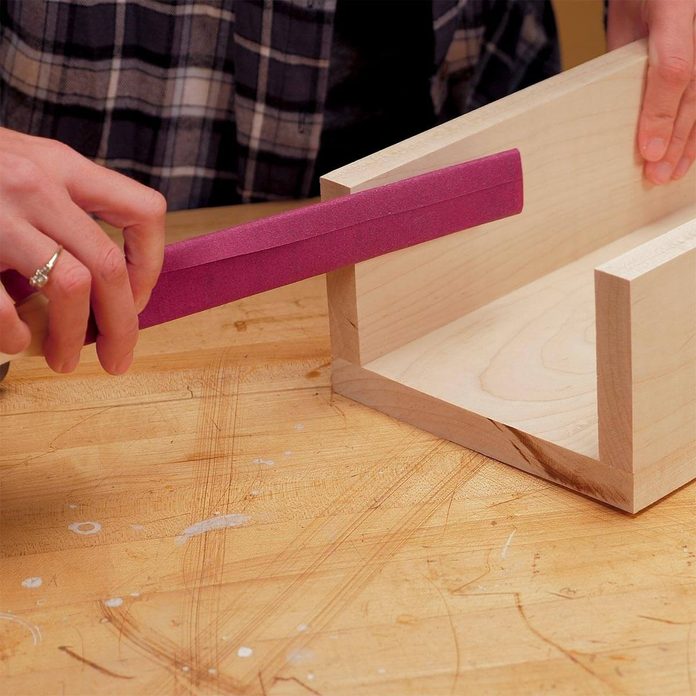
Sanding Station For Small Parts
Sanding small items is tricky, as they’re hard to clamp in a vise to work on them. So instead of bringing the sandpaper to the workpiece, I bring the workpiece to the sandpaper. I glue sheets of sandpaper to a piece of plywood; 60 and 100-grit on one side and 150 and 220-grit on the other. Spray adhesive works well for this. Since there’s sandpaper on both sides, my sanding board doesn’t slide around on the bench.
19
/
34
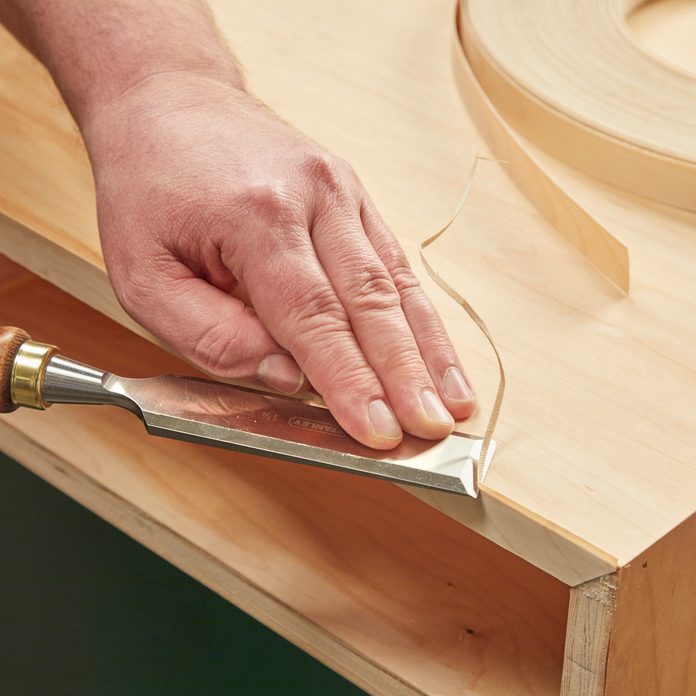
Iron-on edge-banding is a quick way to cover up an edge on plywood. Trimming the excess, however, is tricky. I’ve tried edge-banding trimmers, but I find the results are unpredictable. With the trimmers I’ve tried, it wasn’t easy to change the direction of the cut to suit the grain direction of the edge-banding. If you’re cutting against the grain, you’re likely to tear out a chunk of your new edge-banding. Instead, I use a wide, sharp chisel. This way, I can read the grain direction and trim accordingly. Angle the chisel slightly and go slow, raising the back corner of the chisel just enough so that it doesn’t dig into the plywood veneer. Smooth the corner with a sanding block after trimming. – Austin Tyler
20
/
34
Adding a Key-Holed Ruler to Your Bench
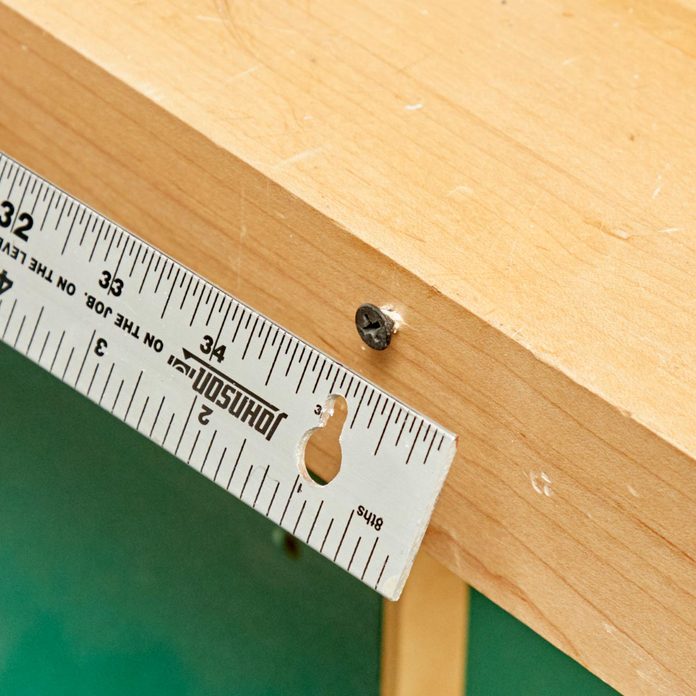
You can mount a removable key-holed metal ruler on the front edge of your workbench, for both easy measuring on the workbench and for easy access for measuring and marking projects elsewhere. Simply drill keyholes (a larger hole with an overlapping smaller hole above it) in two locations along the ruler. After drilling the keyholes we sanded them smooth to get rid of the potentially dangerous sharp edges. Next, drill appropriately sized screws (ones that will fit into the smaller sized keyhole) to the front of the workbench and use the keyholes to mount the ruler to the bench with screws. Also, it is important to note that we placed our screws in a location in which the ruler would lay flush with the edge of the workbench. This makes it extremely easy to use the ruler for quick project measurements.
21
/
34
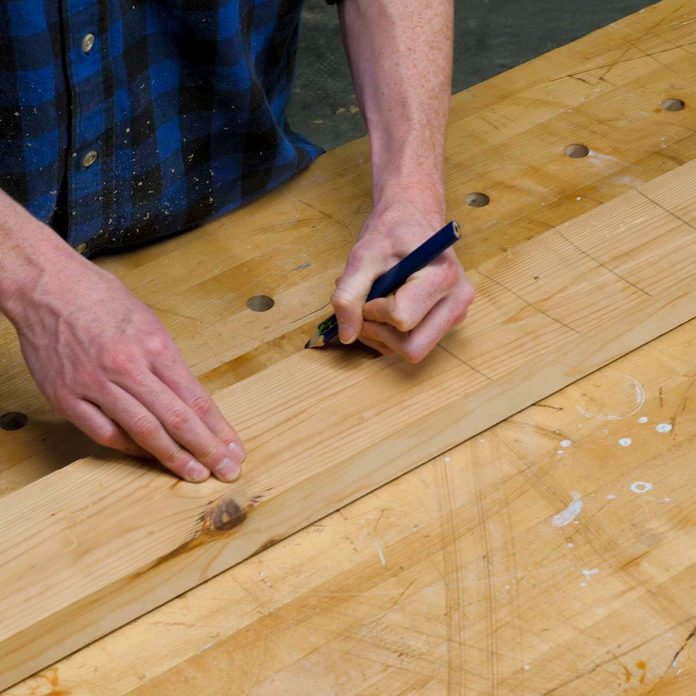
Pencil Hack for Perfectly Flat Boards
Before face-joining a board, mark it up with a pencil. However, don’t just draw a squiggle down the board, use a pencil to draw straight horizontal lines from edge to edge all the way down the board. By doing so, you will ensure that the edges of the board are square as well. Each time you plane the board in the joiner you will be able to see how flat it is based on how many pencil markings are left. Continuing face joining until all of the markings are gone to make flat boards.
22
/
34

Bobby Pin Nail Holder
There's no need to risk hammering a finger when working with tiny nails or in tight quarters. A common bobby pin makes a great nail holder—and keeps your fingers at a safe distance! Once the nail is started, remove the bobby pin and continue hammering away.
23
/
34
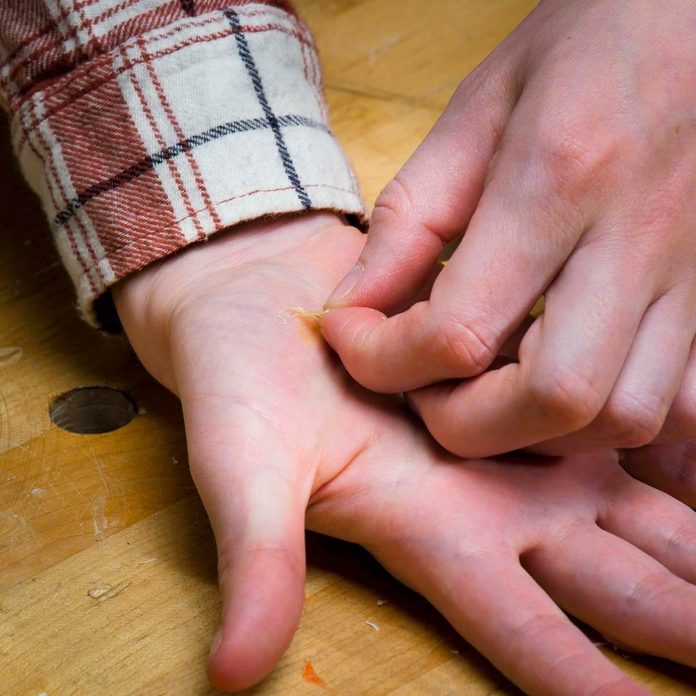
Splinter Extraction
Have you ever struggled trying to get a splinter out of a finger or toe? It can be a challenge, not to mention a pain. Spread a small amount of wood glue over the affected area and let dry completely. When you pull off the dried glue (gently and in the opposite direction of the splinter) it pulls out the splinter. By pulling the wood glue off in the opposite direction, the glue has a chance to pull the splinter out the way it went in. This tip is easy and most importantly pain-free!
24
/
34
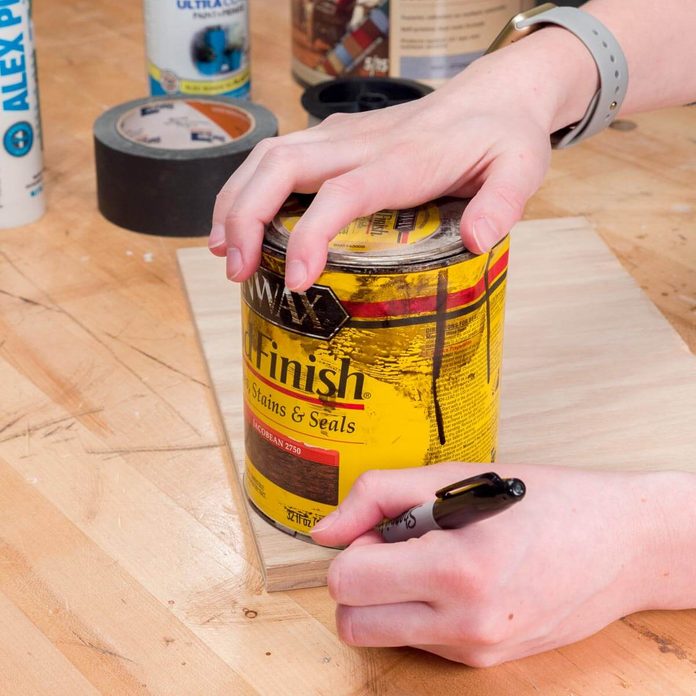
Around the Shop Curve Guides
Many woodworking projects require more than just straight line cuts to get the job done right. And instead of using complex math or a compass to figure out the curve for your project, use supplies you have laying around your workshop. You can use anything from a paint can to a tube of caulk to use as your curve guides. All you have to do is find an object with a circular bottom that is around the size of the curve you’d like; then place it on your project as a curve guide. This hack will ensure that your project curves are accurate and consistent every time!
Need a proper place to store all of your workshop curve guides? Check out these 51 brilliant ways to organize your garage.
25
/
34
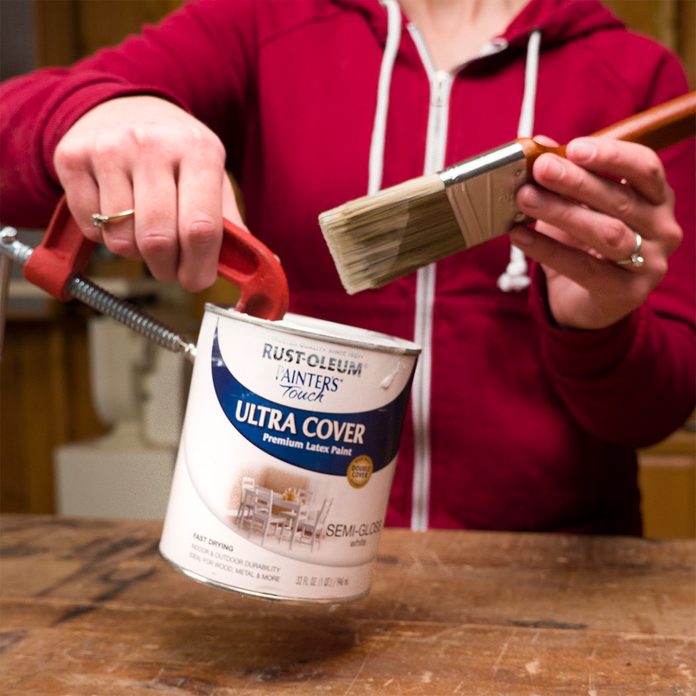
C-Clamp Paint Can Handle
When I needed to touch up a paint job that required very little paint, it didn’t make sense to decant some paint from the quart-size can into a different container just for the sake of having a convenient handle. So I improvised. Instead of dirtying a new paint container, I created a handle for the can using a C-clamp. Yes, it may get some paint on the clamp, but does that matter? Not to me! — Mike Watt
26
/
34
27
/
34
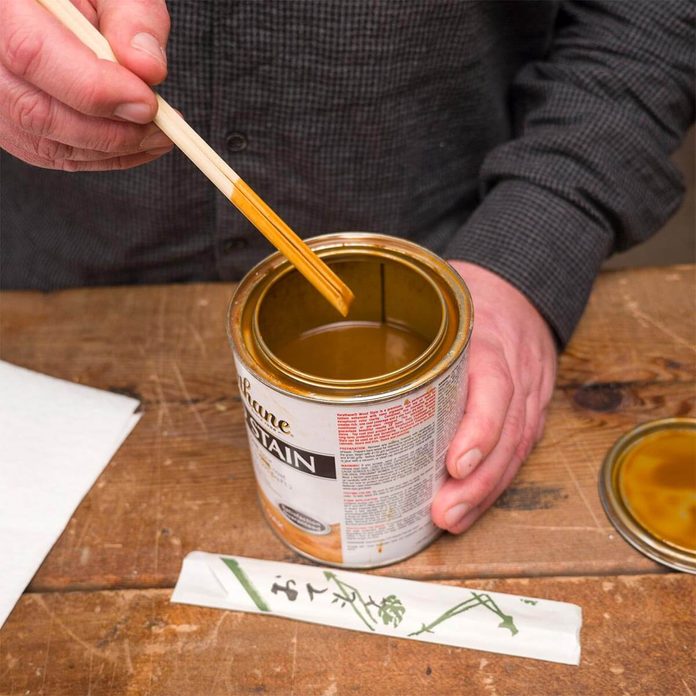
Use Takeout Chopsticks to Stir Finishes
Chopsticks make excellent stirrers for pint- and quart-size cans of varnish, shellac, stain, paint, etc. They’re long enough to reach the bottom of the containers and wide enough to properly mix liquids (especially if you keep the two sticks attached, as they come in the paper sleeve). Best of all, they’re smooth and dust-free. You can just save unused chopsticks when you have takeout, or you can also purchase disposable chopsticks. I buy them in packs of 100 pairs for about $3.50 at the local international market. — Bruce McGarvey
28
/
34
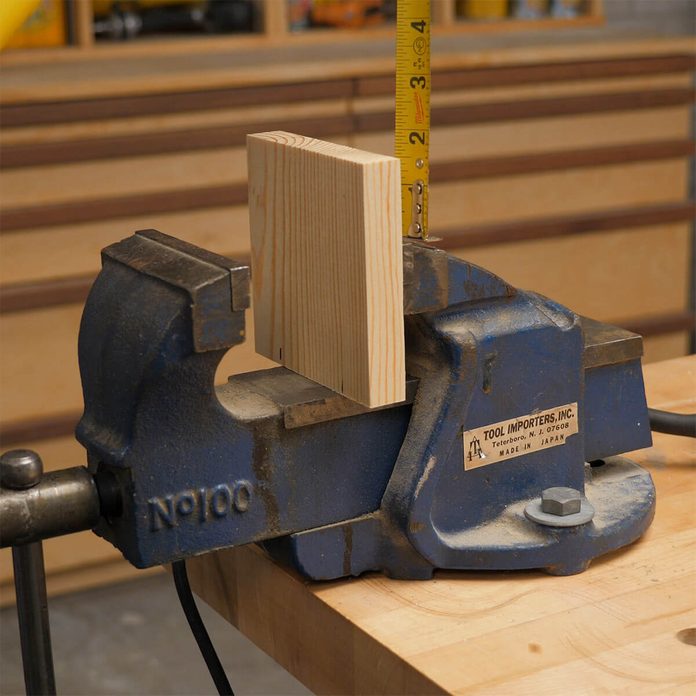
Custom Pads for a Mechanic’s Vise
Sometimes I want to use my mechanic’s vise for woodworking projects, but the metal jaws can leave marks on delicate wood pieces. So I made custom pads for my mechanic’s vise using blocks of wood. Here’s how to do it: Mark the size of the vise shaft on the wood blocks, and measure the size of the notch you need to cut so that the blocks will saddle the vise shaft. Mark the area to cut out on the blocks, and use a jigsaw to cut along the marks. If cut properly, the blocks will rest on the vise shaft and you won’t have to hold them in place or purchase covers that will fit on the jaws of your vise. — Rich Knight
29
/
34

Use a Sneaker to Clean Sandpaper
Make sandpaper nearly new again with a lowly old sneaker. Start up your power sander and dust collection system (remember to wear hearing and eye protection). Then slowly press the rubber sole of an old sneaker along the sandpaper—you'll see a difference instantly!
30
/
34
Quick Woodworking File
Make a slender woodworking file to use for sanding in tight spaces. First, find a paint stir stick. If you don’t have one stored in your garage or shop, you can pick one up at your local home center or paint store. Then cut a piece of sandpaper so that it will wrap around the stir stick once. Use spray adhesive or an all-purpose glue to adhere the sandpaper to the stir stick, and let it dry completely. If you plan to use the woodworking file more than once, use a marker to write the sandpaper grit number on the handle of the stir stick before storing it. If you’re in a pinch and don’t have the materials to whip up this woodworking file on hand, a simple emery board (also known as a nail file) will work, too.
31
/
34
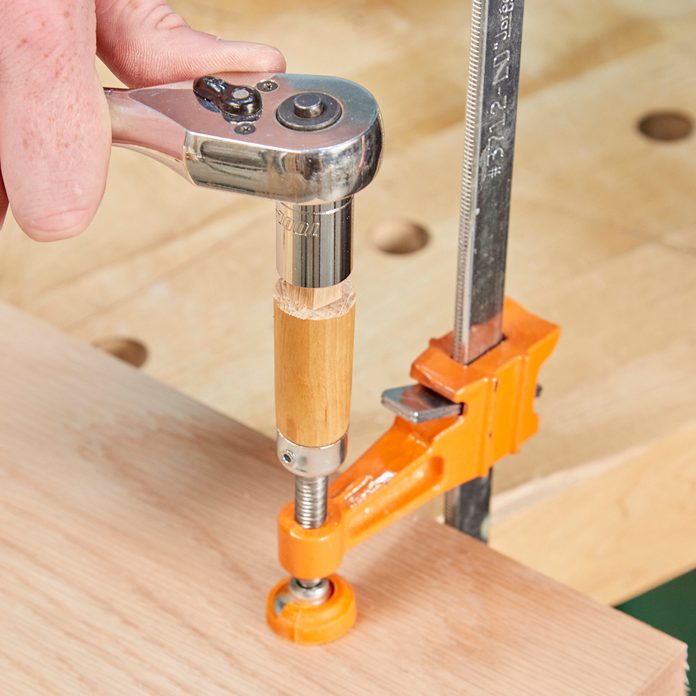
10-Minute Clamp Hack That Will Save Your Hands
Aging gets all of us at some point. The only part of aging that has really affected my furniture making is my grip while I’m clamping; particularly when I use clamps with small-diameter, round wooden handles. I make a lot of live-edge tables that need some creative—and fast—clamping so that all my joints are snug before the glue dries. My solution takes a little time but once it’s done, clamping is a breeze. I modify the ends of my clamp handles by attaching a nut with a washer-head screw. This way I can use a socket wrench to tighten the clamp. Just attaching the nut, however, doesn’t quite do the trick, as the nut will just turn by itself without turning the handle. So I extend the profile of the sides of the nut 1/4-in. onto the handle. This allows the nut to sit deeper in the socket. — Kim Boley
Also, don’t forget to check out these carpentry tips and tricks.
32
/
34

Use a Rubber Band to Grip Stripped Screws
We've all stripped a couple of screws in our day. And it normally isn't a big setback until you need to unscrew it, that is. So the next time you're in this situation, try a rubber band for a screw grip.
33
/
34
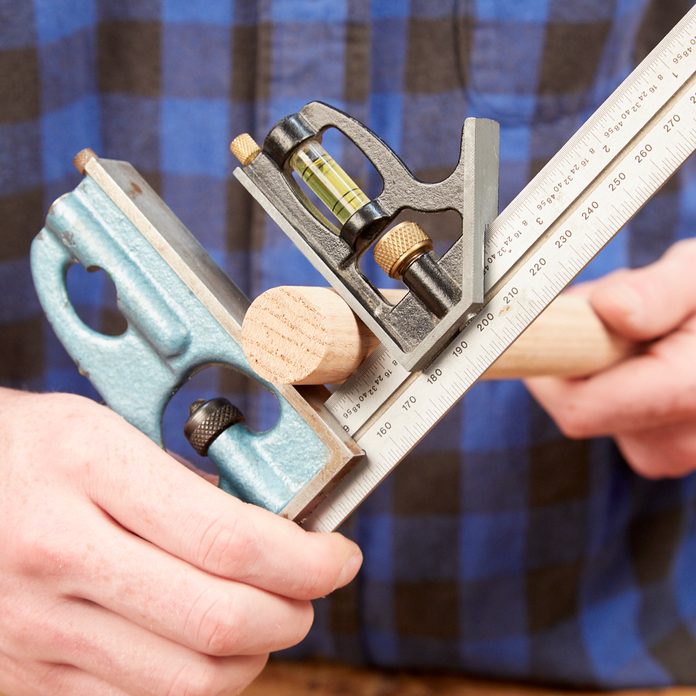
Ad-Hoc Micrometer
Measuring diameters can be difficult. Sure, it works OK to just measure the end, but if you need accuracy, here’s my method. Take apart one of your combination squares and slide the head to another square so that the straight edges are facing each other. Set one of the square heads at an even measurement and then slide the other head until both are touching the part you’re measuring. Read the measurement right off the ruler!
34
/
34

Amazing Miter Joint Clamp
Clamping up four mitered corners is tricky. You can buy specialty clamps for this, but I make my own. Here’s how to do it. Start with a long 1×4, as it’s easier (and safer) to clamp for making the angled cuts than a short piece. Mark out the blocks, and then drill a 1-in. diameter hole in the center of each one. The hole prevents the blocks from getting glued to your project. Cut 45-degree angles tangent to the hole, and then cut the blocks free from the long board.
Check out these 19 attractive, useful and easy woodworking projects you can build! The best part is that they don’t require a complete workshop and years of woodworking experience, just a few common tools and some old-fashioned elbow grease.