
Get inspired to makeover your living spaces this year with these 100 incredible before and after home projects.
100 Amazing Before and After Home Makeovers That Will Floor You
1
/
200
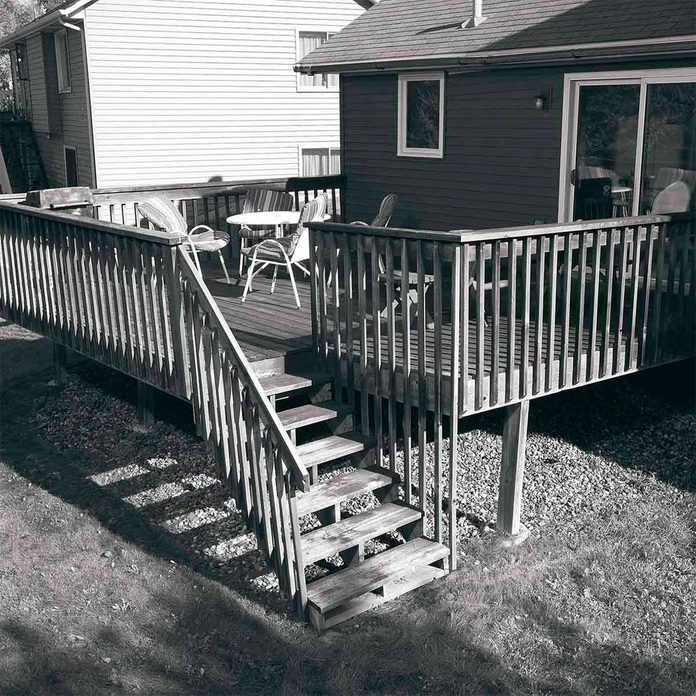
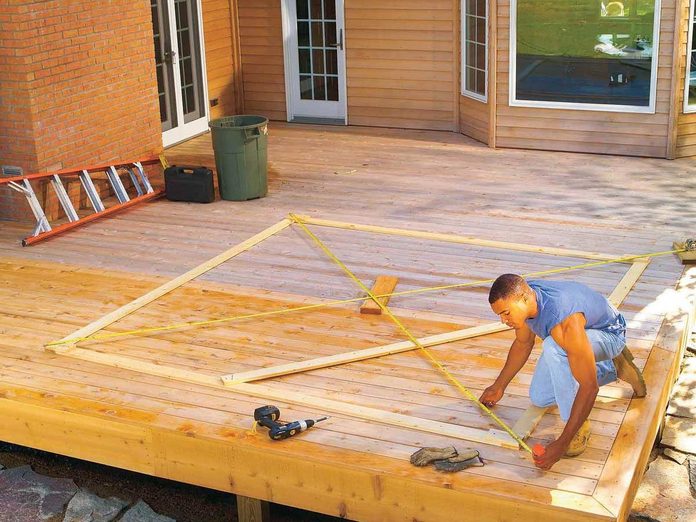
Before: Sound Structure, Worn Decking
This home’s existing decking and railing was in bad condition, but the pressure-treated structure was still sound. There’s no need to tear down an rebuild, when a simple decking and railing update will suffice. And the results of this makeover will surprise you.
2
/
200
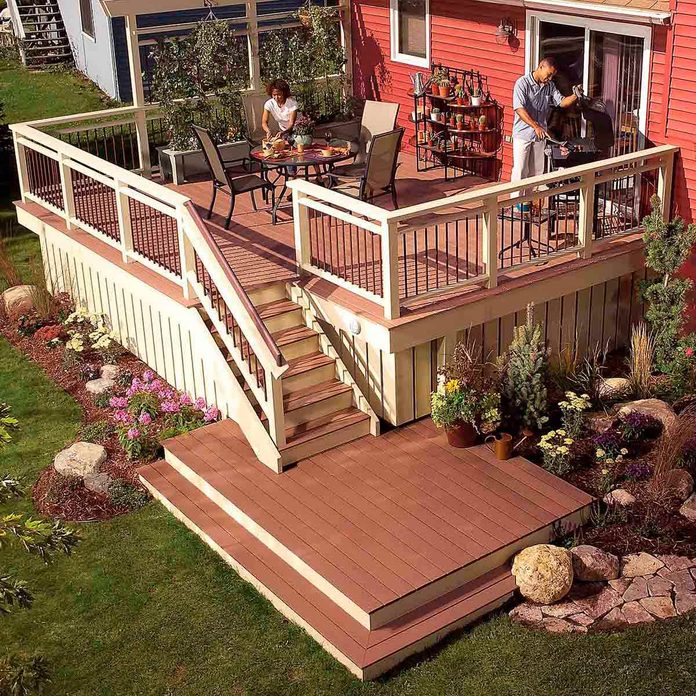
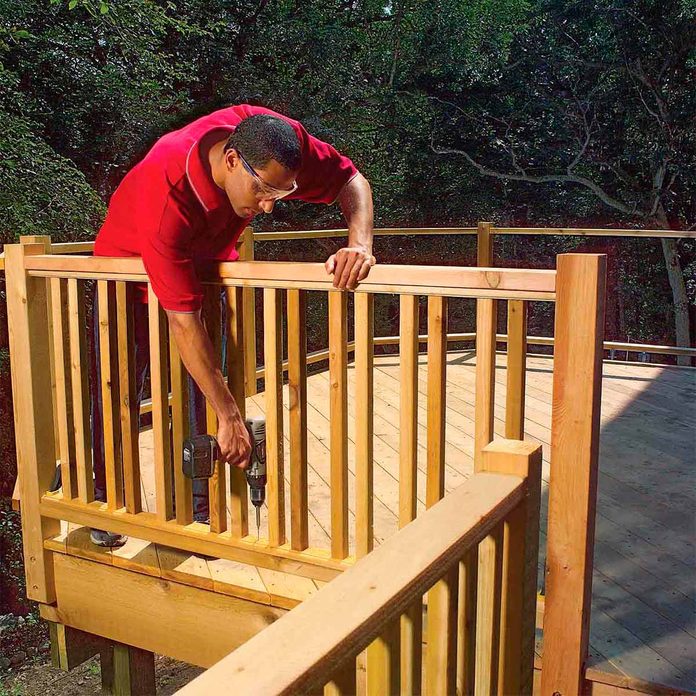
After: Refreshed Decking Looks Brand New
If your existing deck is old, shabby and a maintenance nightmare, you don’t have to tear it all down and start over. Chances are that the structural parts are still in good shape. If so, you can simply remodel it with new decking, rails and stairs, and save tons of money over the cost of a complete rebuild.
In this story, we’ll show you how to replace worn decking, railings, stairs and several other features. We won’t tear out the basic deck framing—instead we’ll describe how to tell if your deck is in good structural shape. We’ll show you how to replace old decking with low-maintenance composite materials and build a new “floating” landing at yard level that expands the deck in an attractive, practical way.
3
/
200
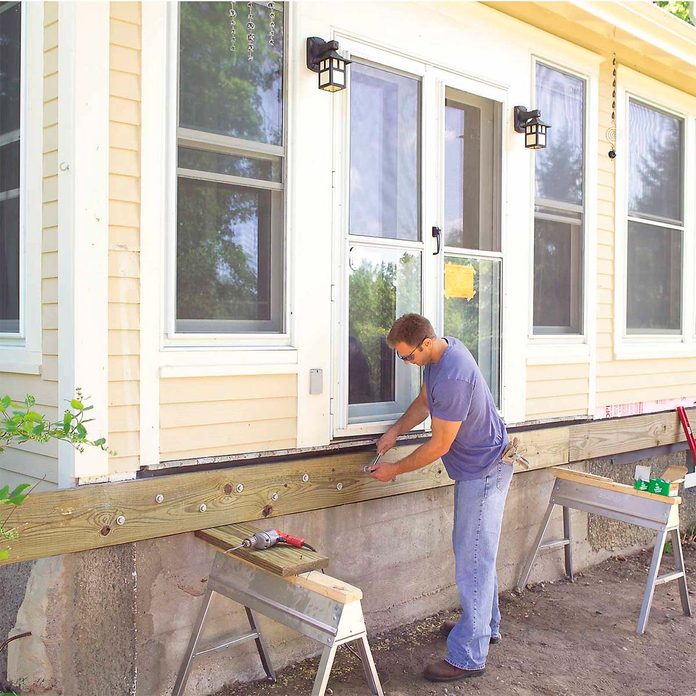
Before: No Space for Relaxing Outdoors
When a deck is inviting, you know it, and here’s one that will definitely draw you outdoors. It’s spacious and attractive. It features large planters to put green plants and flowers close at hand. And it has a versatile railing system that lets you combine solid panels for privacy and open sections for great views and cooling breezes.
We framed the deck with pressure-treated wood, which will last for decades, and then covered the framing with plastic/wood composite decking and an engineered wood trim, aluminum balusters and fiber cement siding.With these materials, your deck will look great for a decade with little more than an occasional cleaning.
4
/
200
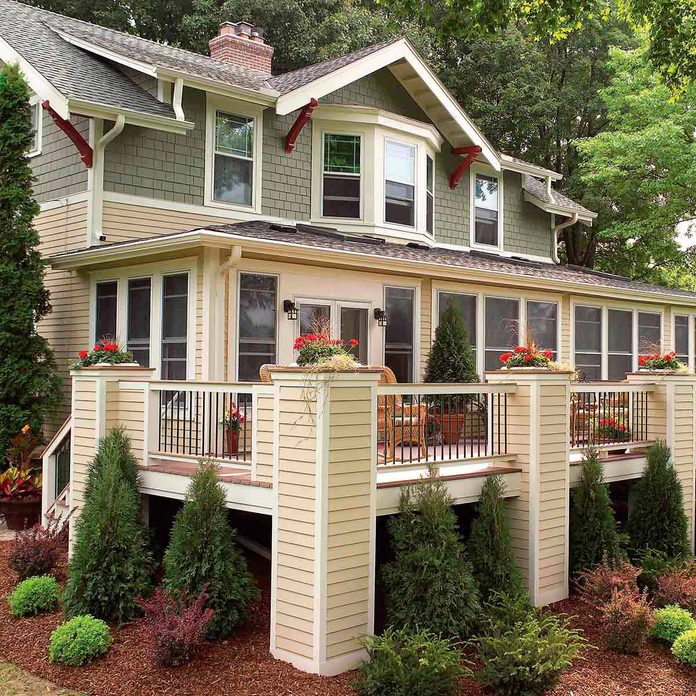
After: Amazing, Maintenance-Free Deck
Build this spacious, semi-private deck, which features planters, a handsome railing, low-voltage lighting and a wide range of low-maintenance, durable materials. It’s a big project, but our photos and drawings show you all you need to know to assemble it successfully.
5
/
200
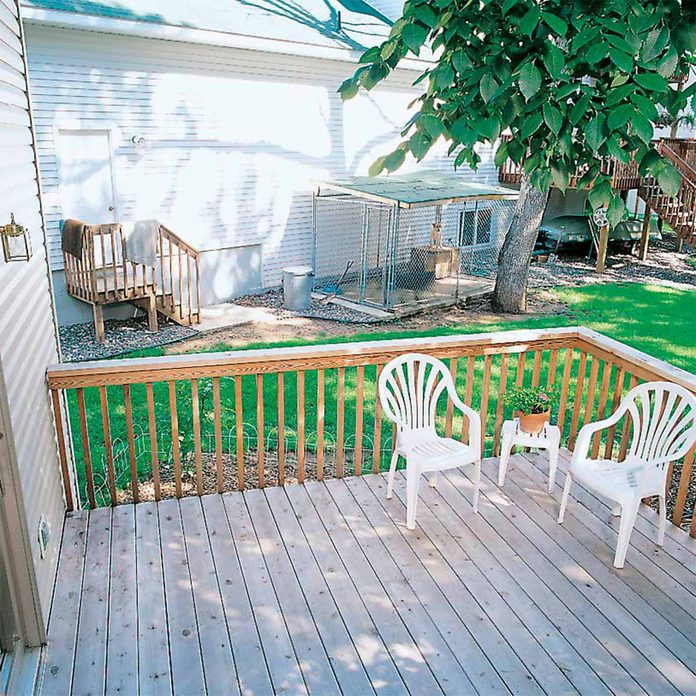
Before: Unattractive View
The deck location on this home includes an unsightly view of the neighbor’s backyard and dog pen. When you can’t relocate a deck, try this simple project instead …
6
/
200
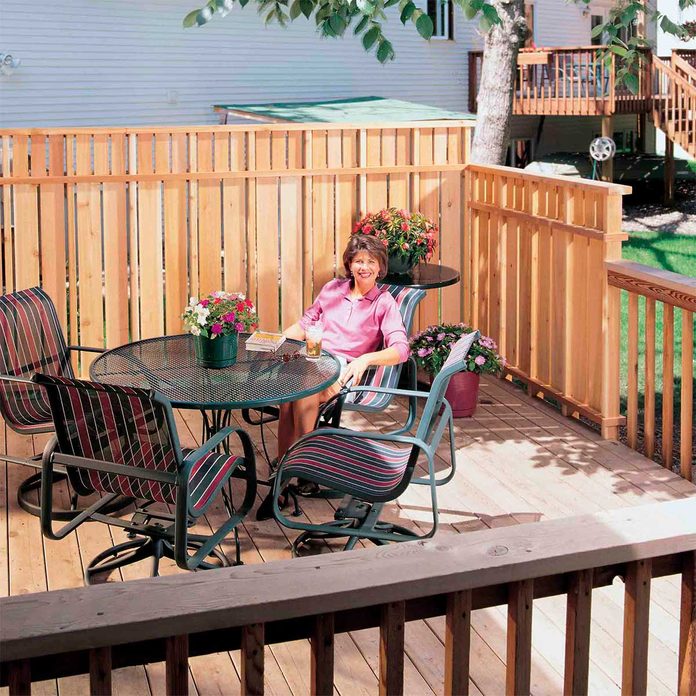
After: Perfect Private Hideaway
If you enjoy spending time on your deck but the neighborhood pest seems to pop over every time you step outside, this privacy fence project is for you. It’s designed to gracefully replace sections of your existing railing and make your deck more private. It also blocks unsightly views, reduces outdoor noise and gives you shelter from the wind, making your deck a more comfortable spot on those breezy days that usually drive you inside. We’ll show you how to build this deck privacy fence here.
7
/
200
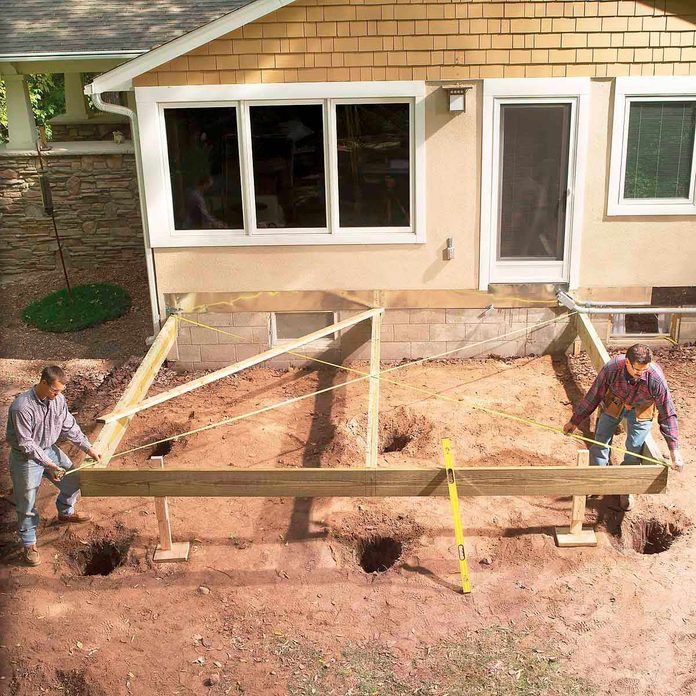
Before: No Place to Kick Back
If there are no areas to sit and relax or gather with friends, your backyard is just wasted space! Turn it into something special.
8
/
200
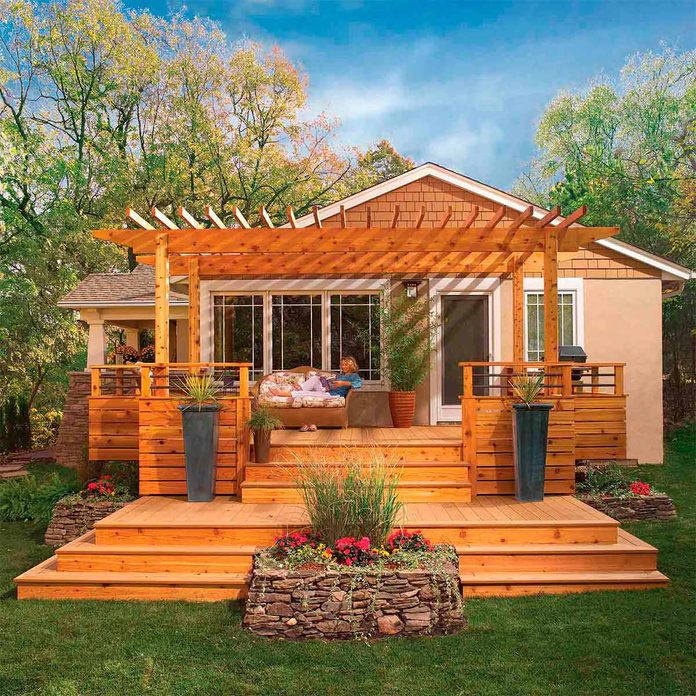
After: Space to Relax and Entertain
This deck isn’t huge—about 16 ft. wide x 18 ft. deep plus bays and stairs—but it’s big on features. The upper deck is just the right size for entertaining small groups—spacious but intimate. It has cantilevered nooks on both sides that provide space for seating and barbecue storage. The pergola shades the upper deck and the home’s interior from the sun, and it offers a space for hanging or climbing plants. The lower deck is a great place to hang out in the sun, while the cascading stairs flow into the yard and provide lots of space for planters and pots. Get the full how-to plans for this project here.
9
/
200
Before: Blah Deck Railing
We’ll show you how to dress up a dull deck with sturdy, handsome railing that provides a wide-open view.
10
/
200
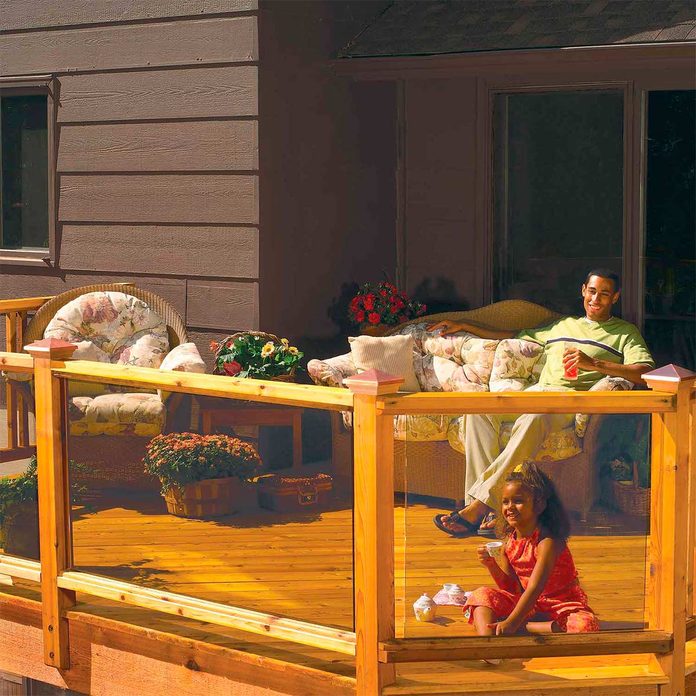
After: Safe, See-Through Deck Railing
The tinted glass in this deck railing is strong and safe, and it adds flair to your outdoor space. This article explains everything you need to build the railing for your deck. We’ll walk you through how to do it yourself here.
11
/
200
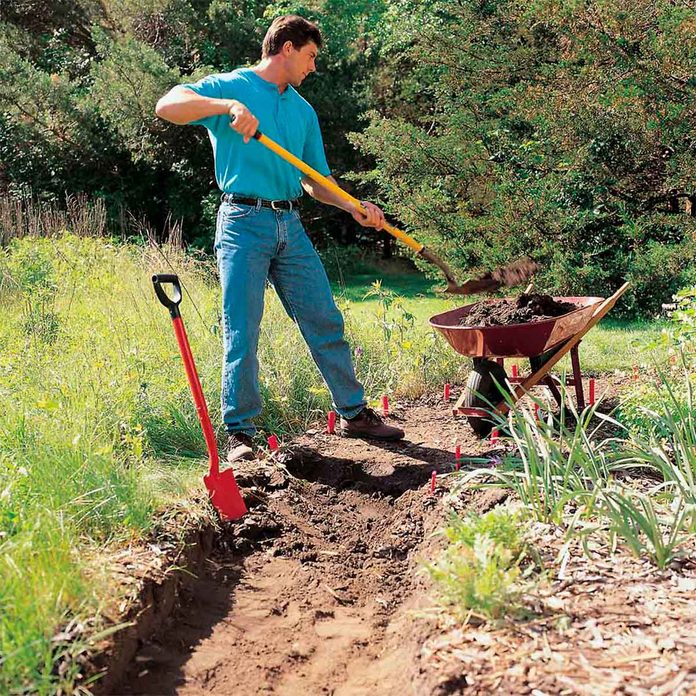
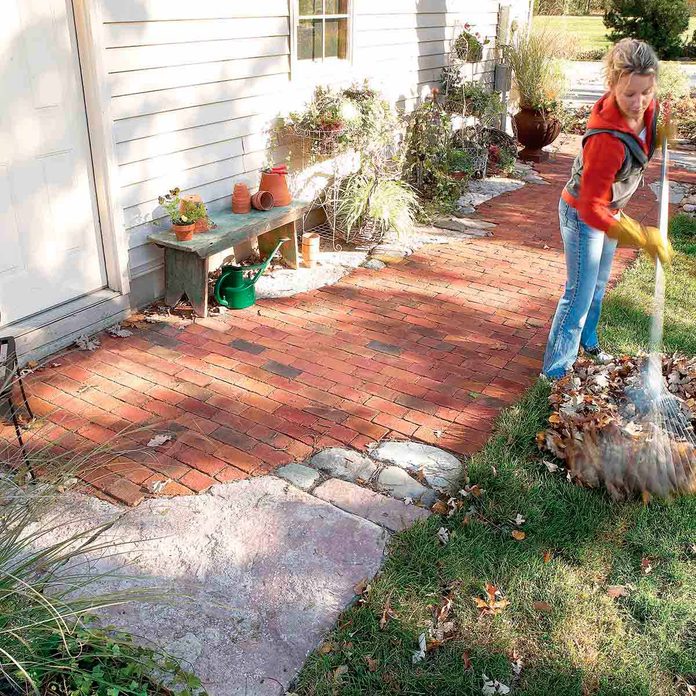
Before: No Place to Pass
Add an element of interest as well as a practical way to walk through your backyard with a gravel path. It’s easier to do (and less expensive) than you may think.
12
/
200
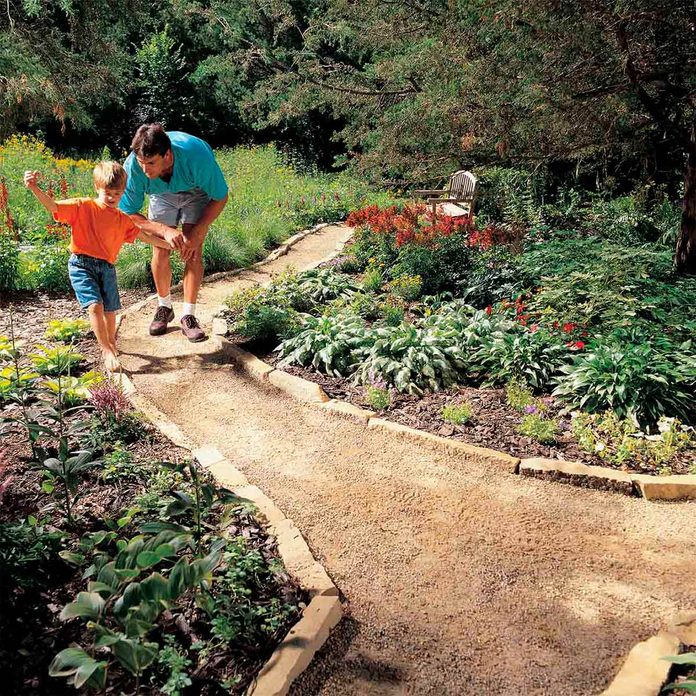
After: Affordable Backyard Pathway
Gravel is the easiest to handle and least expensive path material. It feels soft underfoot, but it’s solid enough to handle a loaded wheelbarrow. And although it looks informal, it can complement a formal garden, especially if you add a stone border. Here are several options as well as how-to steps.
13
/
200
Before: Hot Paver Patio
Is your paver patio too hot to sit on for more than two minutes? Create a touch of shade by adding a pergola.
14
/
200
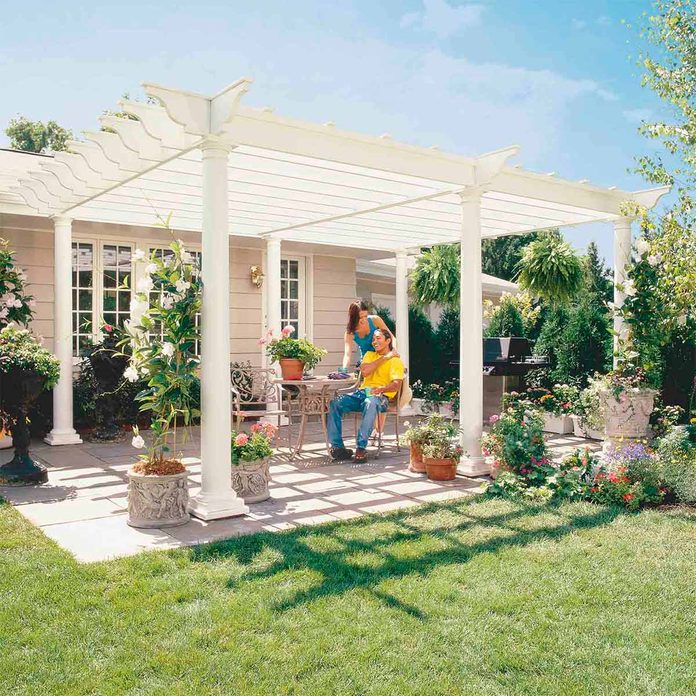
After: Pretty Pergola for a Hint of Shade
Build a vine-covered pergola in your backyard to shade a stone patio or wood deck using wood beams and lattice set on precast, classical-style columns. The dappled sunlight created by the overhead latticework creates a cool, relaxing environment perfect for backyard entertaining. Here’s how to do it yourself.
15
/
200
Before: Buggy, Blank Backyard
Are you chased out of your own backyard by mid-summer bugs? Keep scrolling for the ultimate solution to take back your outdoor space! Try these unbelievable hacks to get rid of mosquitoes right now.
16
/
200
After: Bug-Free Outdoor Room
You can add a spacious, airy outdoor porch to your home. We’ll show you everything you need to complete the project yourself, including how to frame the porch, attach it to your house and all of the finishing details. Sure, it’ll take a lot of time and work, but once it’s done, you can beat the bugs and spend more time outdoors during the summer. We’ll walk you though how to build it step-by-step.
17
/
200
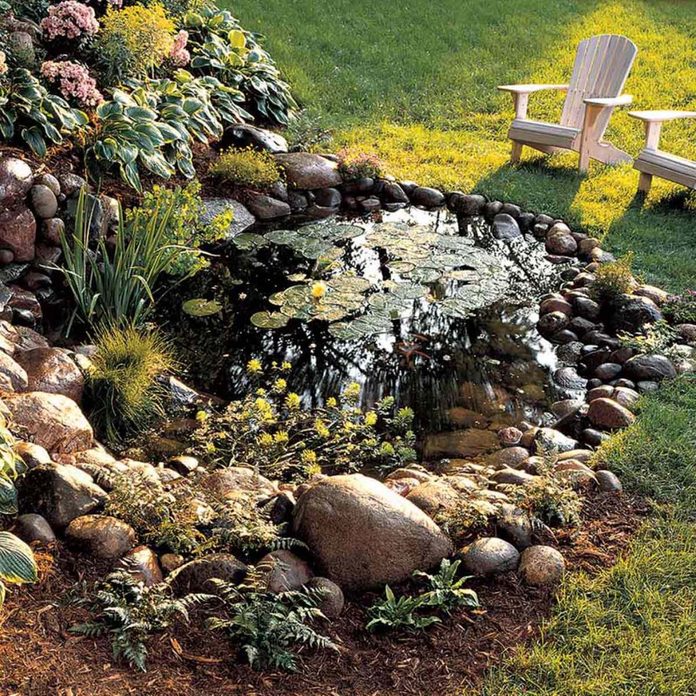
Before: Wishing for a Water Feature
Have space in your backyard for a unique water feature? Here’s a great idea.
18
/
200
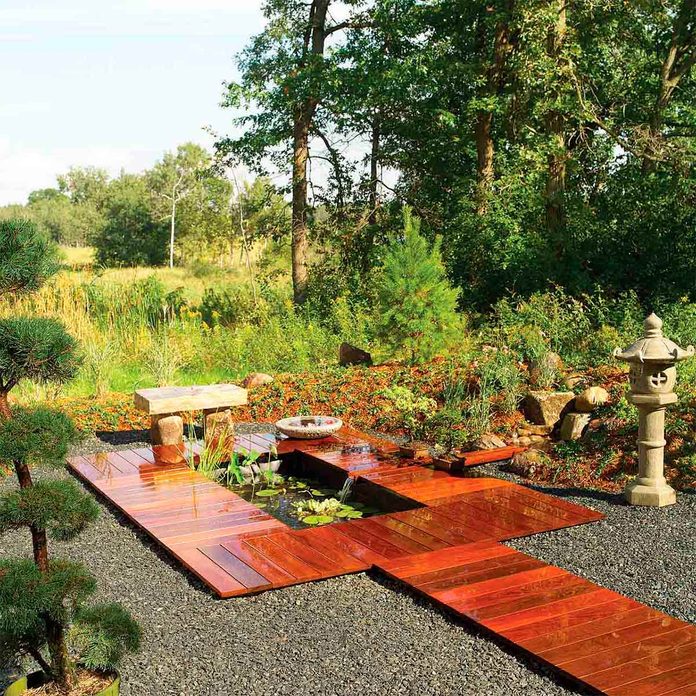
After: Zen Space, And Less to Mow!
Let us show you how to add this easy-to-build pond and easy-care deck to your garden. This serene retreat can be built by a novice and doesn’t require a lot of expensive tools, yet it offers a unique design. In this article, we’ll show you the plans and techniques needed to construct the pond and deck. All it takes is some digging, simple assembly and this easy-to-follow DIY advice.
19
/
200
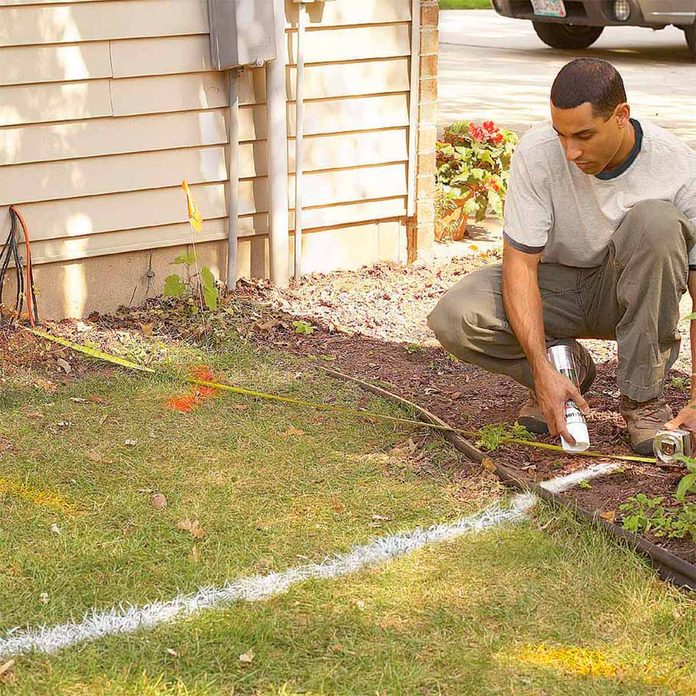
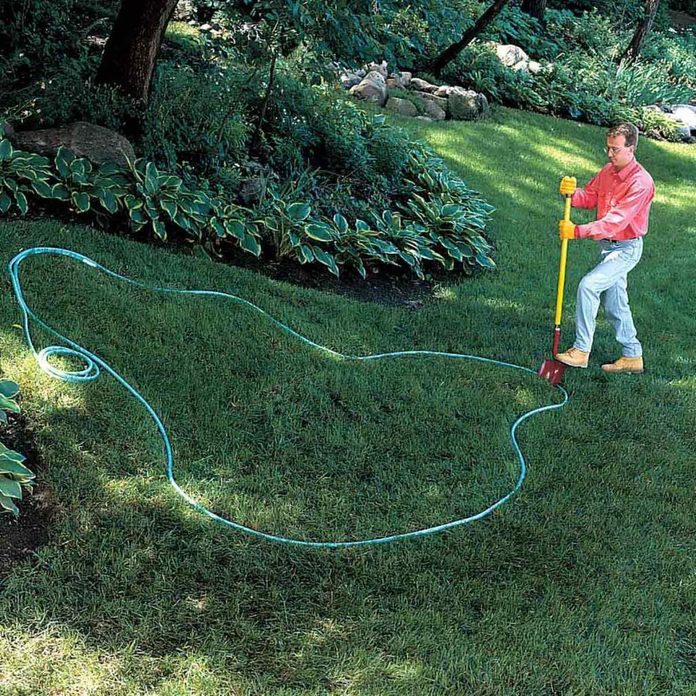
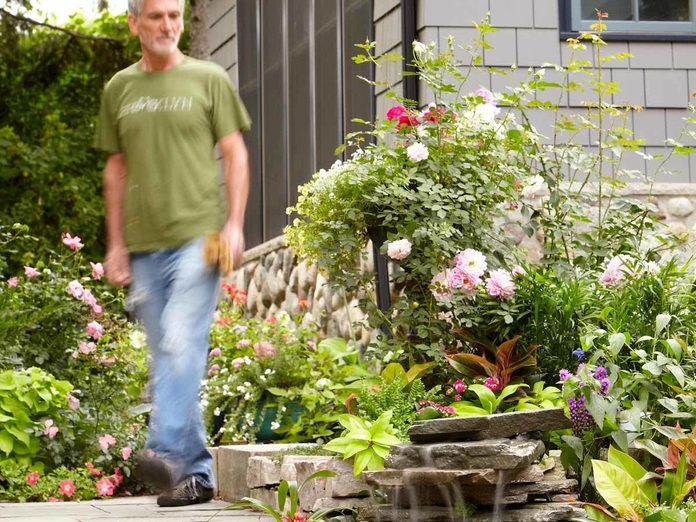
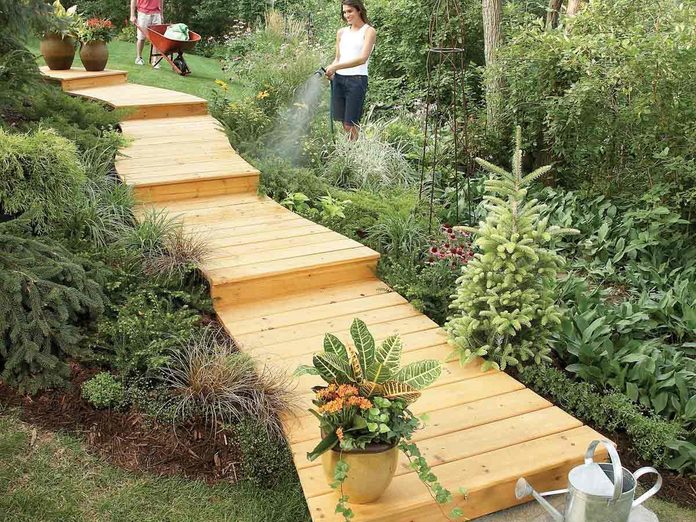
Before: Trampled Grass Walkway
Do you want to spruce up an ordinary, all-purpose sidewalk or patch of grass that’s constantly walked on? If so, this project is a great eye-catching solution.
20
/
200
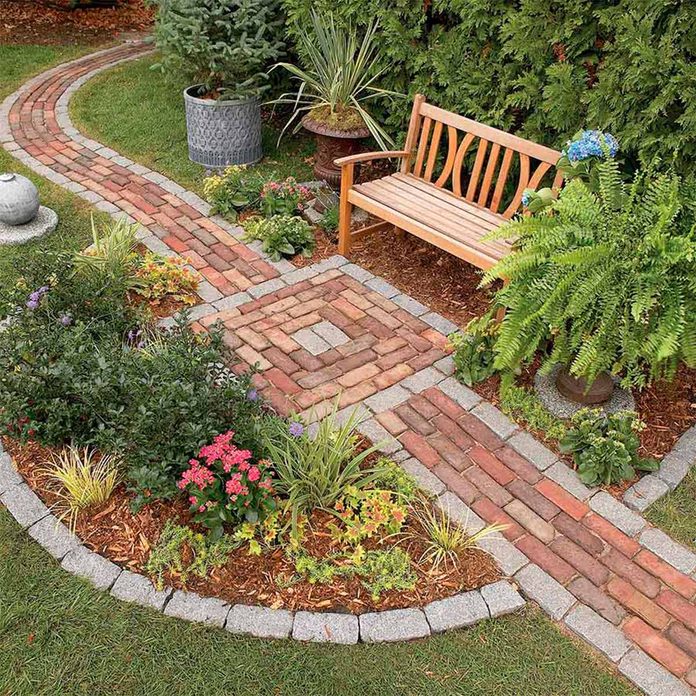
After: Heirloom Garden Pathway
Our project dresses up a space along the side of the house from the driveway to a service door. It also provides a firm, smooth surface for rolling a garden cart or wheelbarrow and keeps your feet out of the mud on a rainy day. Its width, a full 7 ft., allows enough room for a bench to kick off your boots, with plenty of space left over for potted plants.
21
/
200
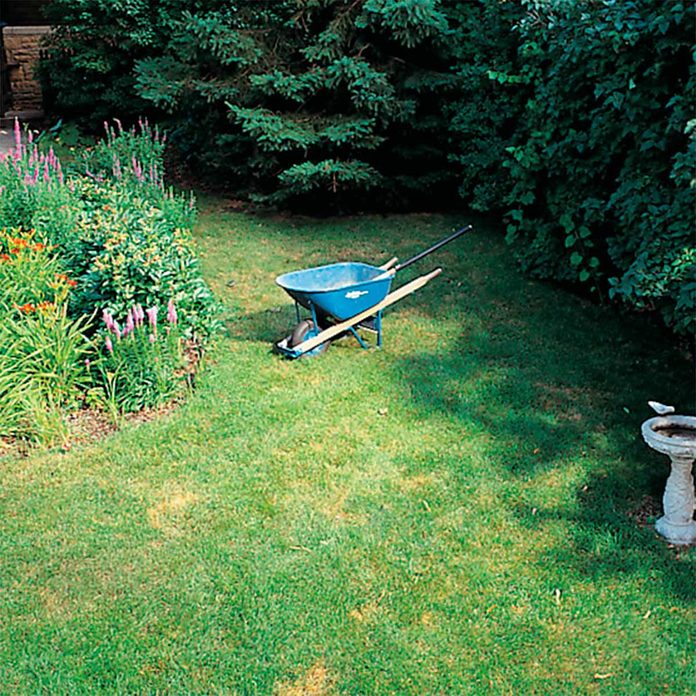
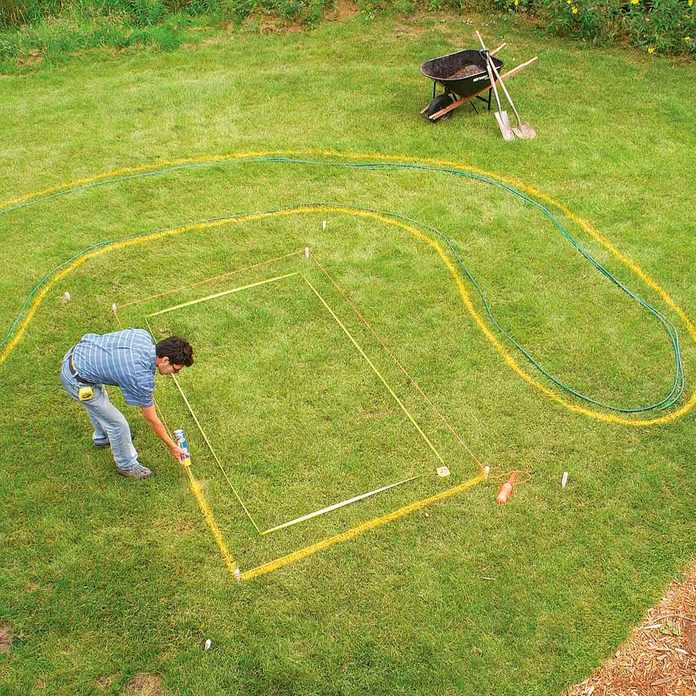
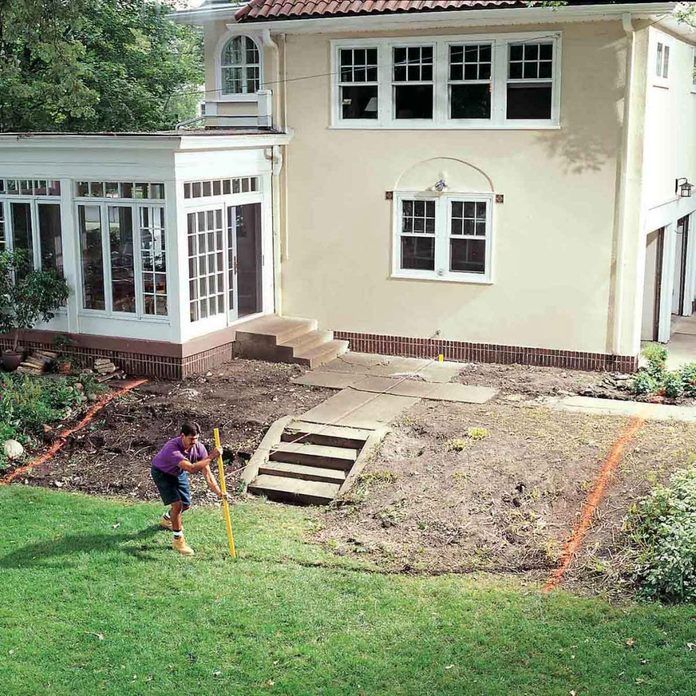
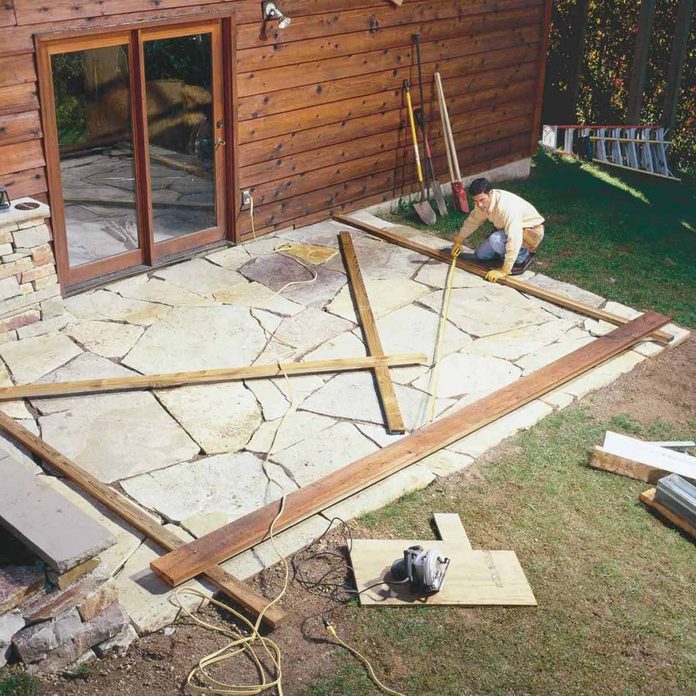
Before: Place for a Patio
Want to put in a patio for outdoor dining? There’s more to think about besides just space. You must consider critical factors such as ground slope, drainage, shade and obstacles like tree roots and underground utility lines. This lawn is already patchy so it’s a good spot for a patio. If you’ve got a patchy lawn, here’s how to fix it.
22
/
200
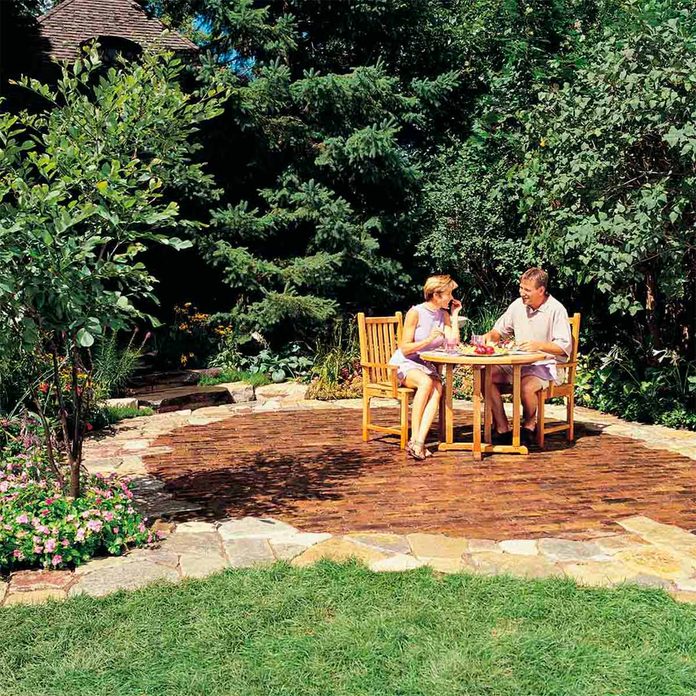
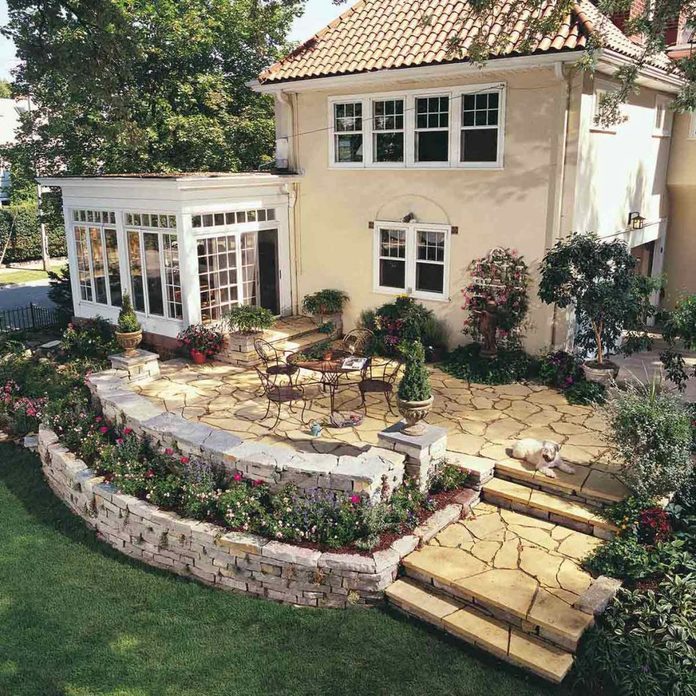
After: Natural Stone Patio
Add a welcoming feature to your backyard with this attractive, long-lasting brick and stone patio. Our design easily adapts to fit your yard. Choose from a wide variety of stone types and brick styles. The result will be permanent and maintenance-free. Here’s the step-by-step, so you can install it in your backyard.
23
/
200
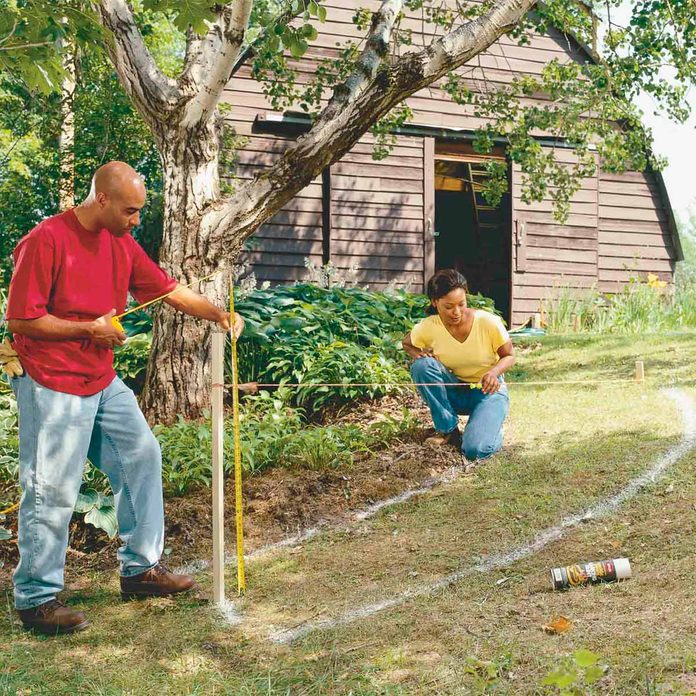
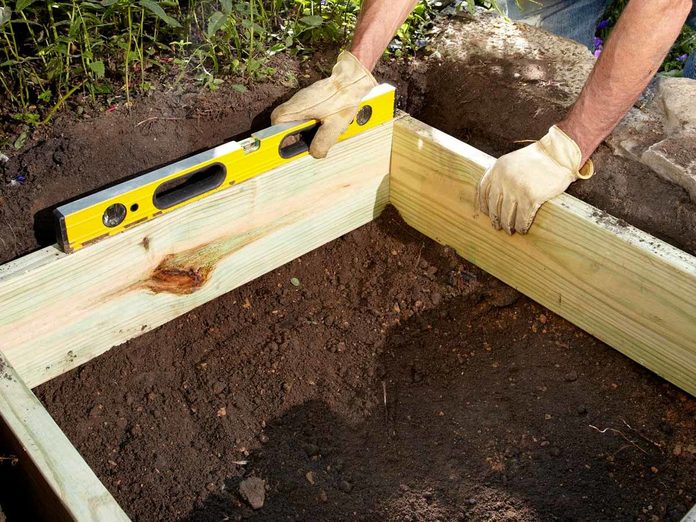
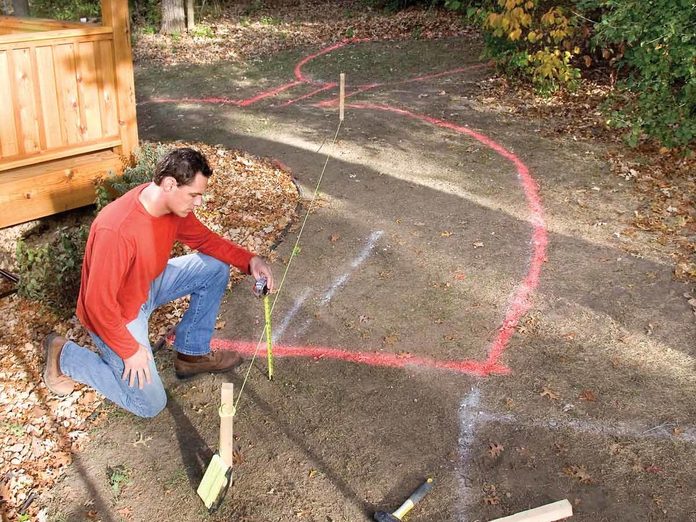
Before: Sloped Site for Stairs
Installing stone steps in your yard can be complex, but it is a doable DIY project. You’ll first need to figure out how many step risers you’ll need. Gentle slopes like ours require short risers and long treads, while steep slopes require taller risers (up to a maximum of 8 in. and short treads). If your hill has both steep and gentle slopes, break it up into sections and calculate the step layout separately for each area.
24
/
200

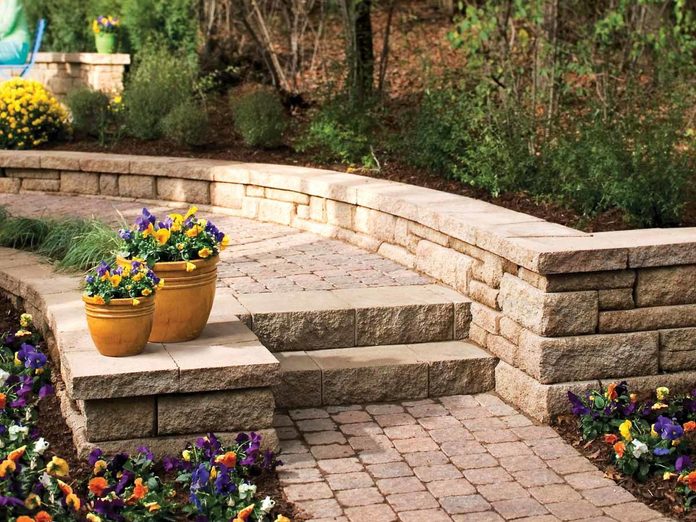
After: Natural, Stepping Stone Stairs
Our steps are built on a gradual slope, but by changing the riser and tread sizes you can build them on slopes as steep as about 40 degrees. Rustic steps like these are well suited for informal garden paths like ours, but we wouldn’t recommend them for entry or other steps that get heavy daily use.
In addition to the basic gardening tools, leather gloves and carpenter’s level, you’ll need a few special tools for breaking and moving stone. Buy a 4-lb. maul to chip and break stone. If you have to cut a few stones, buy a dry-cut diamond blade, available at home centers. To move the stone, rent or buy a two-wheeled dolly with large wheels. Get the full how-to plans for this project here.
25
/
200
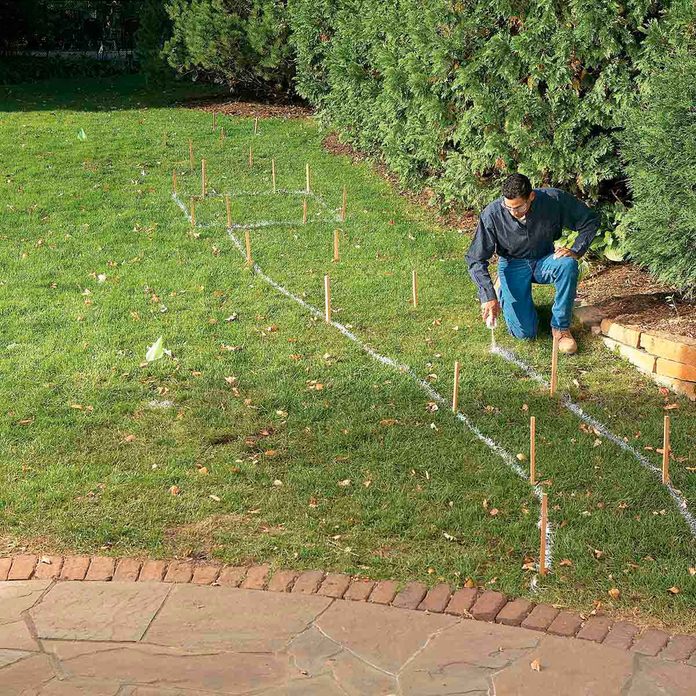
Before: Lacking Backyard
You don’t need heavy equipment and a week of work to lay an attractive and durable path. We designed this one for simplicity and ease of construction. It’s made from old street pavers and granite cobbles set on a sand bed. But you can substitute just about any pavers or types of stones that are readily available and fit your landscape.
26
/
200
After: Fantastic Focal Point
Make a simple garden path from recycled pavers or cobblestones set on a sand bed. Learn all the details of path building, from breaking cobblestones to easy, fast leveling using plastic landscape edging. Plus: Check out our favorite outdoor woodworking projects for beginners.
27
/
200
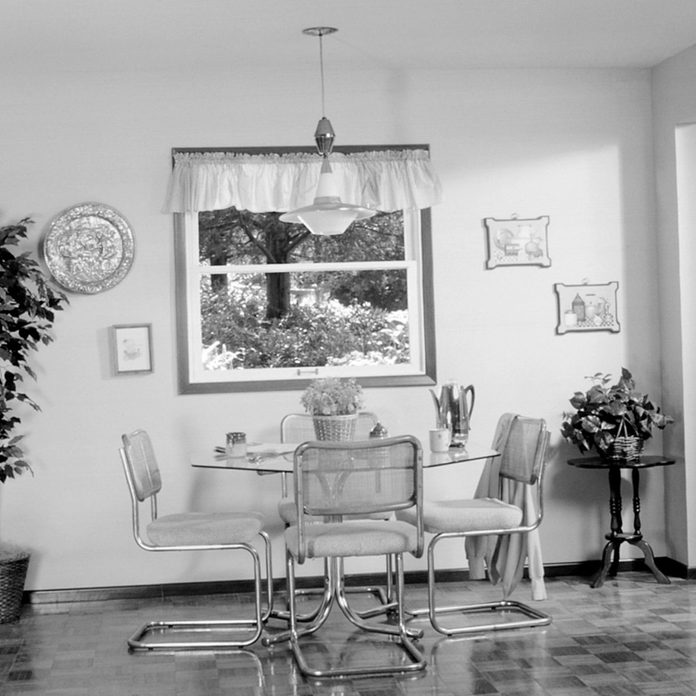
Before: Tiny Window
A kitchen with little natural light can feel cramped. Open it up by replacing a small window with a much bigger one. It’s easier than you think to do it yourself! Plus: Here are 30 other ways to revolutionize your kitchen space.
28
/
200
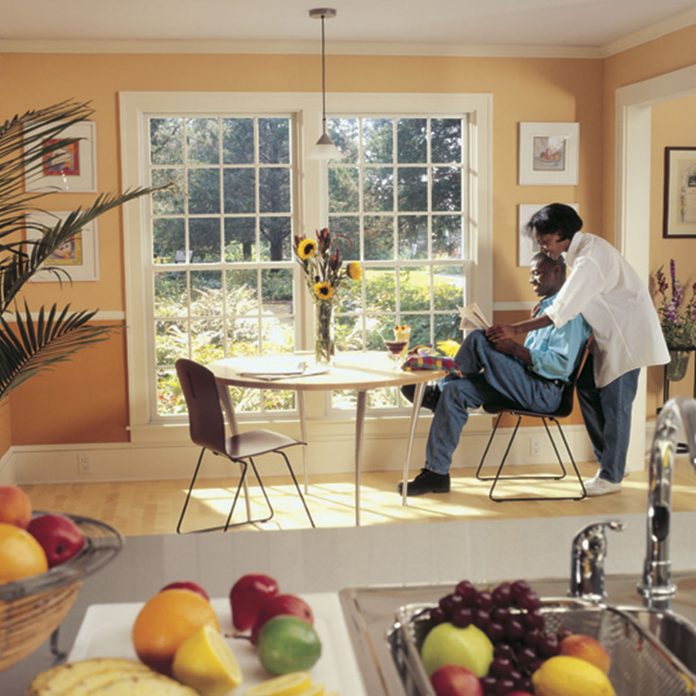
After: More Natural Light
It’s amazing the difference a bigger window makes! Learn everything you need to know about replacing windows here. And be sure to check out this buying guide, too.
29
/
200
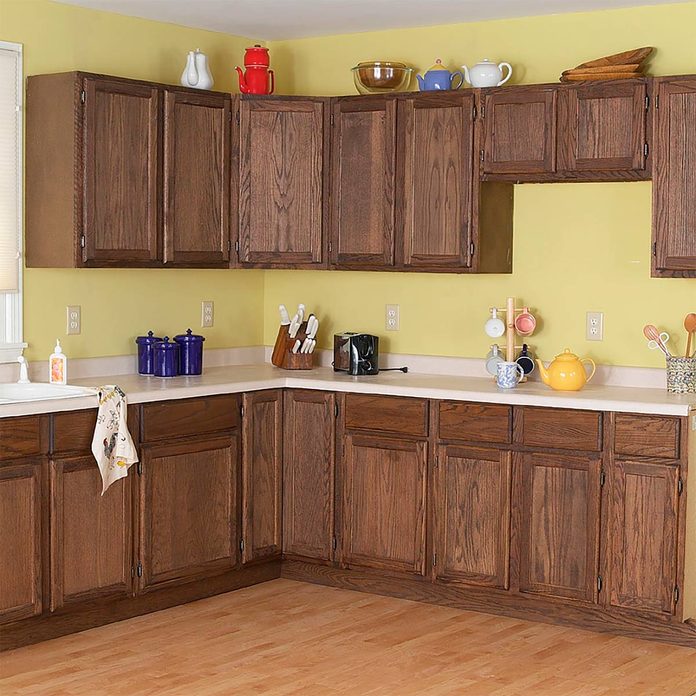
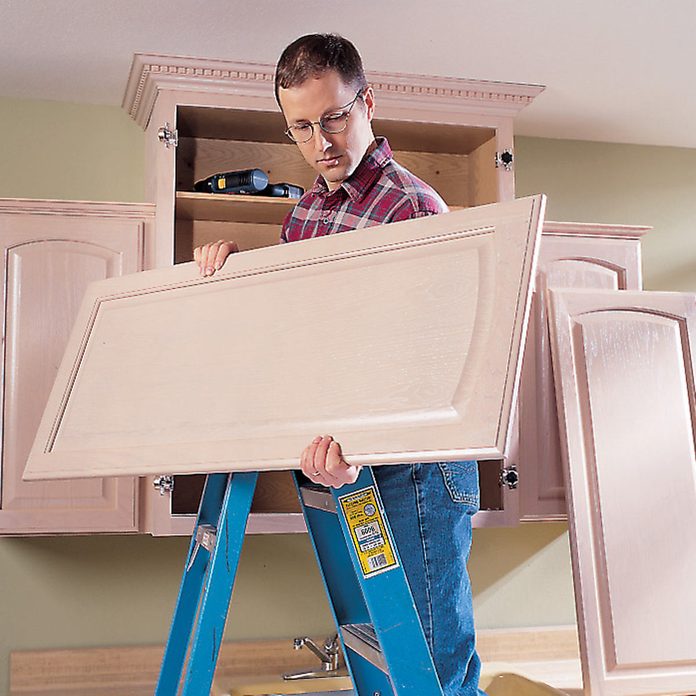
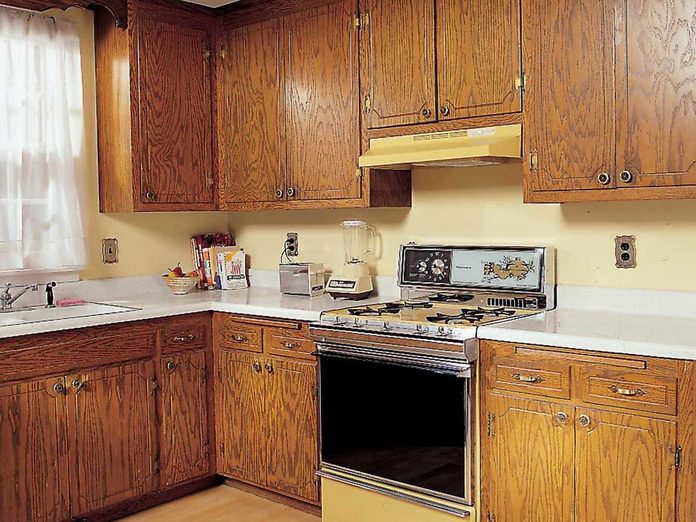
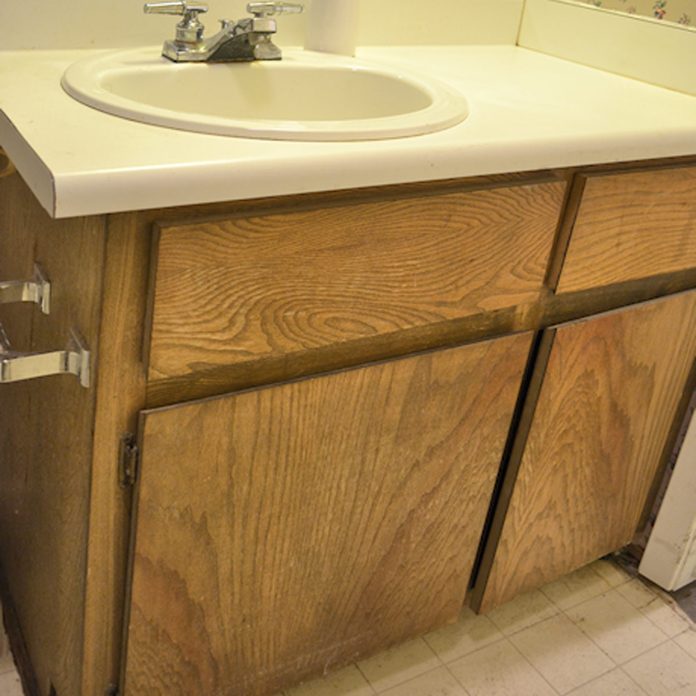
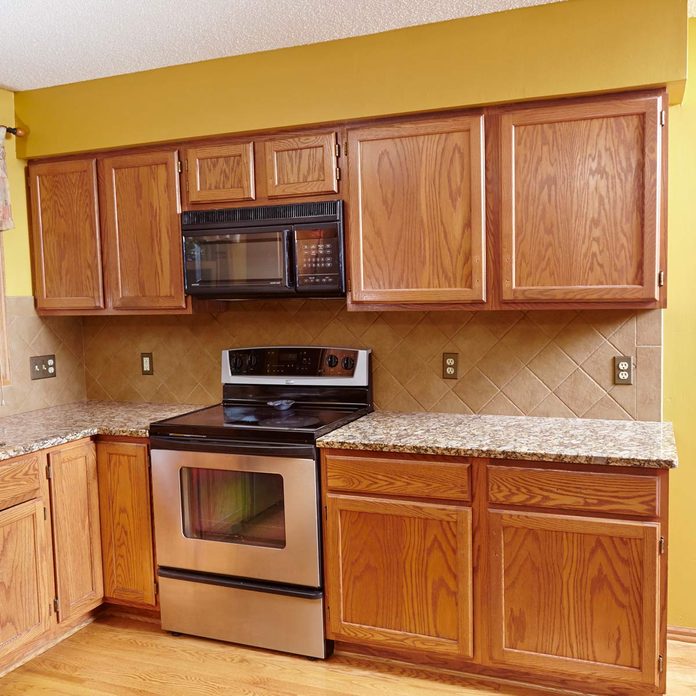
Before: Dated Cabinets
If you’re pleased with the layout of your kitchen and your cabinets are in good shape, there’s no need to gut the space and replace expensive cabinetry. Instead, try this inexpensive (yet dramatic!) cabinet upgrade.
30
/
200
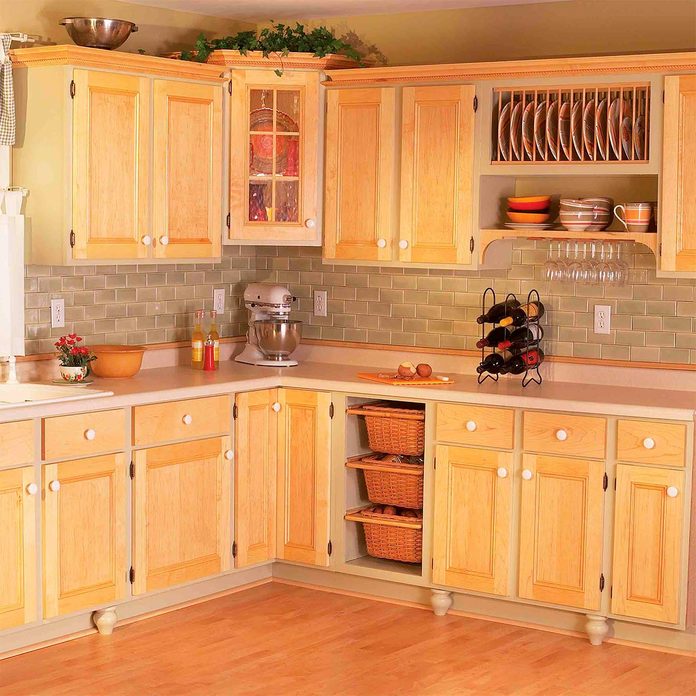
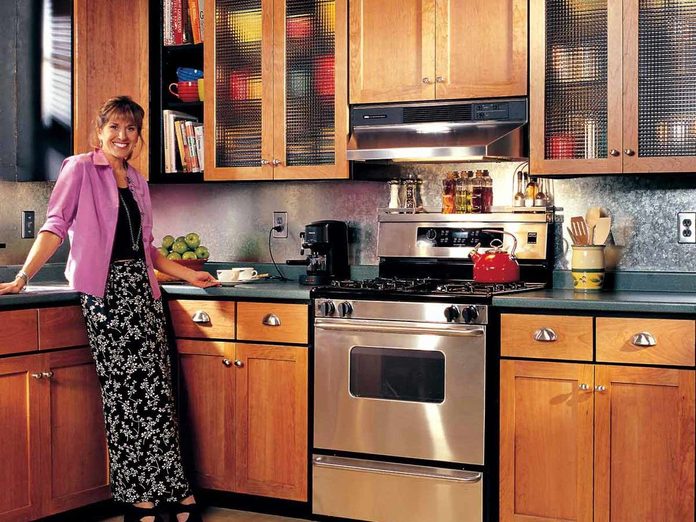
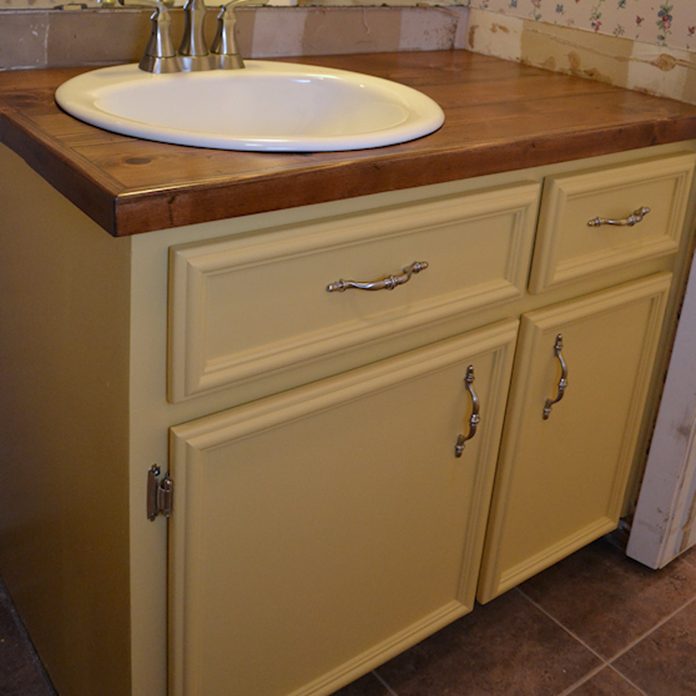
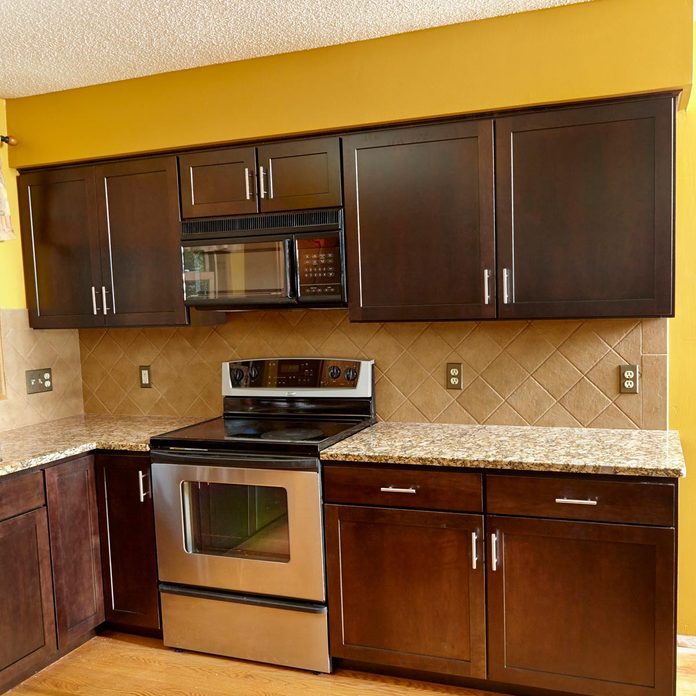
After: Bright Facelift
Remodel your kitchen at a bargain cost with these cabinet upgrades, including new doors and drawer fronts, open shelving, improved storage and painted frames. It’s a lot easier than you might think, and we’ll walk you through it step by step.
31
/
200
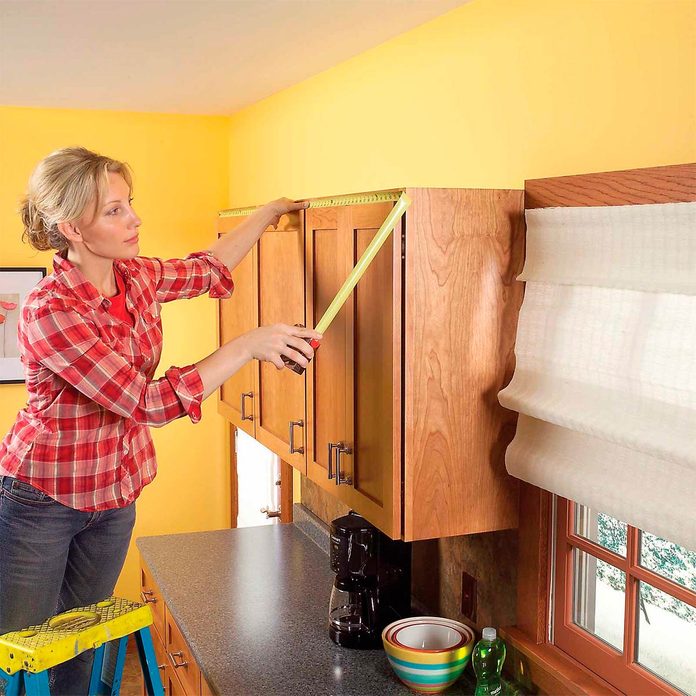
Before: Unused Space
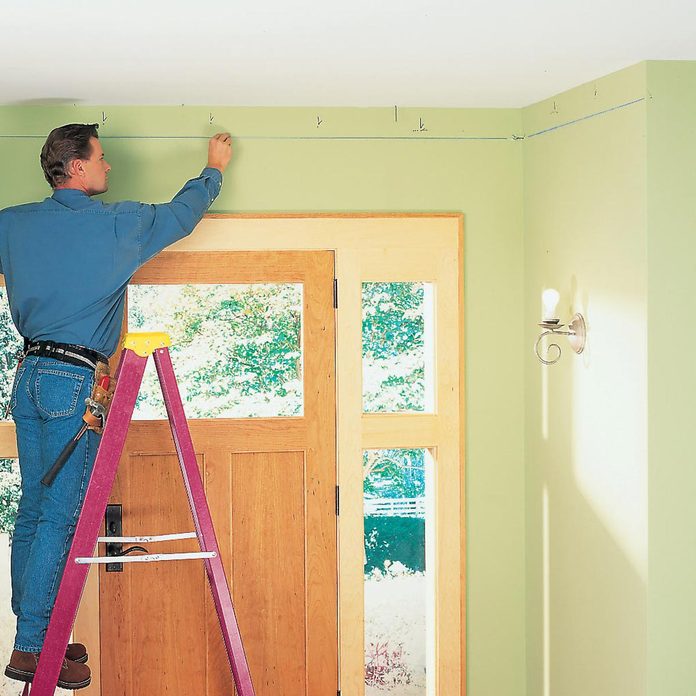
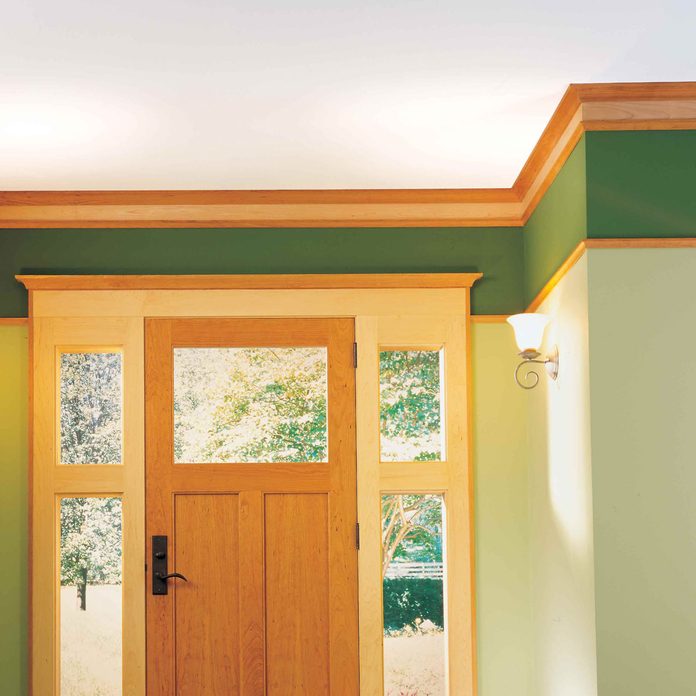
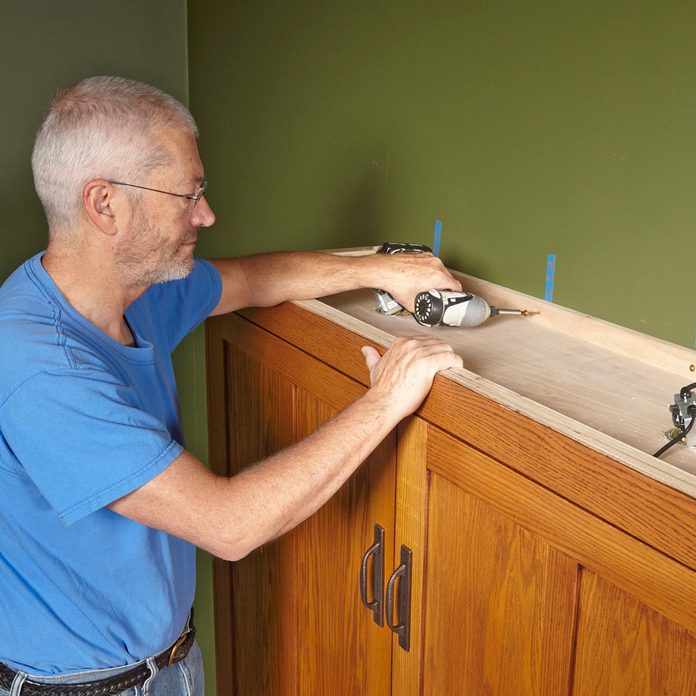
If your kitchen needs more storage space and a little decorative touch, look up! Finish the top of your upper cabinets with molding.
32
/
200

After: Additional Display Storage
Here, a simple addition of molding along the upper cabinets adds a decorative touch as well as more storage space for displaying favorite dishes. It’s painted to match other features in the kitchen.
33
/
200
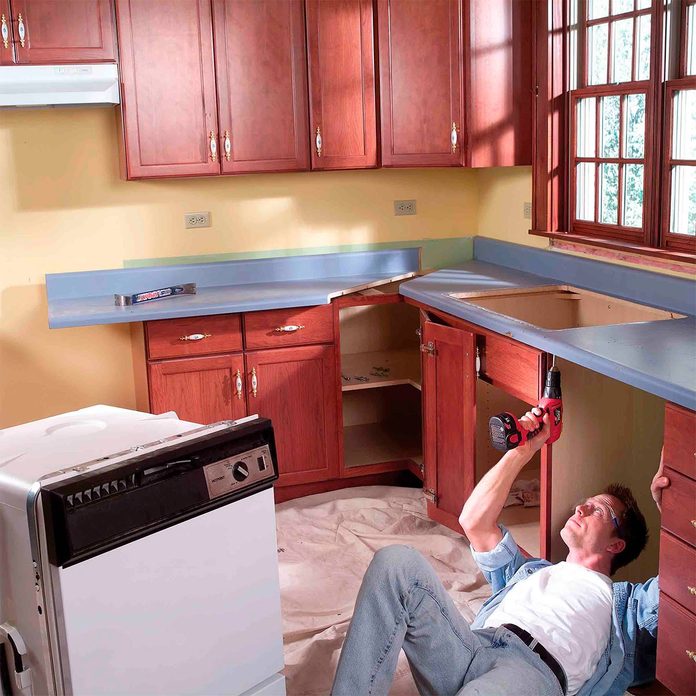
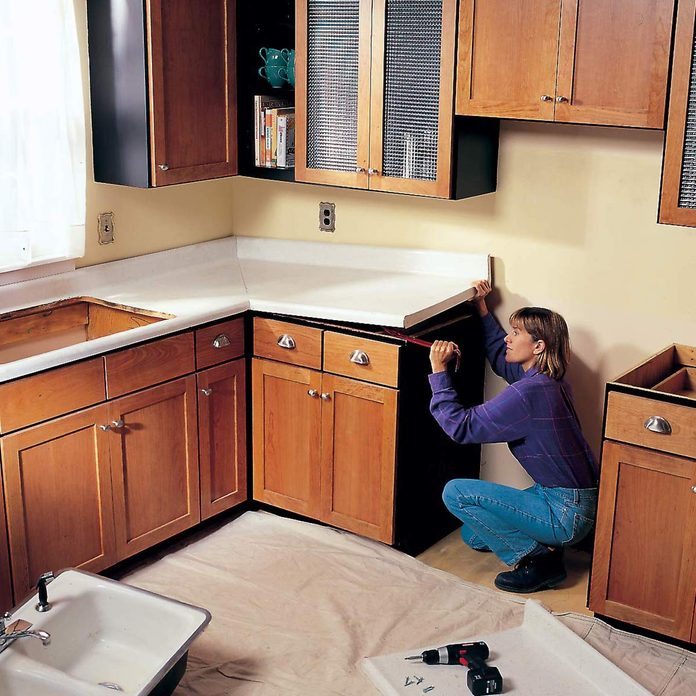
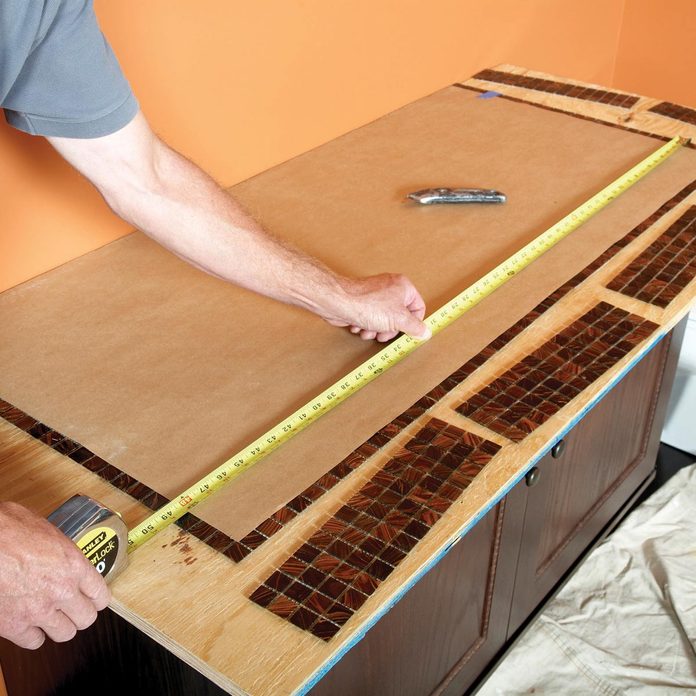
Before: Worn Out Countertop
Are your old countertops looking a little worn and outdated? Is the sink showing its age? Installing new countertops is a quick and affordable way to give your kitchen a makeover.
34
/
200
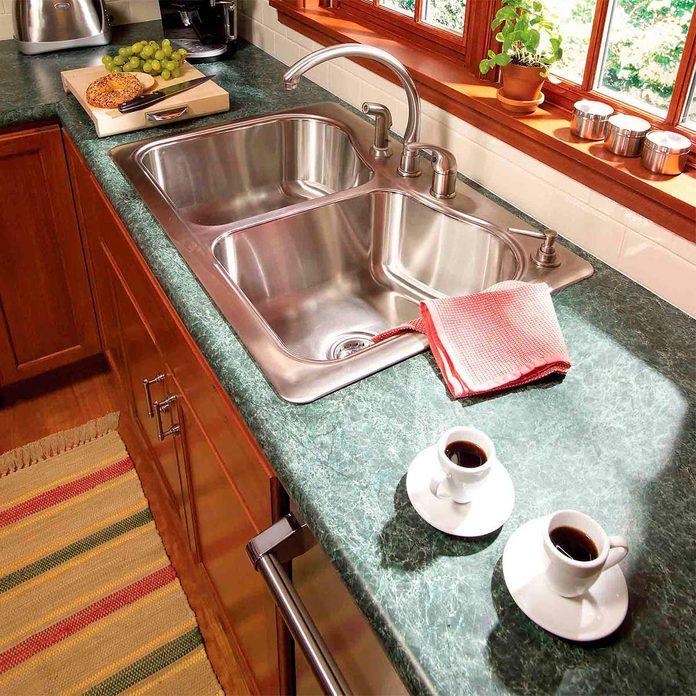
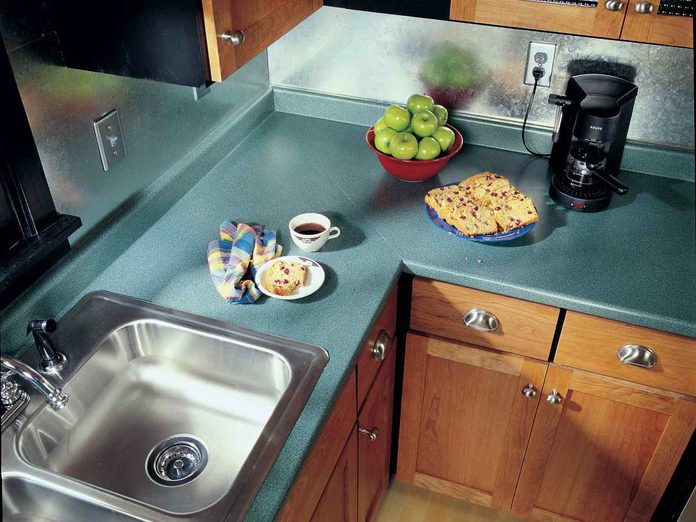
After: Refreshed Work Surface
If you’re handy with power tools and used to precision measuring, you can install your countertops in a weekend. You’ll need basic hand tools, a jigsaw, a drill and a belt sander. We’ll walk you through the steps here, and (bonus!) we’ll show you how to install a new sink, too.
35
/
200

Before: Reader’s Dated Kitchen
Reader David Smith and his wife bought a house in an adult community that needed some upgrades. Being a retired general contractor, David’s first project to tackle was the kitchen.
36
/
200

After: Reader’s Modern Kitchen
“I did all the work myself, from 20 in. diagonal tile on the floor to new lighting. My wife helped with the design and the granite countertops. The “bridge” above the sink has gotten a lot of compliments. Now I am the handyman for a lot of residents in our community.” — David Smith. Take a look at these ideas to upgrade your apartment kitchen without losing your deposit.
37
/
200
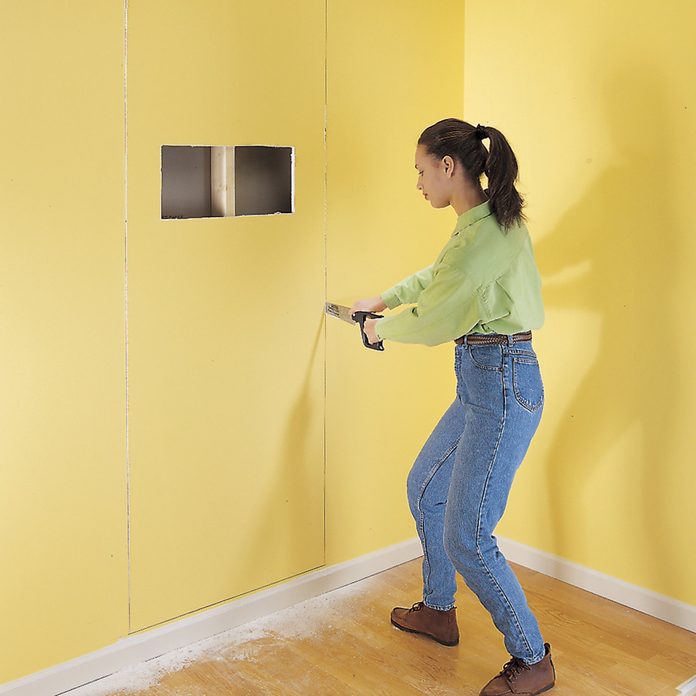
Before: Unused Wall Space
Don’t have room in your kitchen for a pantry? Think again! You can go into the wall to find unused storage space that’s perfect for a spacious pantry cabinet. Here’s how to cut drywall so you don’t have a mess on your hands.
38
/
200
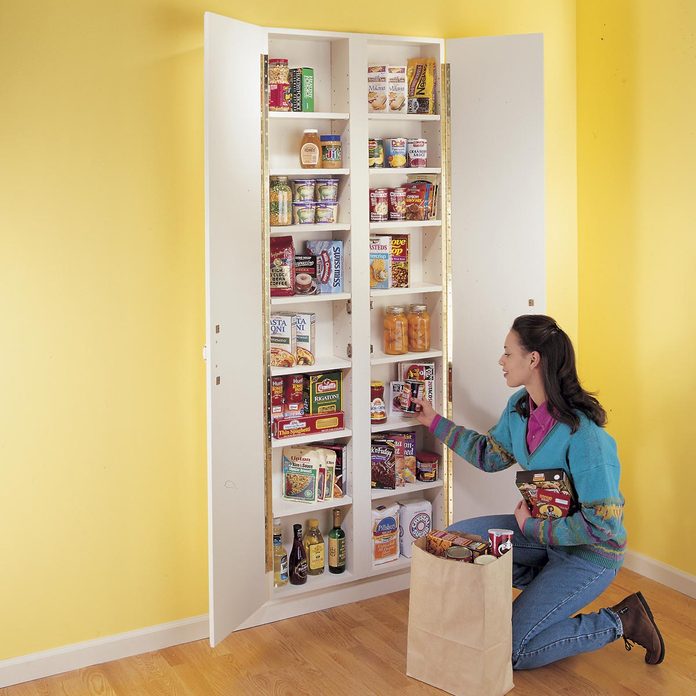
After: Pantry Wall Niche
In almost every room of your house, you can find tons of storage space hidden between the two sheets of drywall. Simple stud-space cabinets like the one we show here are great for capturing some of this wasted space. We’ll show you how to build them.
39
/
200
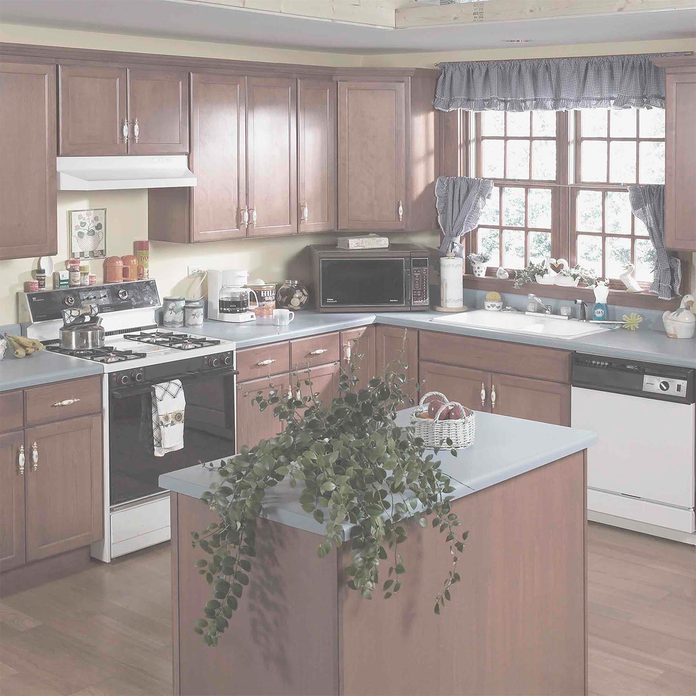
Before: Blah Walls
You don’t have to do a complete remodel of your kitchen to add new life to it. Two projects—a tile backsplash and a new range hood—can quickly and dramatically transform a dull kitchen.
40
/
200
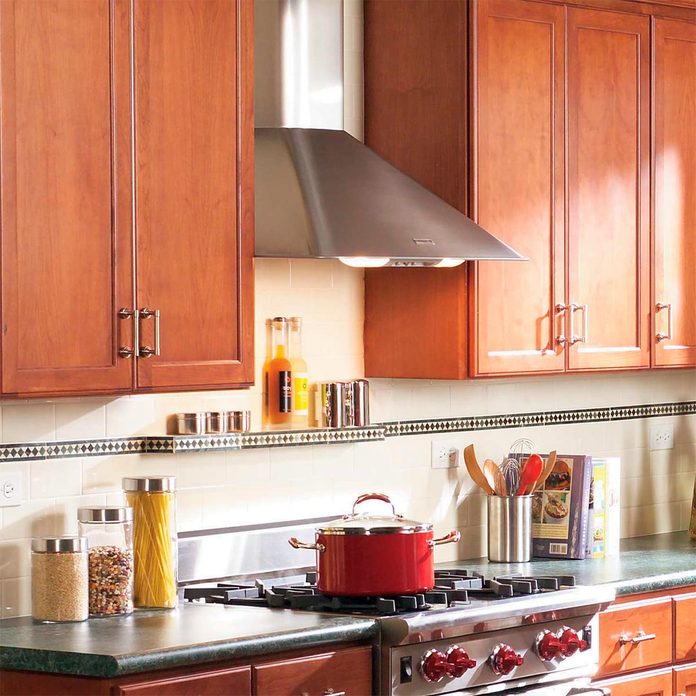
After: Beautiful Backsplash
A tile backsplash combined with a new range hood can quickly and dramatically transform a dull kitchen. Learn how to install both in a weekend, along with a custom, over-the-oven shelf for spices and seasonings. Get the complete how-to here, so you can do it in your kitchen!
41
/
200
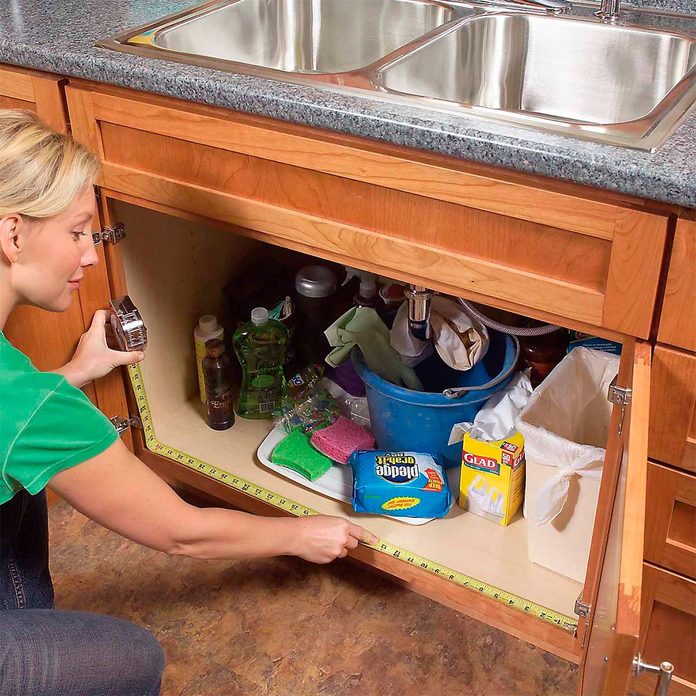
Before: Disorganized Under the Sink
Have you finally had it with that dark and dingy, I’m-not-sure-what’s-there storage space under the kitchen sink? Then you absolutely need to build these simple cabinet add-ons!
42
/
200

After: Clutter-Busting Cabinet Add-Ons
Build these handy undersink roll-out trays in a weekend. You can tackle this project with simple carpentry tools and some careful measuring.
43
/
200
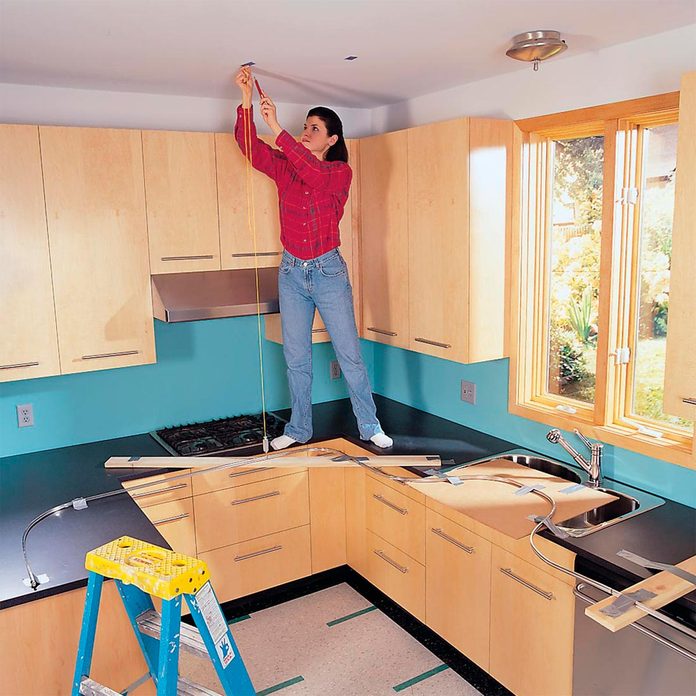
Before: Dim in Important Work Areas
This kitchen makeover includes four weekend kitchen upgrades—a new sink and faucet, a stainless steel backsplash, classy track lighting and open shelves. Each one will make your kitchen feel brighter and fresher, especially if you have a small kitchen. And you save a ton when you do it yourself.
44
/
200
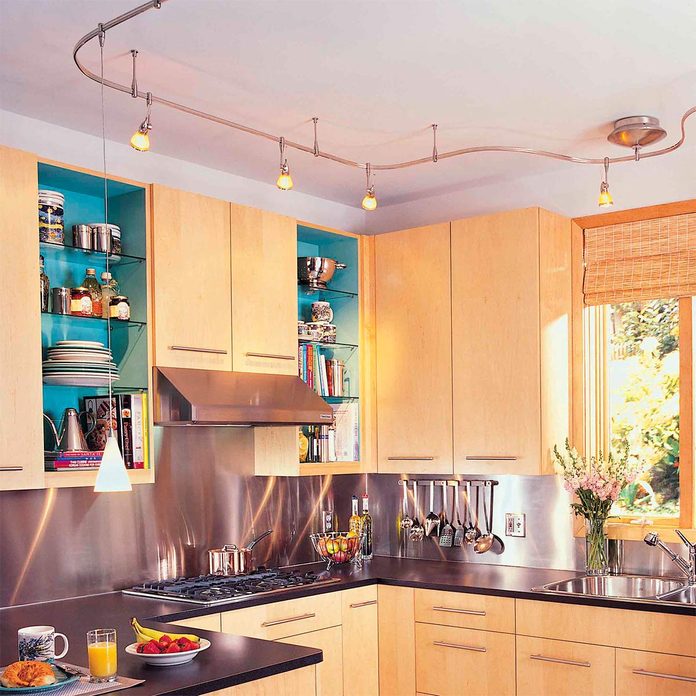
After: Strategic Illumination
Our favorite part of this redo is the new lighting because, well, every kitchen needs good lighting!
45
/
200

Before: Reader’s Kitchen Remodel in Progress
Ok, so reader Mike Helsel’s kitchen remodel took longer than a weekend, but he worked on each project throughout the process (including removing a wall!) during free evenings. “To take on a very ambitious kitchen remodel, I had the help of my young daughter and my very forgiving wife.” — Mike Helsel.
46
/
200
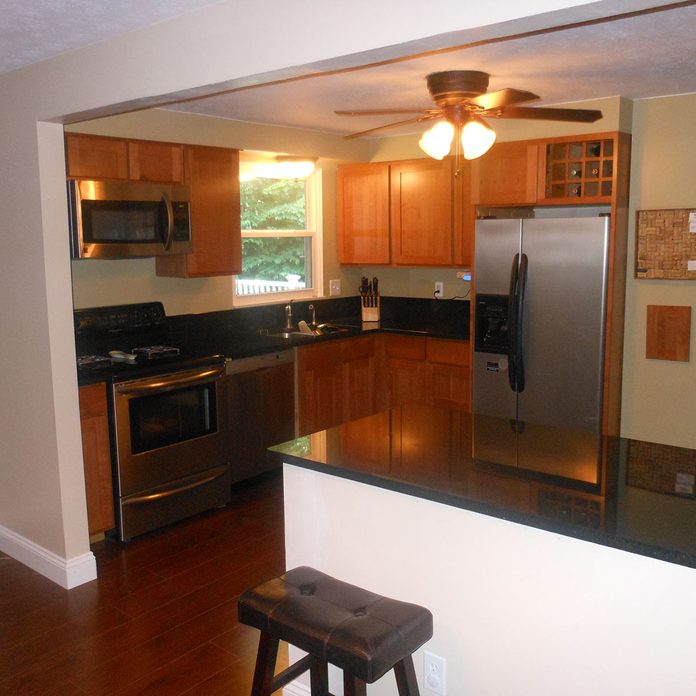
After: Wide Open Space
“Here is my kitchen remodel. The total project cost $4,100. I built the cabinets from cherry wood that I got from a local farmer for $75. The biggest expense was the black Ubatuba granite countertop at the price of $2,200 (which is actually cheap for that material). During the remodel we were only without a sink or a stove for two days total. I worked on the project at night, from approximately 9 to 11 p.m.,” Mike says.
47
/
200
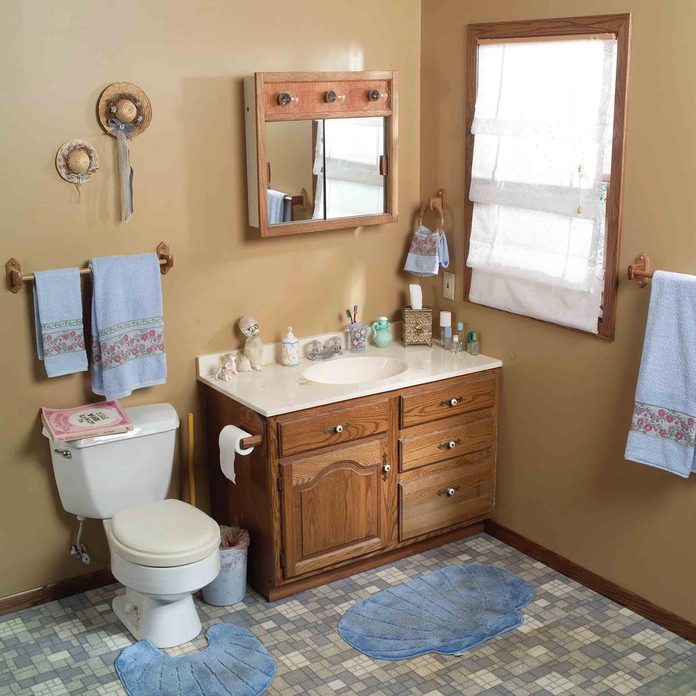
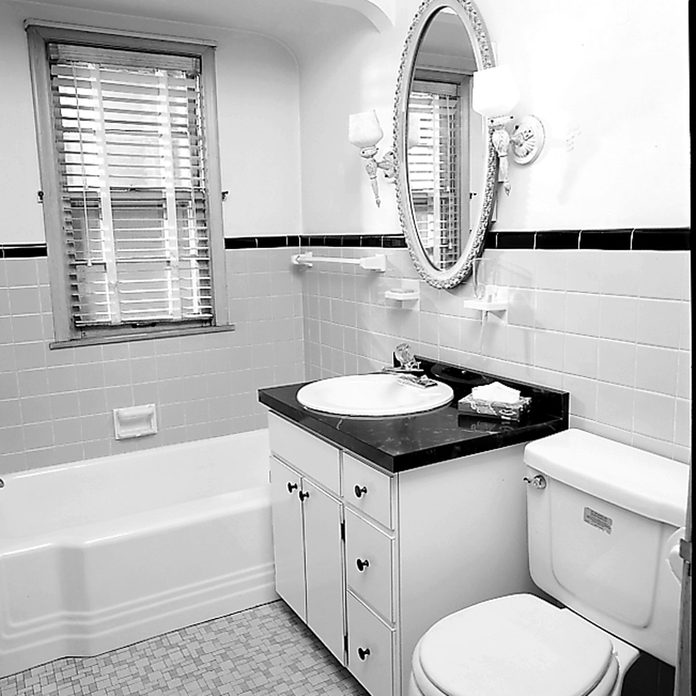
Before: Spa Oasis Bathroom
The photo above showcases what the bathroom looked like before the remodel. The original fixtures were starting to reveal their age and the decor was especially outdated. We’ll show you the step-by-step techniques to do the whole job in a day or a weekend if you decide to tile behind the sink as we did.
48
/
200

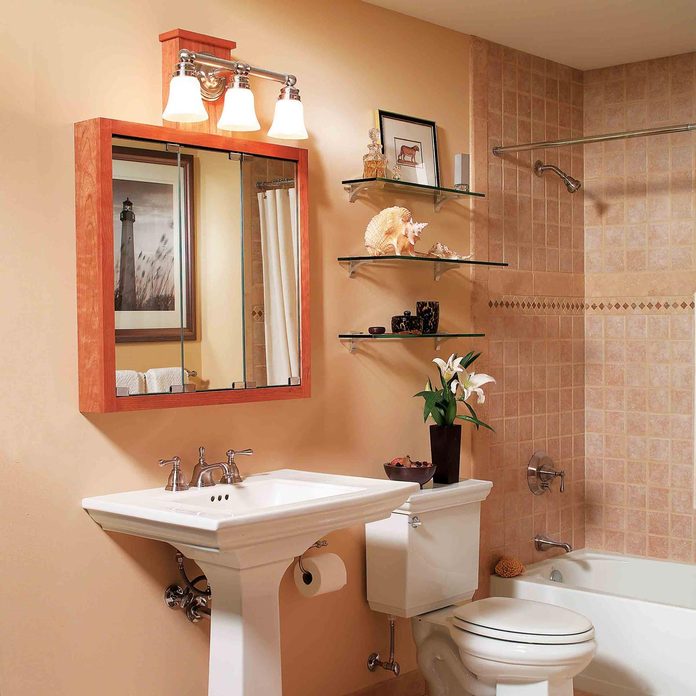
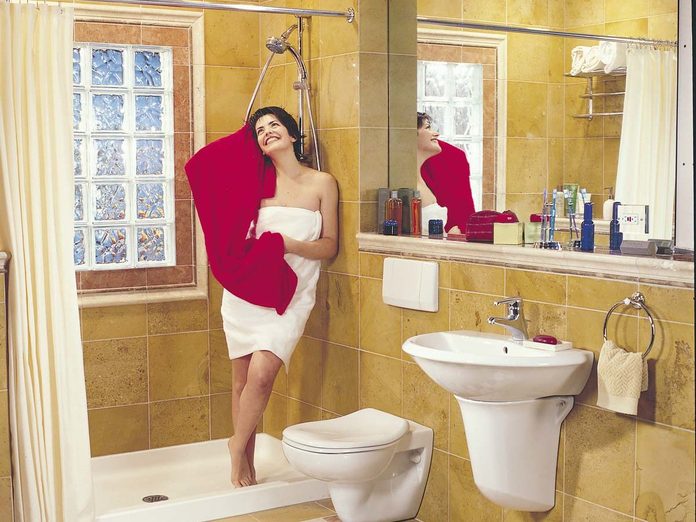
After: Spa Oasis Bathroom
Replacing a vanity with a wall-hung sink is one of the best ways to make a small bathroom feel roomier. As the floor space opens up, the room becomes brighter and easier to clean. And it’s the perfect time to update the lights, mirror and perhaps the medicine cabinet as well. The tradeoff, of course, is a loss of storage space. So as part of a bath remodel, consider adding a larger medicine cabinet/mirror, a small freestanding cabinet or even cabinetry or shelving above the toilet to handle the stuff you used to store in the vanity. Make the best use of your limited bathroom space with these storage and organizing tips.
49
/
200

Before: Bathroom Shelving
Bathrooms never have enough storage or shelf space. Where do you display knick knacks, let alone store unsightly items like extra toilet paper, blow dryers, curling irons, cans, soaps and bottles? Once you’ve filled up the vanity, how do you squeeze more storage into a small bathroom? We’ll show you how to install a large medicine cabinet in the wall, add glass shelves over your toilet (or anywhere else you want them) and install built-in pantry cabinets. Whether you decide to upgrade your bathroom with one of these projects or all three, you’ll make your bathroom more functional.
50
/
200
After: Bathroom Shelving
Upsize existing storage space by replacing that tiny medicine cabinet or mirror with a larger, surface-mounted cabinet. And utilize the space you have by adding glass shelving to the “dead” space over the toilet. You can also steal space from an adjoining room or closet by insetting kitchen pantry cabinets (or tall utility cabinets) into the wall. Installing a new medicine cabinet and shelving is easy and fast. Each project takes less than an hour. For these simple projects, you’ll only need a screw gun and a 2-ft. level.
51
/
200
Before: Powder Room
Make your cramped bathroom feel more spacious and stylish by tearing out the old vanity and sink and installing a new pedestal sink. It’s the easiest way to remodel a bathroom. This simple change-out will make your entire bathroom will feel fresh and new again.
52
/
200
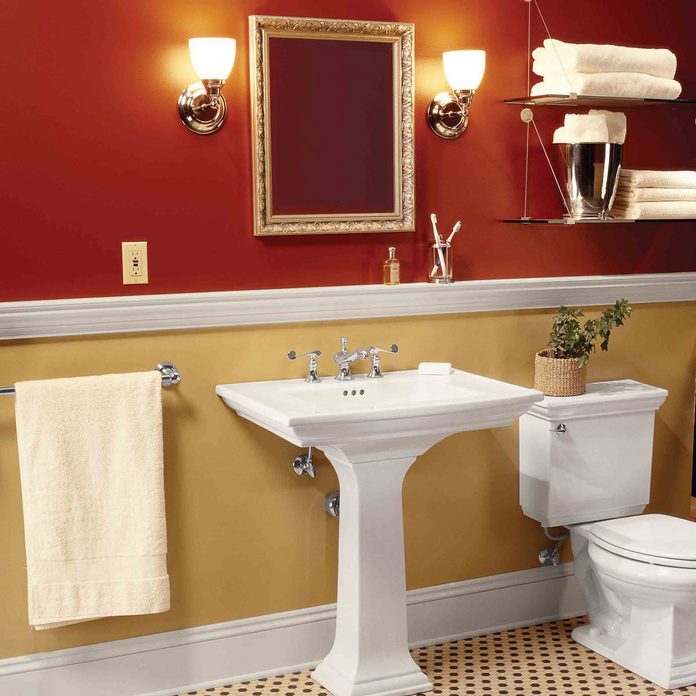
After: Powder Room
Replacing your old vanity cabinet with a pedestal sink is one of the quickest and easiest ways to remodel a bathroom. And the pedestal sink makes a bathroom feel bigger. To complement the new sink, you can add new lights and mirror for even greater impact.
53
/
200
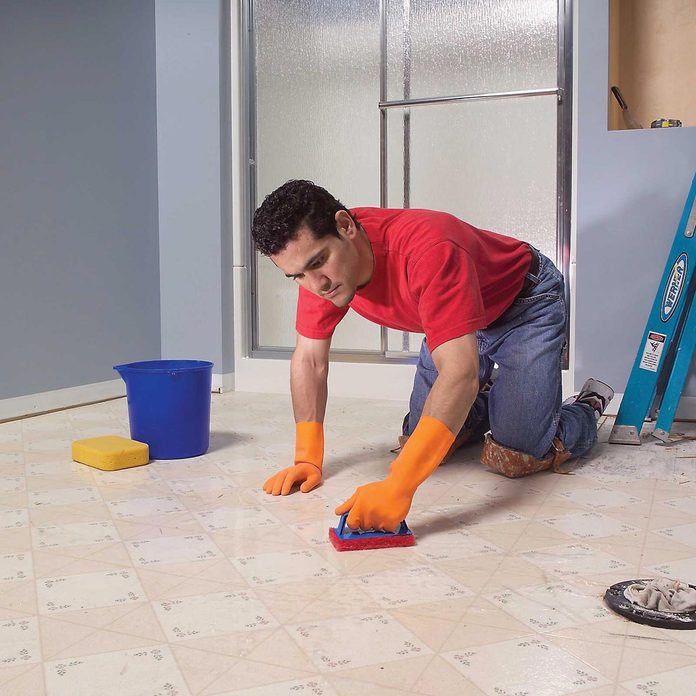
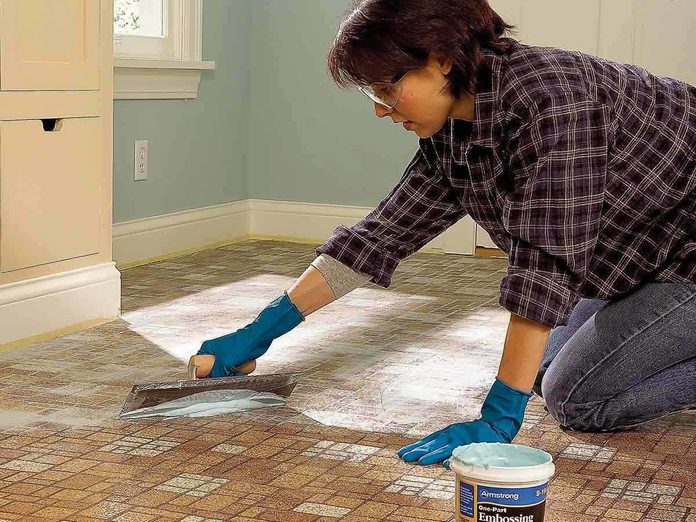
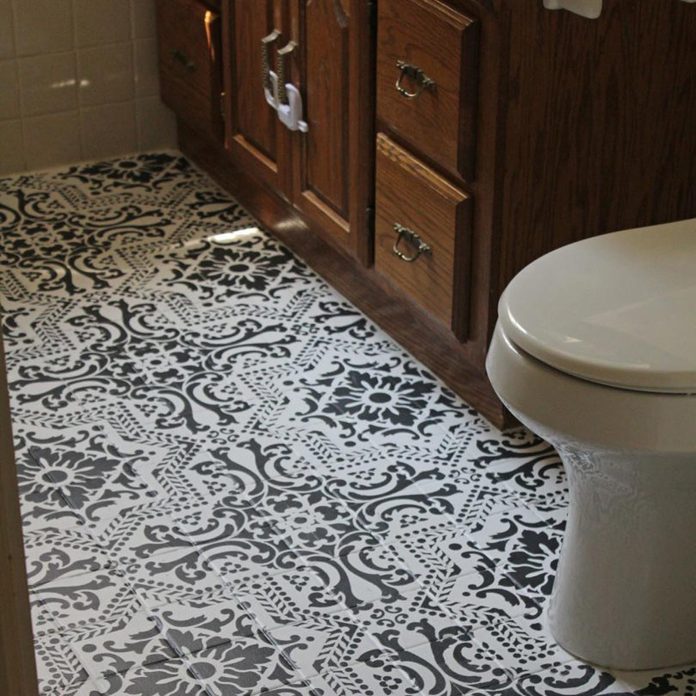
Before: Bathroom Floor
Give your old, worn out vinyl floor a new look with elegant tile. We’ll show you how to save hundreds of dollars by installing the floor yourself. Even if you don’t have any tile experience, you can tile your bathroom floor in a weekend and end up with a great looking, durable floor. Learn how to install a ceramic tile floor.
54
/
200
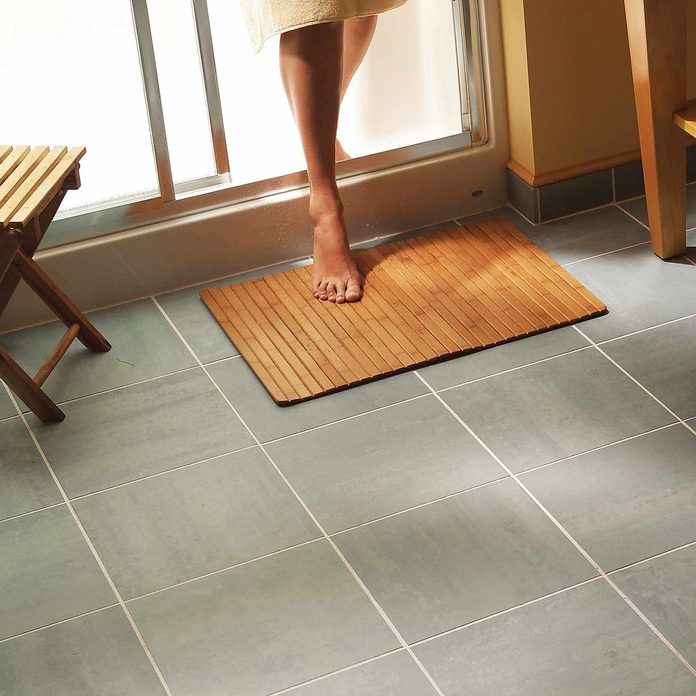
After: Bathroom Floor
Whether you’re replacing an old shabby bathroom flooring tile or installing a new one, you can’t beat ceramic or stone tile for durability and appearance. When laid properly, it’s virtually a forever floor tiling that requires almost no care and maintenance. And you can select materials from a vast array of colors and textures.
Everyone wants a bathroom that’s spacious, functional and gorgeous. A spa retreat right in your own home. This collection of 21 beautiful bathrooms will inspire you and help you plan that perfect in-house retreat you’ve been dreaming of.
55
/
200
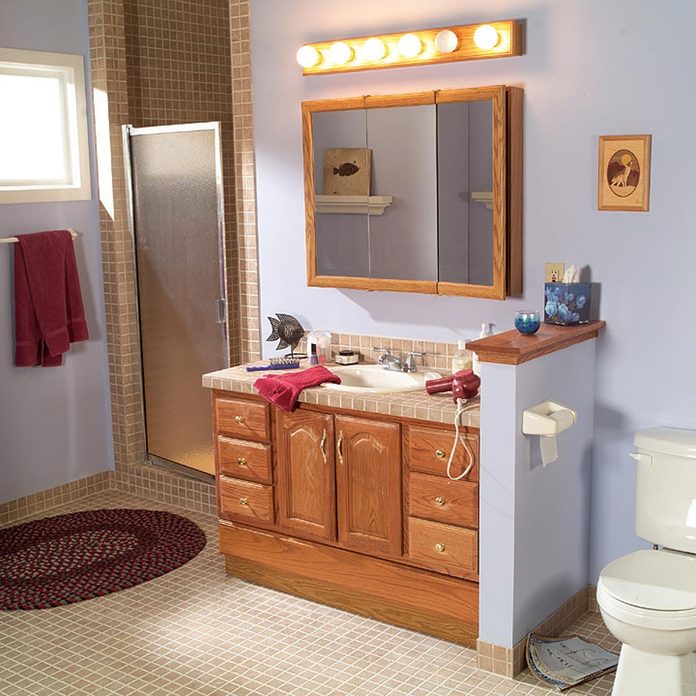
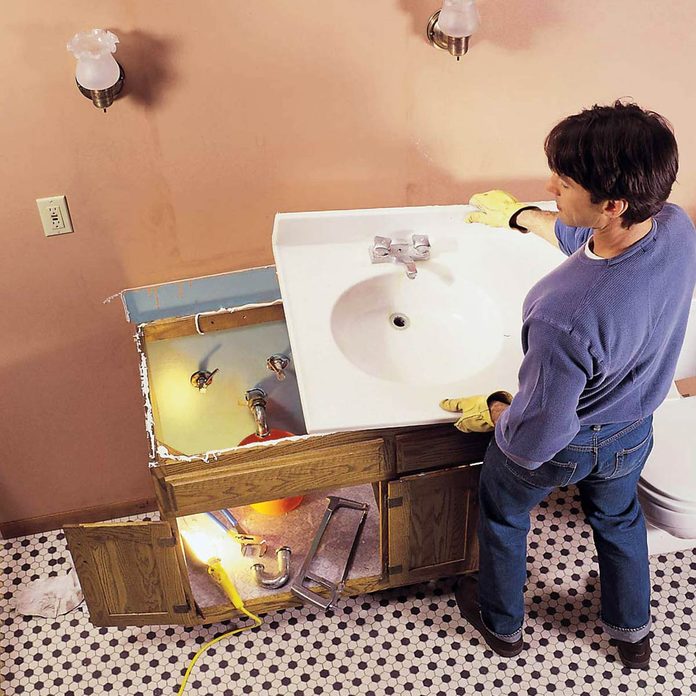
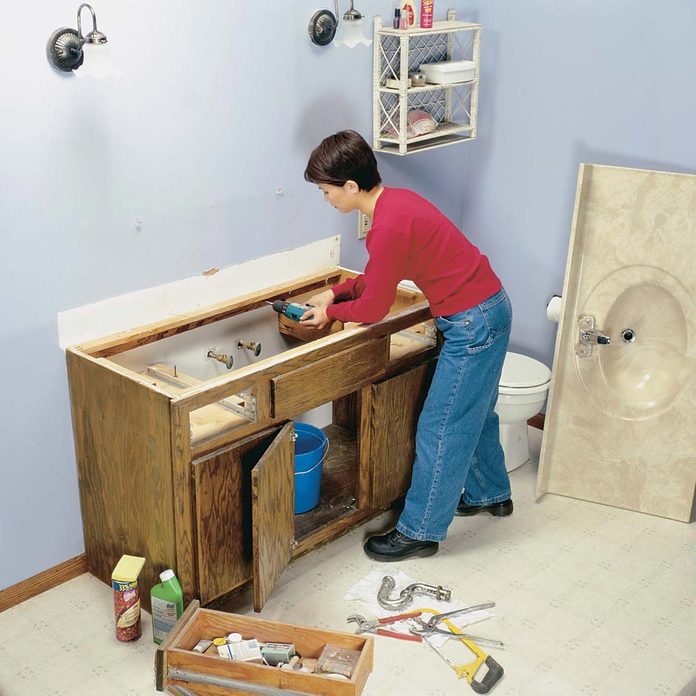
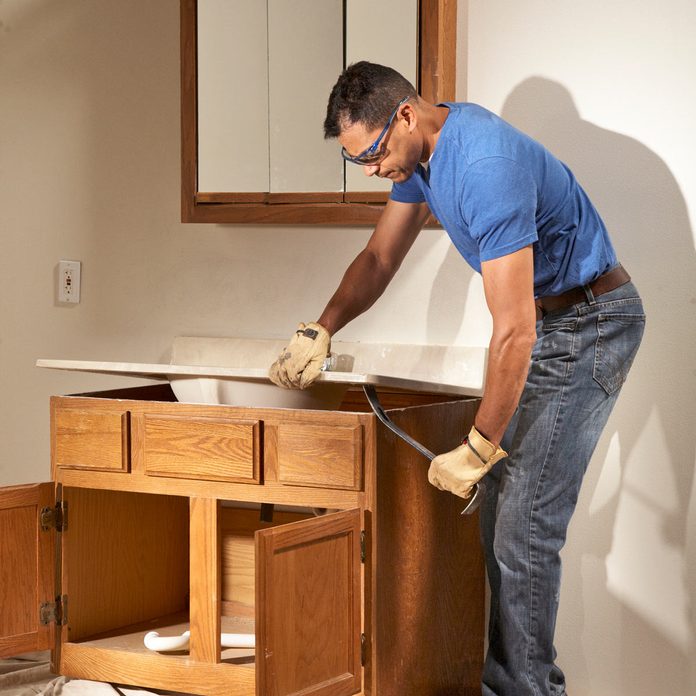
Before: Bathroom Vanity Facelift
Sinks and vanities get more use than any other fixture in your house. It’s no wonder they can look tired and run-down after five or 10 years. Fortunately, changing a vanity is relatively easy, and if you paint the walls at the same time, you can achieve a stunning transformation. We’ll show you how to remove the old cabinet and plumbing, choose and install a new vanity, sink, faucets and countertop.
56
/
200
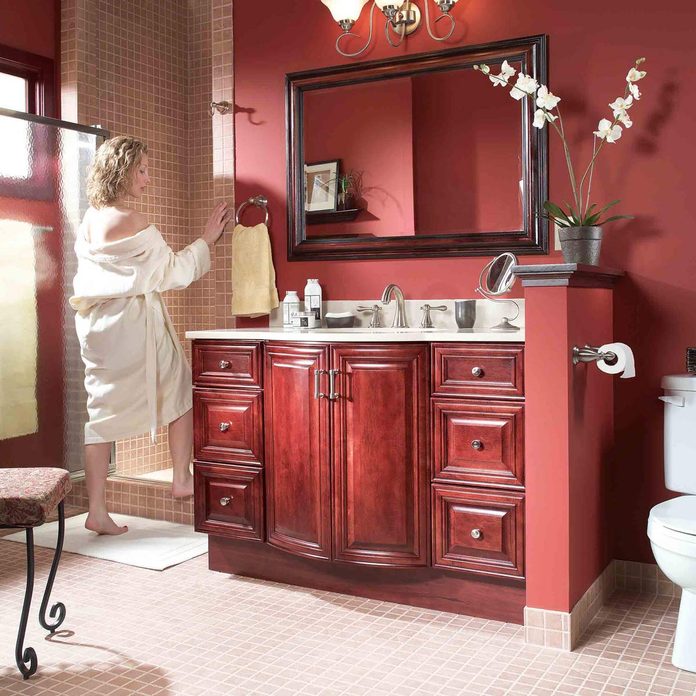
After: Bathroom Vanity Facelift
Give your bathroom a dramatic makeover in one long weekend by replacing the vanity cabinet, sink and faucets. Changing a vanity is relatively easy. All you need are basic carpentry and plumbing skills. And if you paint the walls at the same time, you can achieve a stunning transformation.
57
/
200
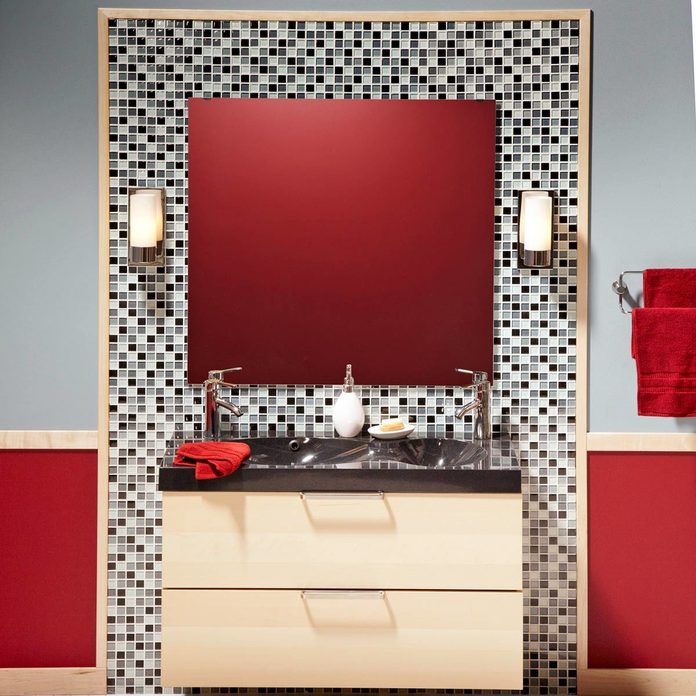
Before: Vessel Sink Bathroom Refresh
Remodel a small bathroom and make it feel bigger with a table-mounted vessel sink and wall mounted faucet. The vessel sink and wall-mount faucet cost more than standard off-the-shelf plumbing fixtures. But the combined cost of the table and plumbing fixtures we show is about the same as if you purchased a top-quality vanity cabinet, solid-surface vanity top and high-end faucet. And you’ll save at least half the cost of a professional bath remodel by doing the work yourself.
58
/
200
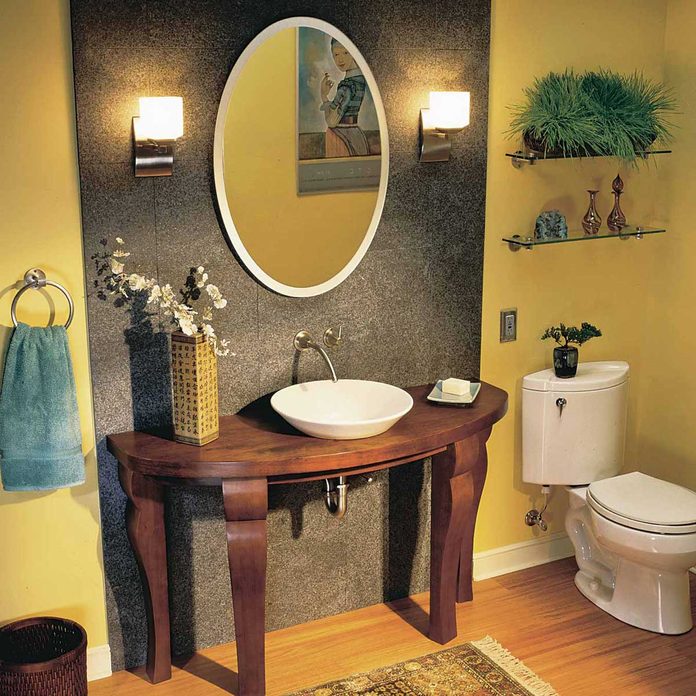
After: Vessel Sink Bathroom Refresh
This is a surefire way to give your half bath a dramatic new look. Combine your choice of furniture with one of these basin-type sinks for a unique, custom-styled bath redo. This modern version of your great-grandma’s wash basin creates an eclectic style that looks great in contemporary or traditional settings. We replaced all the fixtures, put down a new wood floor and tiled behind the sink, from floor to ceiling.
Just because you have a small bathroom doesn’t mean you can’t be creative and smart! Learn how to make a small bathroom look bigger.
59
/
200
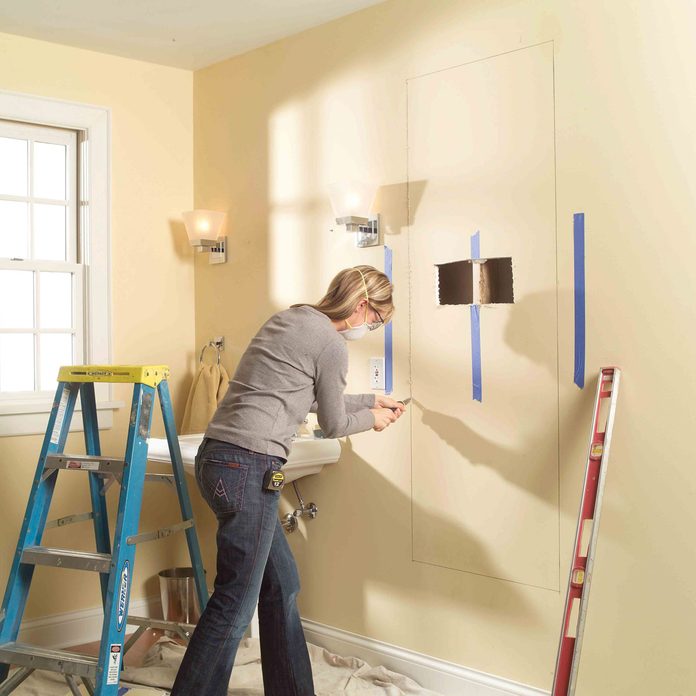
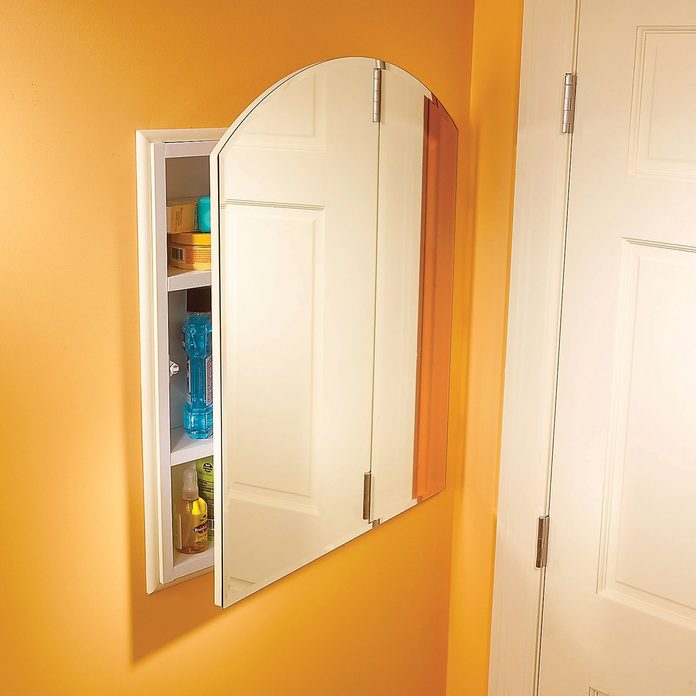
Before: Built-In Bath Cabinet
Create the perfect space to keep all your bath products organized and easy to reach. Since this cabinet is recessed into the wall, you won’t lose any valuable floor space. This project is a great introduction to basic cabinet-building skills. It’s a simple box with a face frame attached to the front. You buy the doors in the style that best fits your bathroom décor and mount them to the face frame.
60
/
200
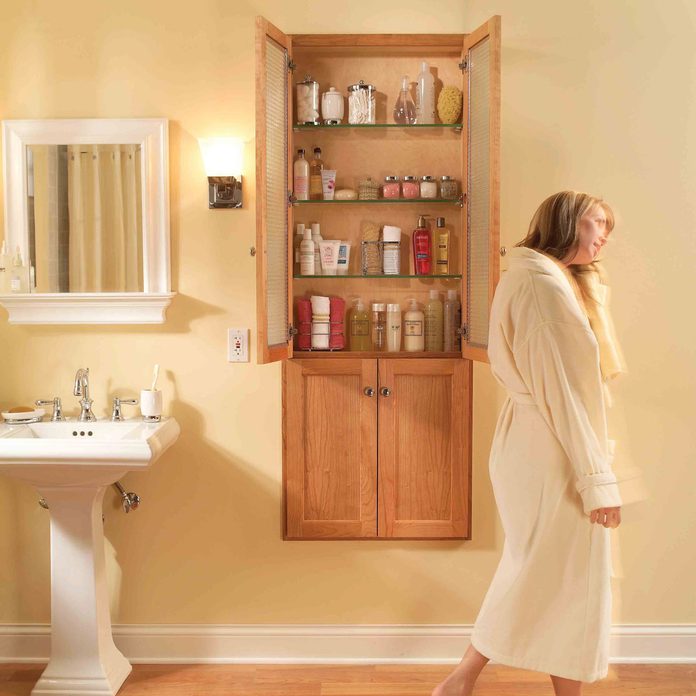
After: Built-In Bath Cabinet
If you’re short on bathroom storage space, this built-in cabinet could be just the ticket. It’s large and spacious, yet the shallow depth allows easy viewing and access to all of the contents. No more digging around in drawers or the dark corners of linen closets to find what you need.
61
/
200
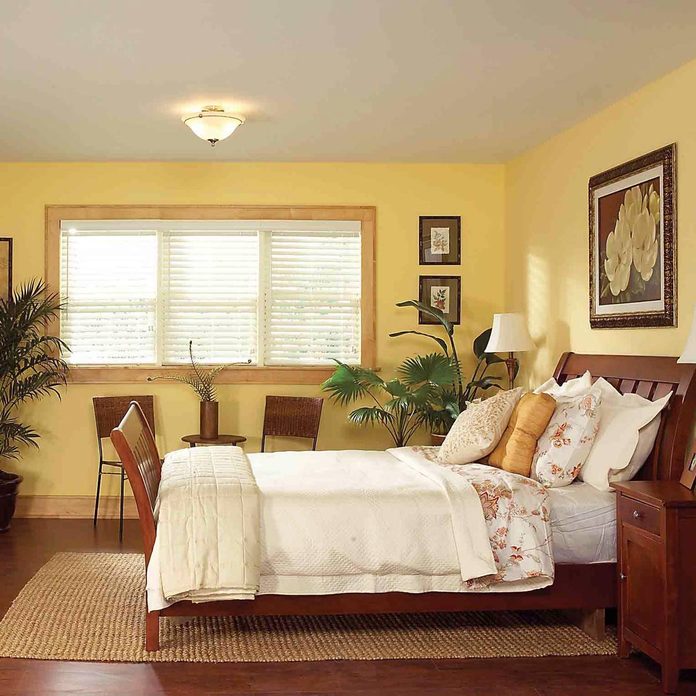
Before: Dimly Lit Bedroom
If you’re bored by a plain boxy room, take heart. You don’t have to rip apart walls and ceilings to make the space more inviting, better lit and more dramatic. The simple soffit lighting project we show in the after photo will do all that. A soffit is a dropped section of ceiling that’s usually positioned along the walls. It creates a multi-height ceiling, which in itself adds a visual feature. But even better, it offers a perfect home for lighting—general lighting for the room as a whole and recessed lights for practical uses like illuminating closets and reading, as well as for highlighting artwork and display shelves.
62
/
200
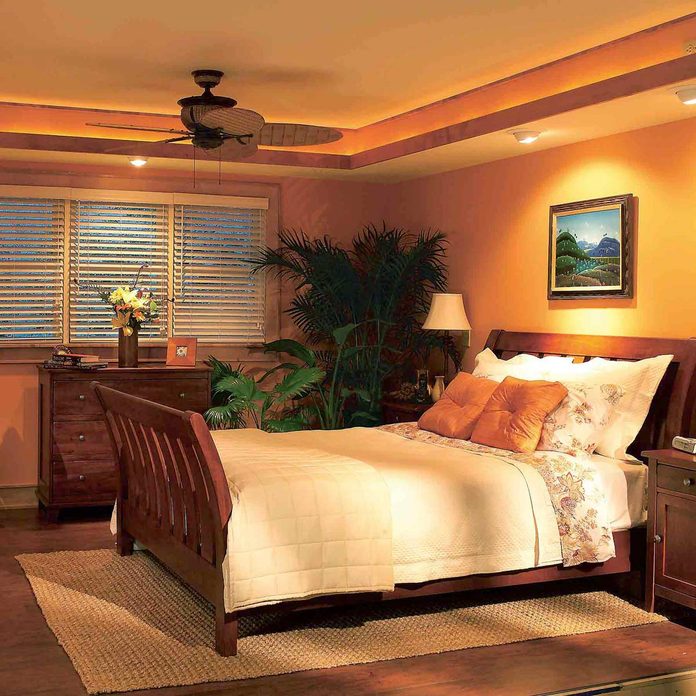
After: Unique Recessed Lighting
Add drama and beauty to a bedroom with this easy-to-build soffit system and well-placed lighting. This is the ultimate improvement for ordinary ceilings. Start to finish, you can complete this project in an easy weekend.
63
/
200
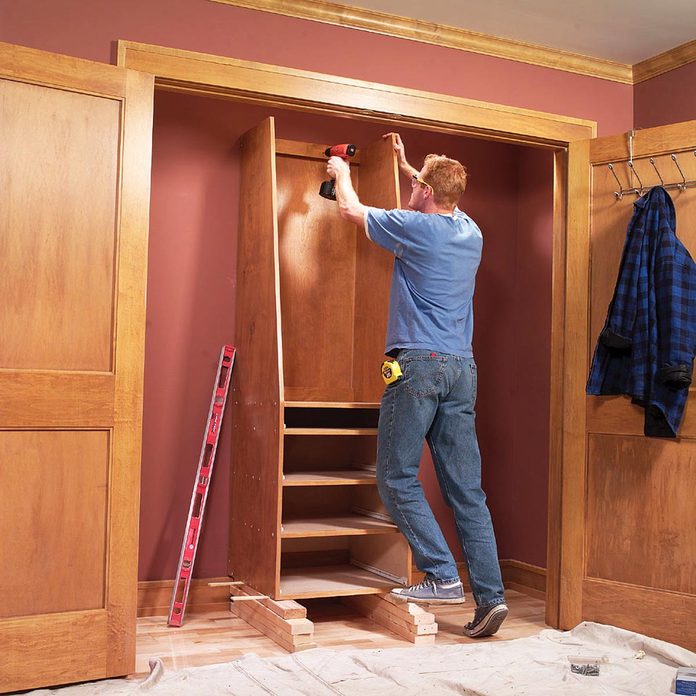
Before: Not Enough Vertical Storage Space
Is your closet too small and overstuffed? Do your cluttered shelves, packed and sagging clothes rods, and jumbled shoes all cry out for more space? Of course, the coolest solution would be to expand the existing closet, but that’s usually impossible. Instead, you can organize your existing closet to make every cubic inch count and get more dresser space to boot.
64
/
200
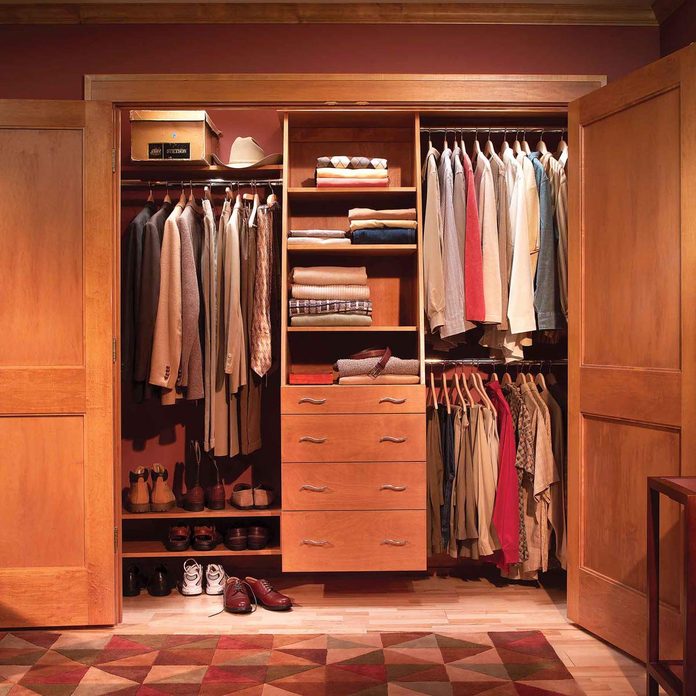
After: Closet Storage Maximized
Here’s what we’ve added to maximize a standard 8-ft. long by 30-in. deep closet storage space: cabinet module to keep folded clothes, two tiered shoe shelves to tame shoe scatter, double stacked clothes rods for shorter clothes and single rod on the other side of the closet for slacks and dresses.
Is your closet still overflowing? Never fear — follow our 15 top tips for reclaiming closet space and you’ll have all the space you need.
65
/
200
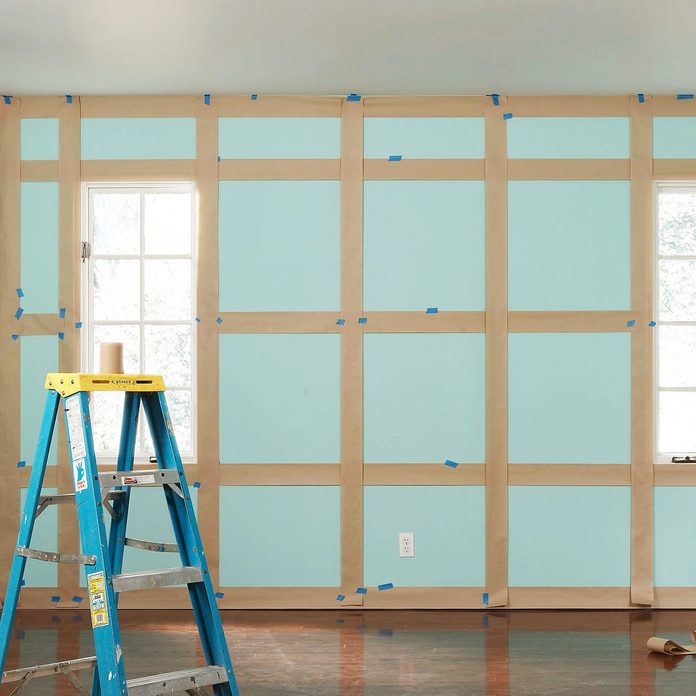
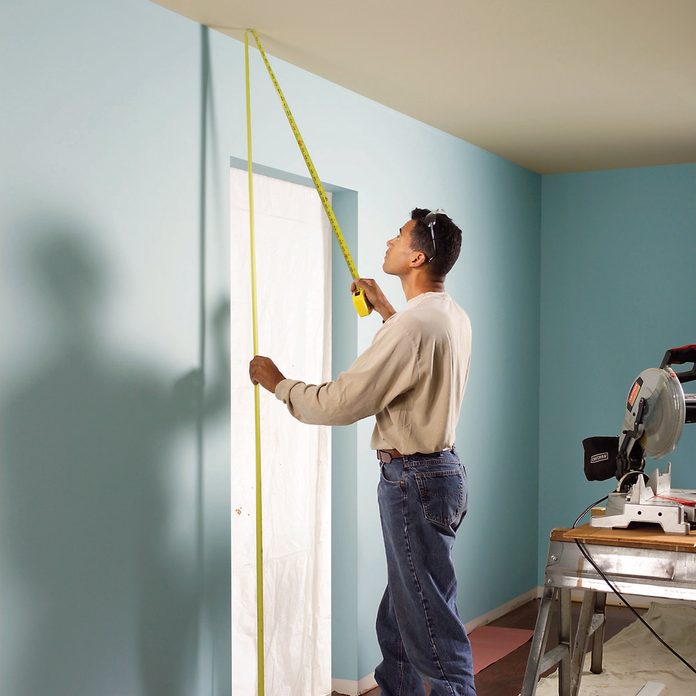
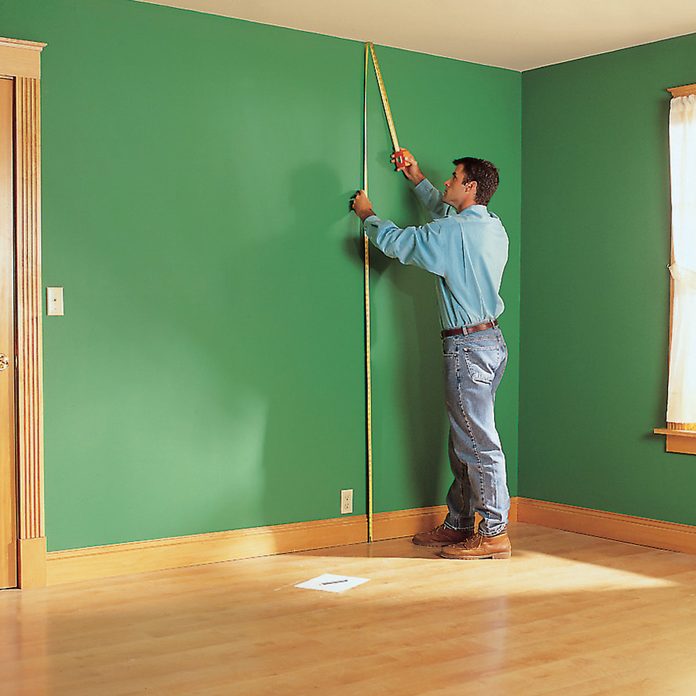
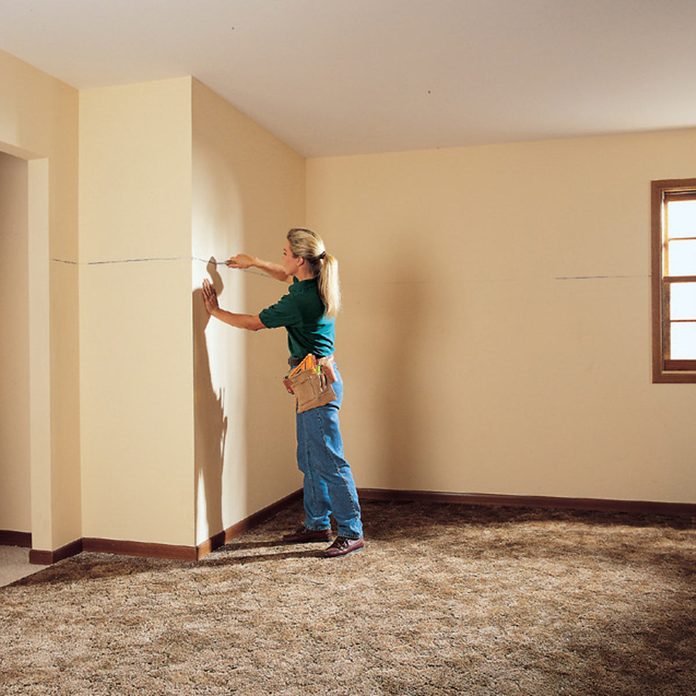
Before: Plain Wall
Here’s a simple method for creating an elegant paneled wall without the expense of solid lumber or the skill of a master carpenter. We fashioned this paneled wall by nailing strips of inexpensive MDF (medium-density fiberboard) directly over the drywall. The square-edged strips are easy to join, and the smooth MDF surface makes a perfect surface for a flawless paint job. For little money you can completely transform the appearance of your bedroom.
66
/
200

After: Classic Paneled Wall
Creating a new look for one wall or a whole room is as easy as nailing boards over the drywall. Lay out an attractive grid pattern and go to work. You’ll be done in a weekend. With a little perseverance, you can nail up the strips on Saturday, leaving Sunday to sand and paint. You’ll need a basic set of hand tools, a circular saw, a power miter saw, a sander and a finish nailer to complete the job. If you don’t have a finish nailer, consider renting one for a day. There’s a lot of nailing to do and it will speed up the job considerably.
67
/
200
Before: Sunny Basic Room
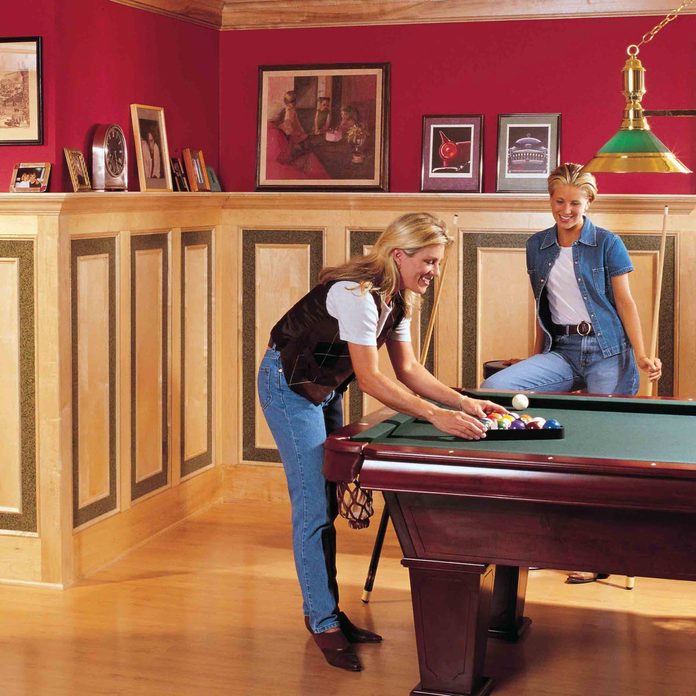
Elegant, traditional wainscoting looks like an intimidating project, but with this simple, easy-to-assemble design even a moderately skilled DIYer can transform an ordinary room into a showplace. In this article, we’ll show you how to plan your layout and cut, fit and finish the wood for any room in your house. We’ll also show you how to make clean, tight joints using a plate joiner.
68
/
200
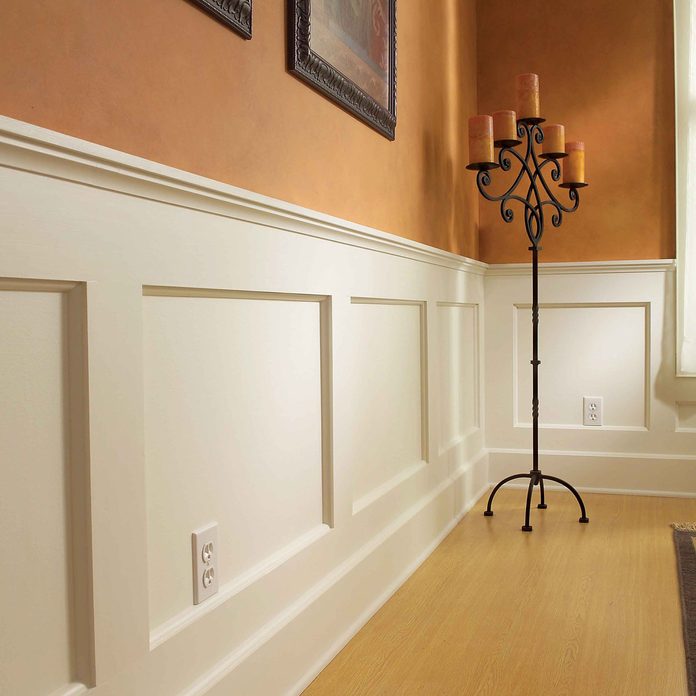
After: Elegant Wainscoted Wall
At first glance, this panel design may look too complex for your average do-it-yourselfer, but it’s not. The panels are made from three horizontal 1×6 bands that run around the room, with narrower vertical boards spaced every 30 in. or so. The panels are the wall itself. Once you nail on filler pieces and trim, the project takes on a traditional wainscot panel look.
69
/
200
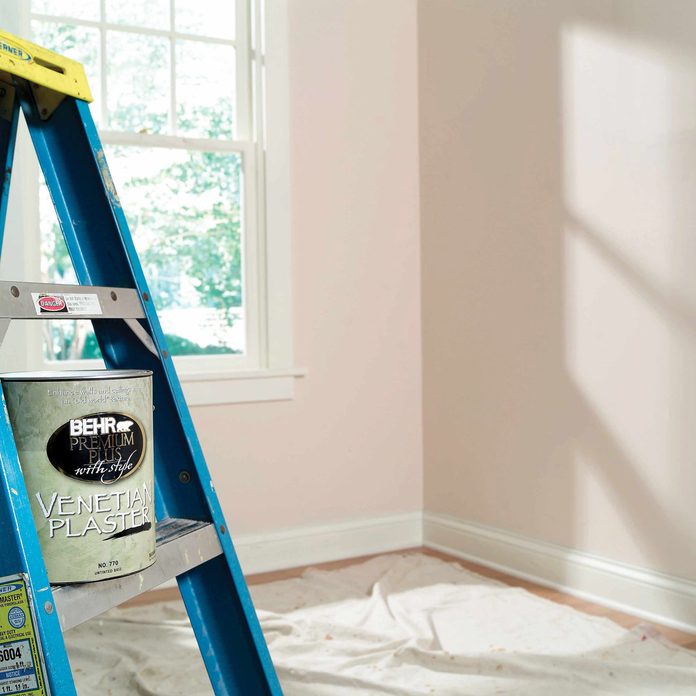
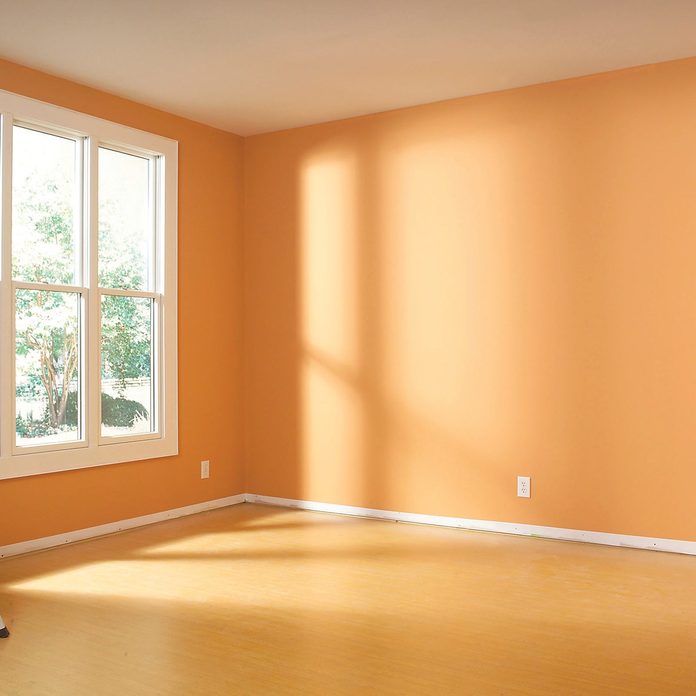
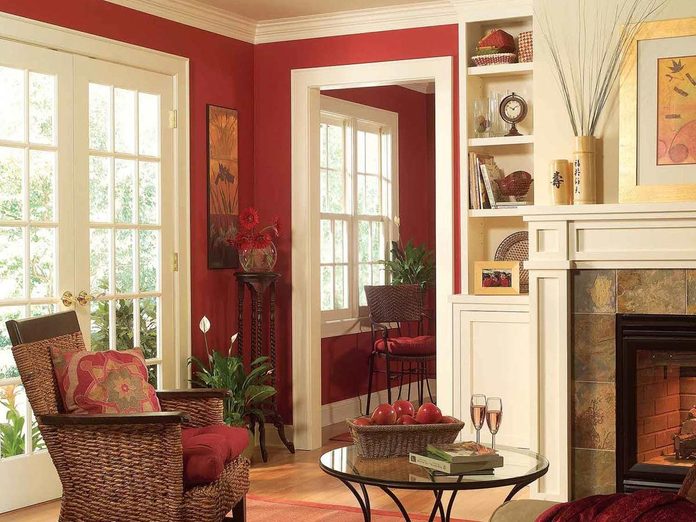
Before: Dull, Uninteresting Room
Maybe you’ve decided that red bedroom walls just aren’t you. Maybe you think your 2-year-old could have sponge-painted better than the previous owners. Whatever the case, if you’re ready for a new look in your bedroom, bath, dining room—or just about any other room in the house—we’ll show you how to redo it in a weekend with two simple projects. The first is a new decorative wall technique called Venetian plaster. Once a difficult project tackled only by pros, Venetian plaster is now easy to apply in a simple multi-step process. The second project is an easy-to-install urethane molding that you can cut with a handsaw (no power miter box necessary) and then glue and nail to the walls.
70
/
200
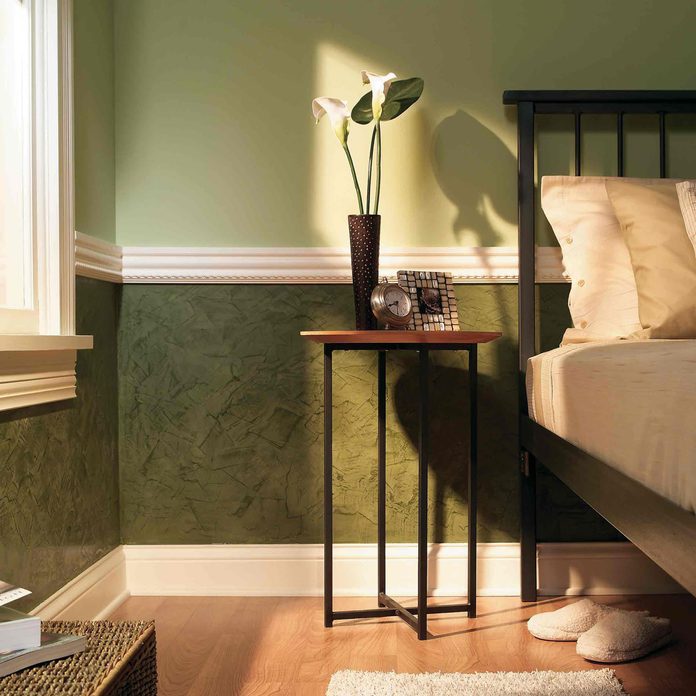
After: Stunning Venetian Wall Plaster and Rail Molding
Venetian plaster wall texture and urethane moldings are two great ways to create a new look for an ordinary-looking room in just a weekend. It’s the perfect way to makeover a room without spending a lot of money.
71
/
200

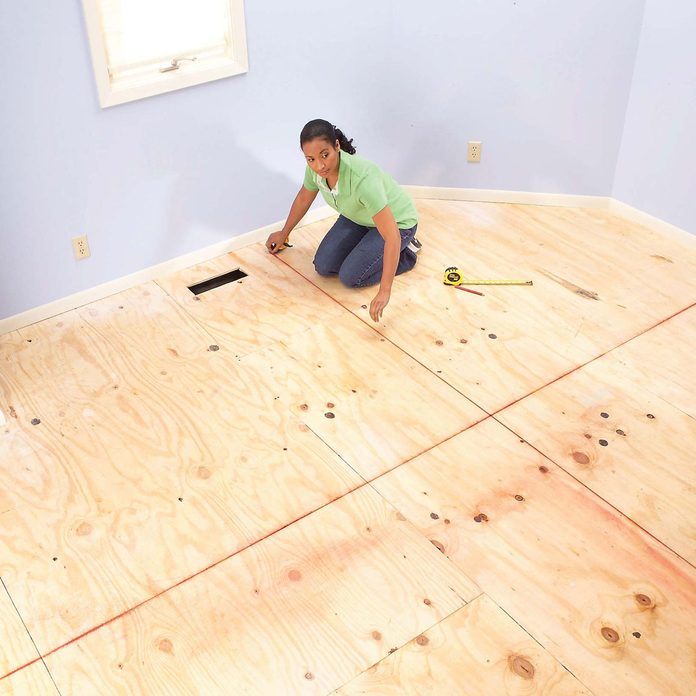
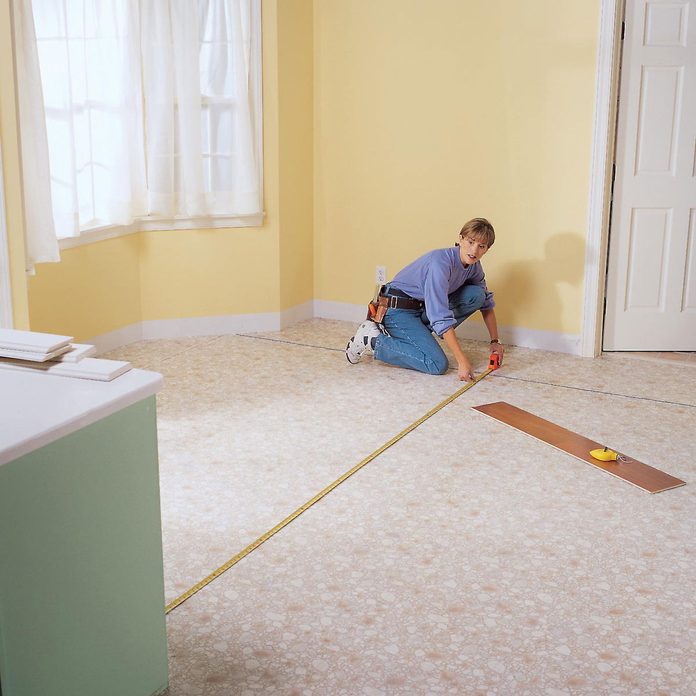
Before: Unfinished Floors
Installing a new hardwood floor used to be a lot of commotion. You had to schedule an installation and have the installer haul in a pallet of raw hardwood flooring and bang it in with a huge mallet and floor nailer. The next day the work area had to be sealed from the rest of the house as the big sanding machines rolled in and created bags of sawdust. For the next three days, the staining and finishing process stank up the whole house, and it took at least a week for the finish to harden before you could bring in the furniture. However, pre-finished flooring has changed all that. Now you can install a new wood floor that’s completely finished from A to Z in a single weekend.
72
/
200
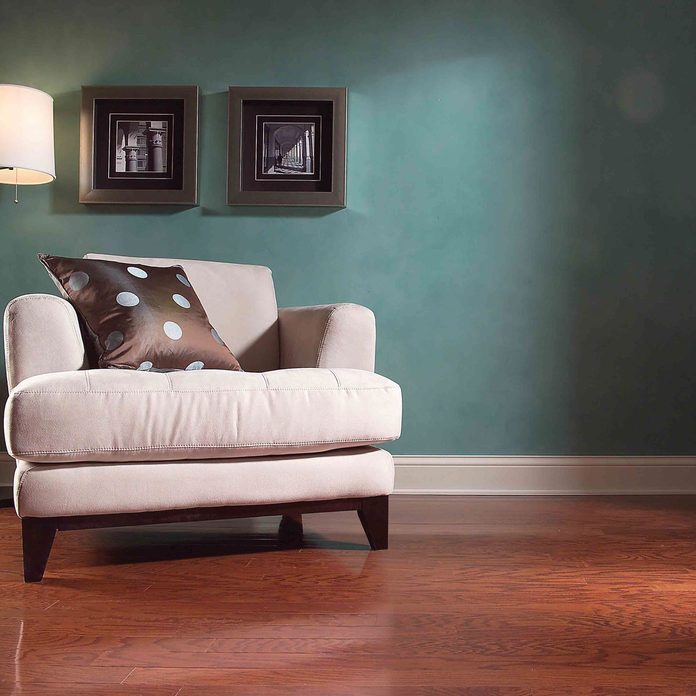
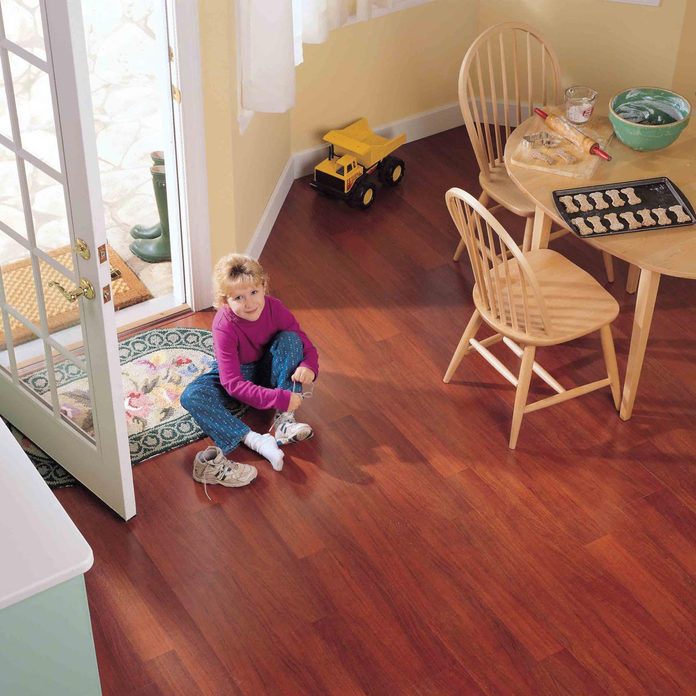
After: Flawless Pre-Finished Wood Floor
You’ll be amazed at the beauty, practicality and speed of installation of a staple down pre-finished wood floor. You can literally start installing one day and be using the room the next day. And don’t confuse this flooring with wood look-alike plastic laminate flooring. The type we show here (Robbins, Huntington Plank style, red oak with walnut stain, www.armstrong.com) has a wear layer that can be re-sanded a couple of times, years down the road when the tough factory finish is finally compromised. Most experts agree that this is a 50-year or more floor.
73
/
200
Before: Un-Fun Basic Kids Bedroom
Modular carpet, also known as carpet squares, is a DIY-friendly alternative to traditional wall-to-wall carpet. Even inexperienced homeowners can carpet square a room in a day. In this article, we’ll show you how to install the carpet and cut it to fit around obstacles such as doorjambs. Installation is nearly goof proof — you can easily pull up misaligned squares and reposition them. And you won’t need any specialty tools. A tape measure and chalk line to snap your baselines, and a carpenter’s square and utility knife to cut the squares will get the job done.
74
/
200
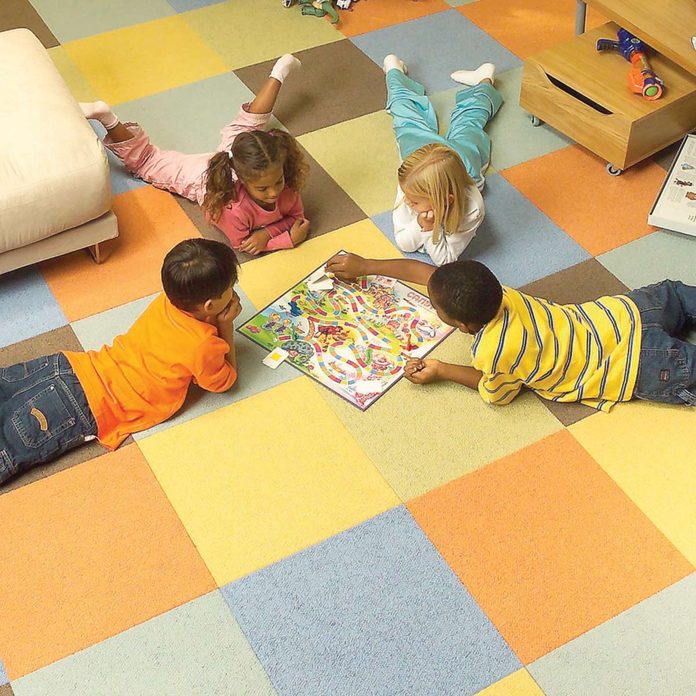
After: Colorful Carpet Squares Kids Room
If you think installing carpet is time consuming and complicated, think again. Modular carpet, aka carpet squares, is one of the easiest floor coverings to install. You simply lay the squares on the floor; adhesive strips and the carpet’s heavy backing hold them in place. You can finish most rooms in a day, if not an afternoon. And you can use it anywhere. You can add whimsy to a kids’ playroom or create an elegant look in a formal dining room.
75
/
200
Before: Bland, Bare Wall
If a room could stand getting dressed up there are a ton of possibilities. Check out what we did with this wall.
76
/
200
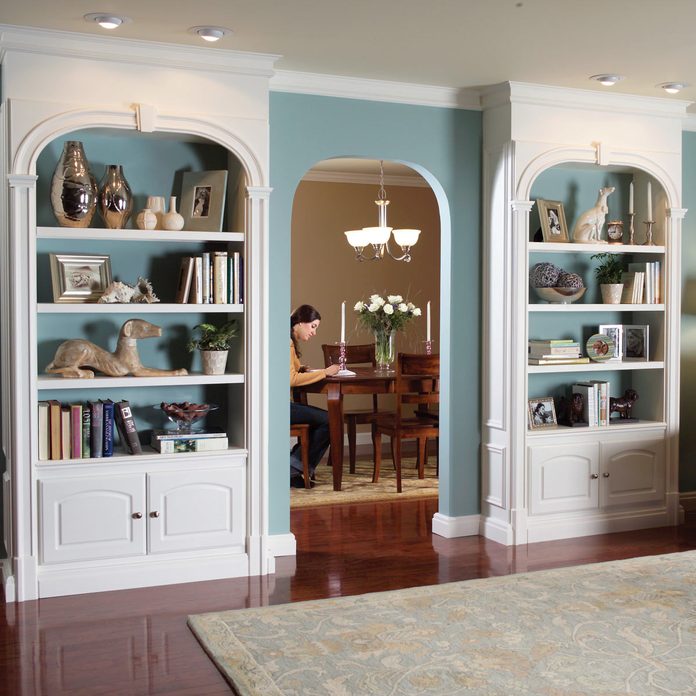
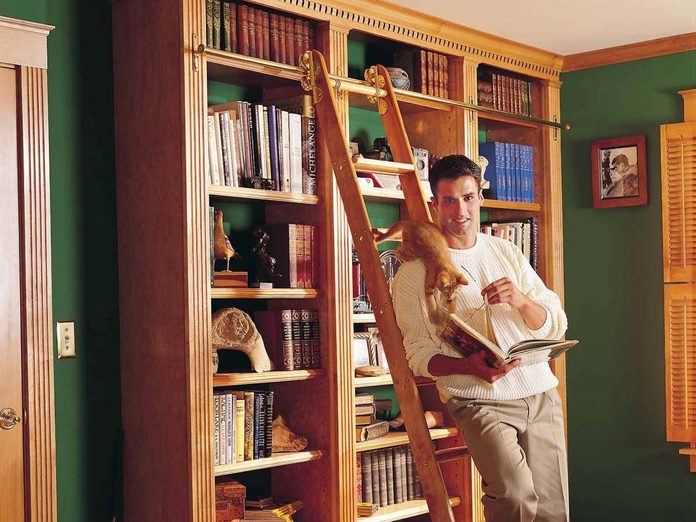
After: Gorgeous Bookshelf
Molded millwork, off-the-shelf cabinets and inexpensive MDF make these classic-looking bookshelves a snap. Be sure to check out 33 other gorgeous bookshelf plans we’ve created.
77
/
200
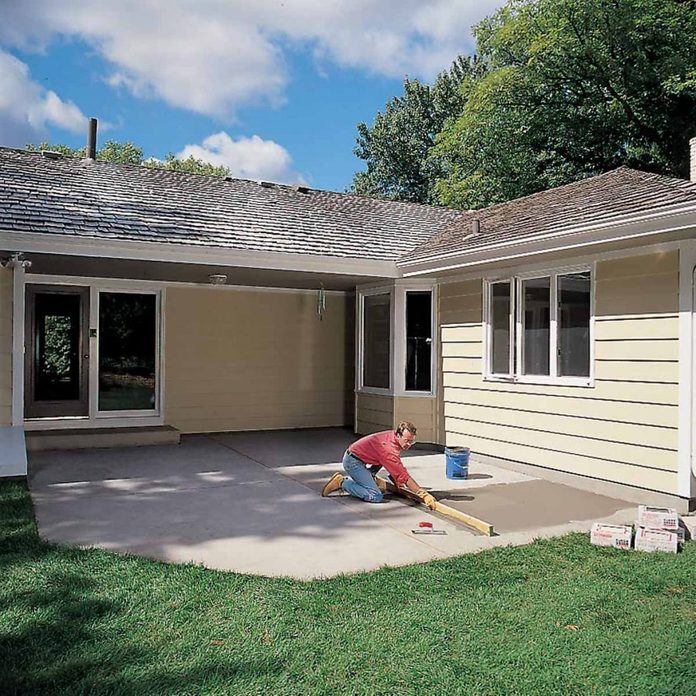
Before: Drab Patio
Your standard concrete patio isn’t going to receive any comments at the next barbecue but you can do something about that.
78
/
200
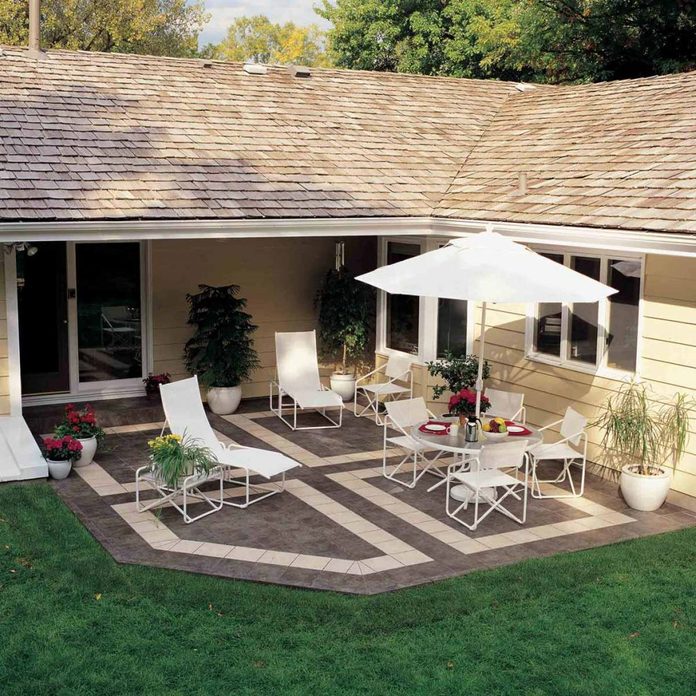
After: Patio Pleasure
Patio tile can be an attractive solution to spruce up the patio. As tile has improved, so has the ability to use it outside.
79
/
200
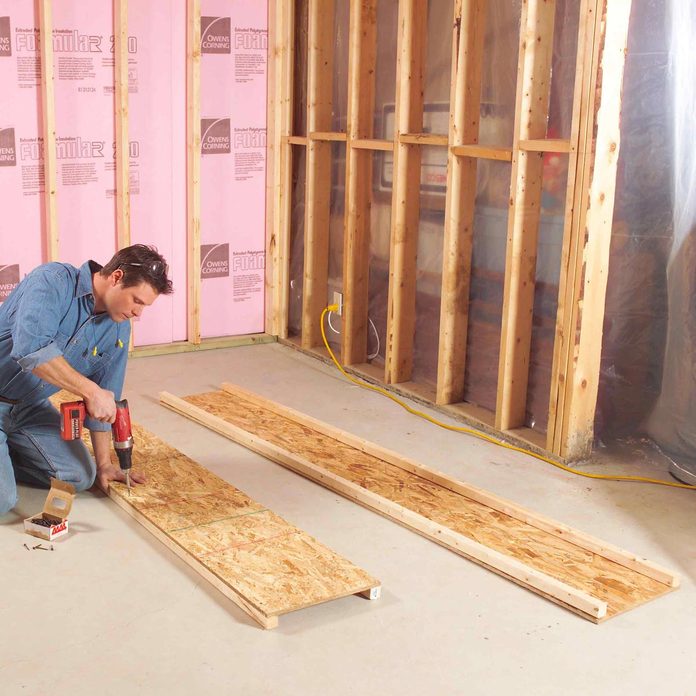
Before: Unfinished Basement
Turning an unfinished basement into a living space can be a great way to add living space to your home. Check out these 12 upgrades that will add value to your home.
80
/
200
After: Finished Basement
Your basement can be more than a utility and storage area. With some forethought and good techniques, you can make it as warm, comfortable and inviting as any other room in the house. But, make no mistake about it: Finishing a basement is a big job. See the steps it took with this project.
81
/
200
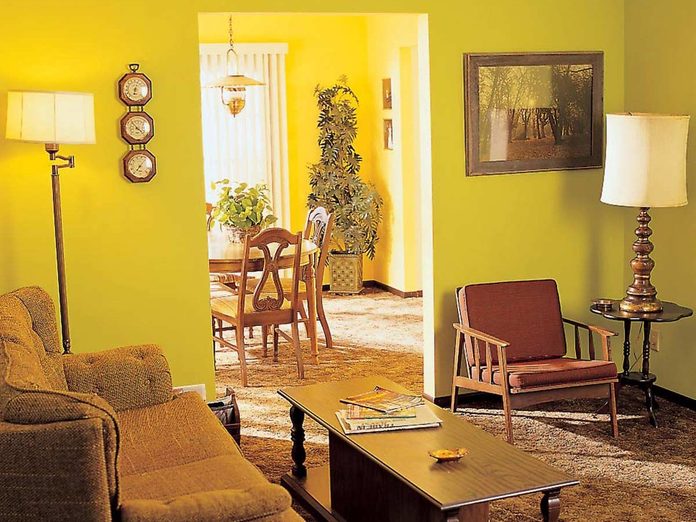
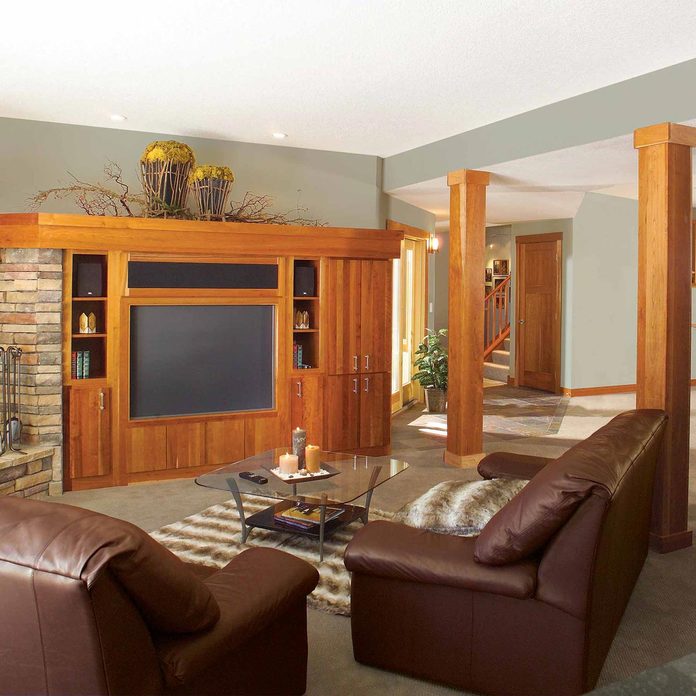
Before: Narrow Walkway
A tight space like this can be transformed to a beautiful, wide-open format. Check out the remodel we did.
82
/
200
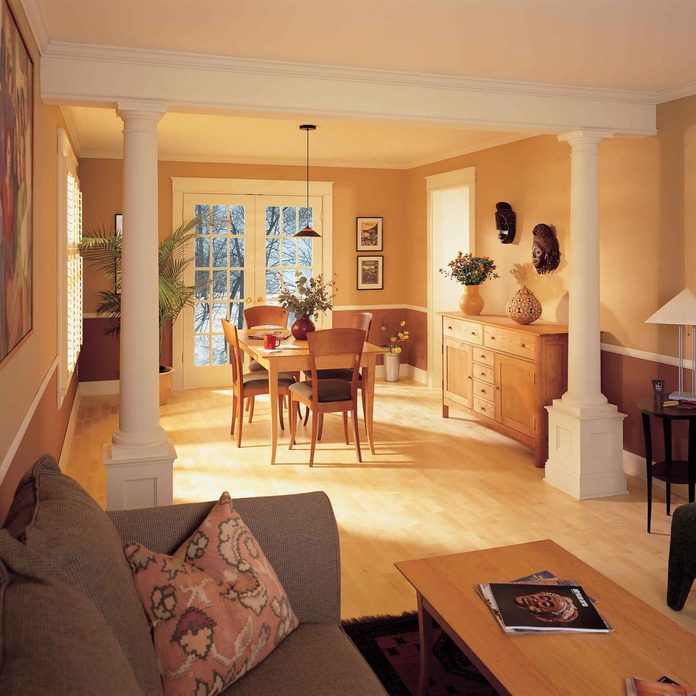
After: Knocked Down Wall
The drywall got ripped out in this home and columns were installed. The carpeted floor was replaced with prefinished maple flooring, all for around $2,500.
83
/
200
Before: No Molding
A room can be transformed dramatically with ceiling molding. See how this room really came to life.
84
/
200
After: Sharper
Here, two standard cove moldings were combined with a flat molding. Special-ordered cherry cove moldings were used to contrast the flat strip of maple.
85
/
200
Before: Blah Wall
If you need a place for your books and other knick knacks, a bookshelf can be the perfect fit in a room.
86
/
200
After: Elegant Bookshelf
Recreate the mid-19th century, Greek Revival period of American architectural history with this floor-to-ceiling hardwood bookcase. See how this one got built.
87
/
200

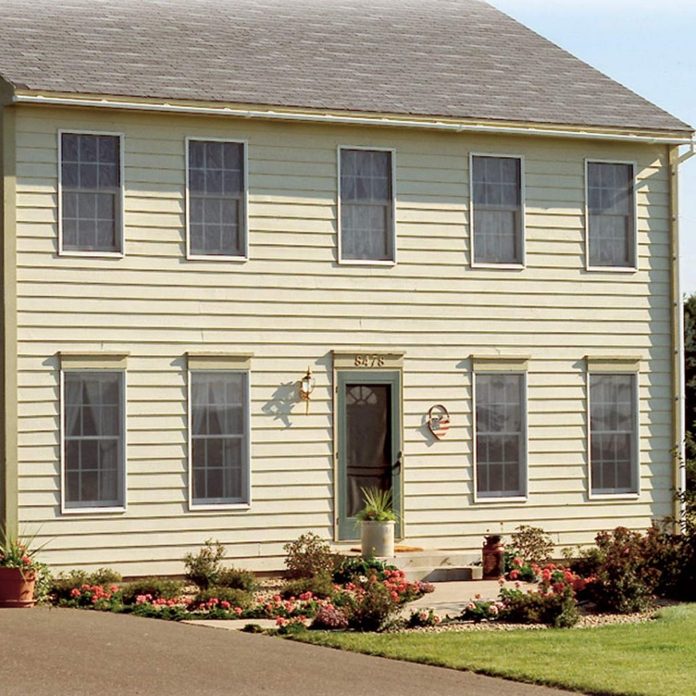
Before: Dull Exterior
Dullness is pervasive in suburbia but it can be dealt with by dressing up the exterior and creating new shapes.
88
/
200
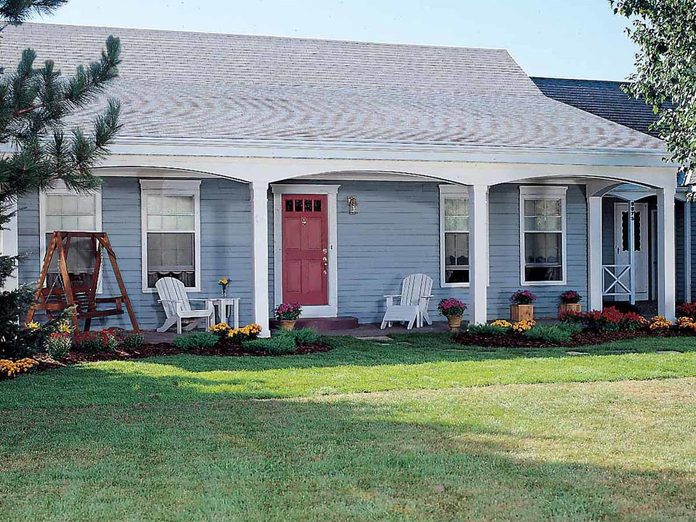
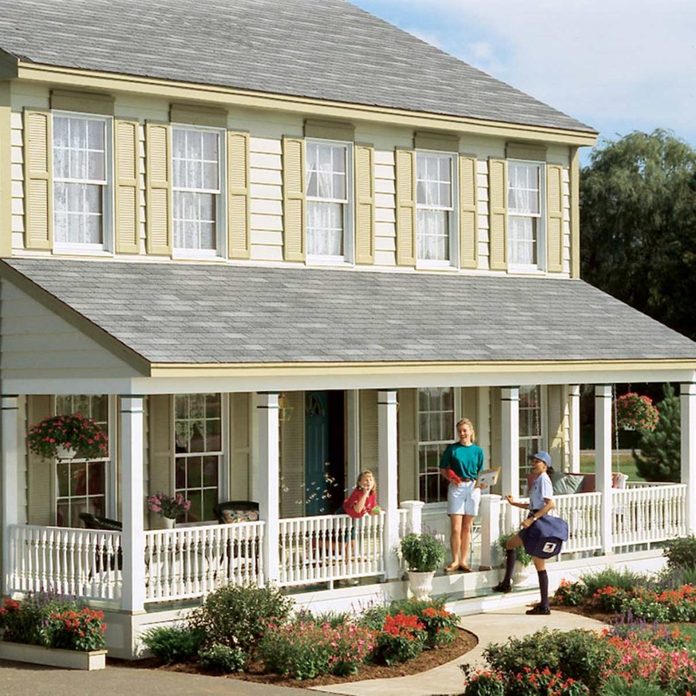
After: A Place to Enjoy
This arched front porch gave new life to this home. The arches are graceful and make the home stand out in a square-shaped world.
89
/
200
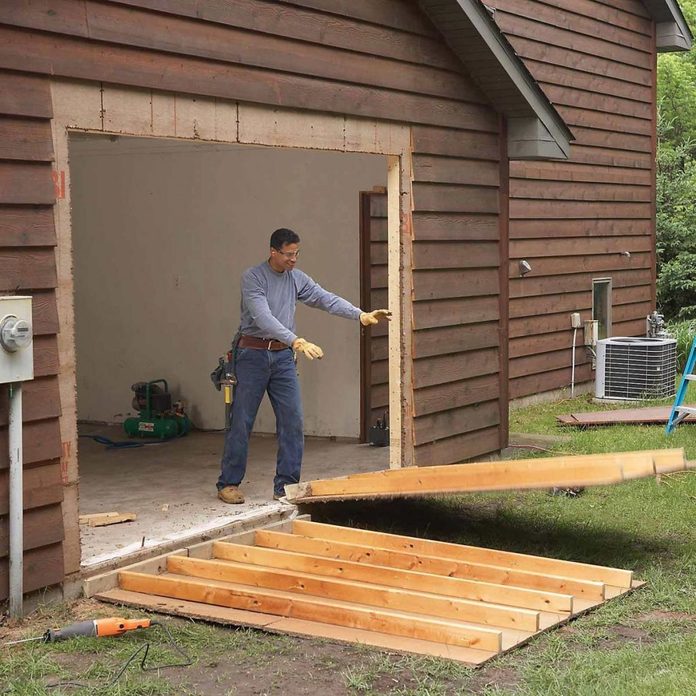
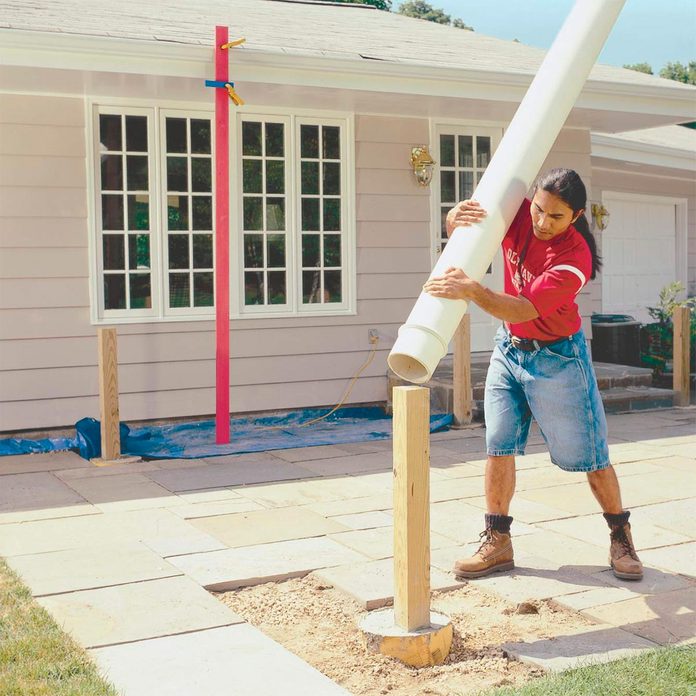
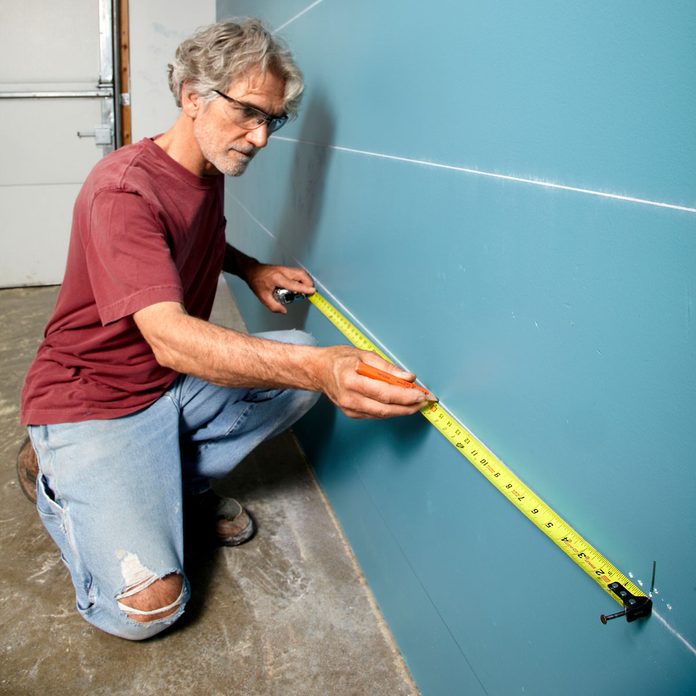
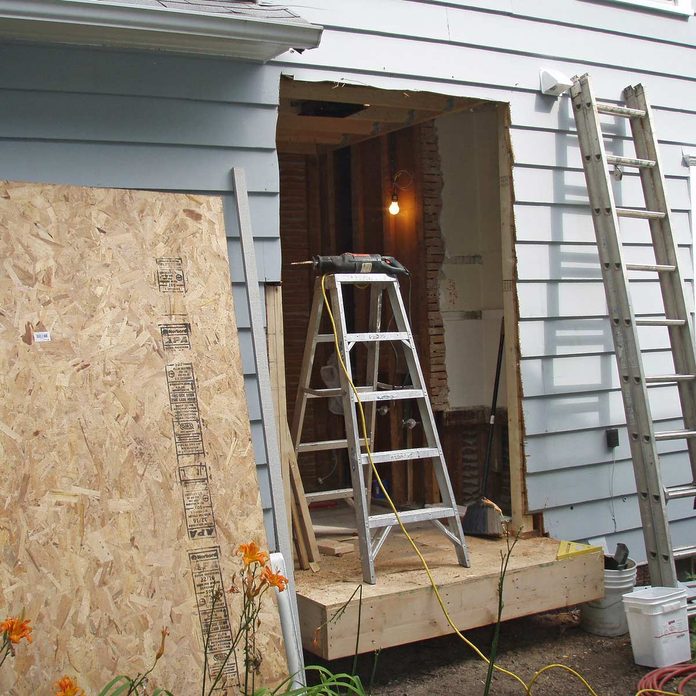
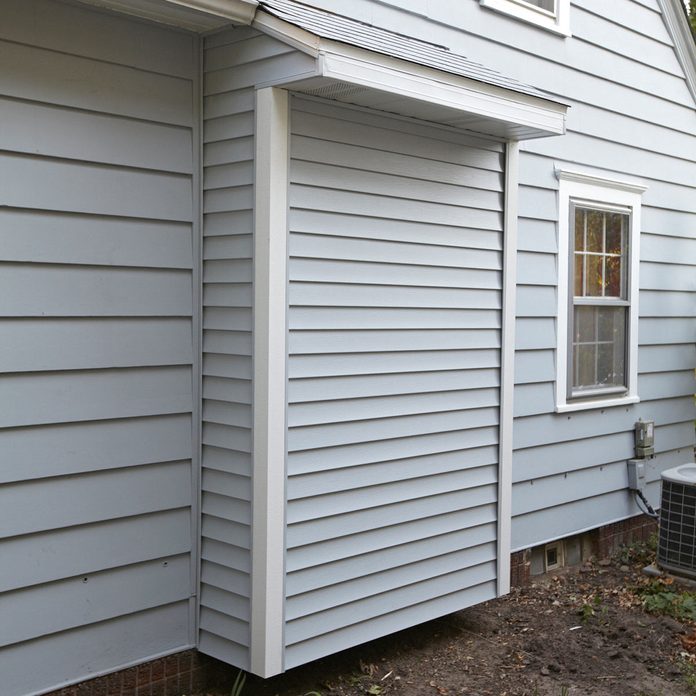
Before: Tight Garage Space
Create space in your garage for a motorcycle, ATV, riding mower, woodworking tools or odds and ends with a simple, wood-foundation addition. You can try these cheap storage ideas to free up some space too!
90
/
200
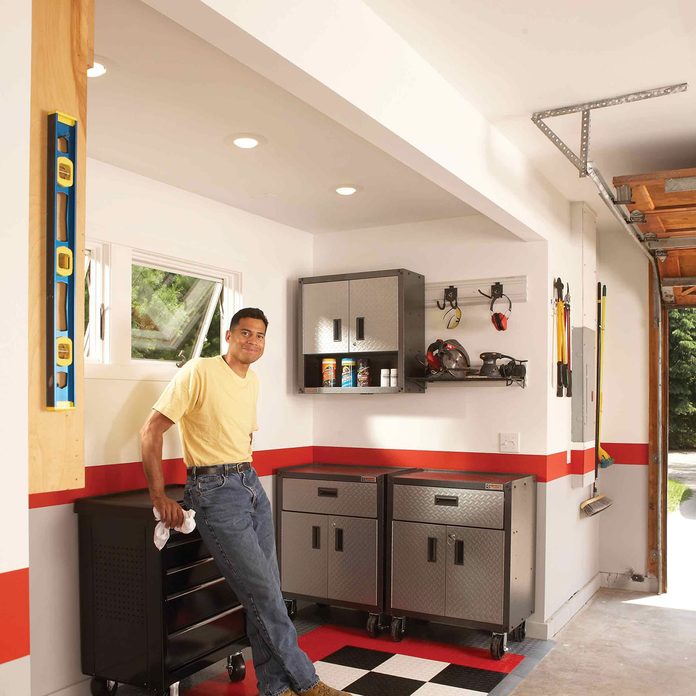
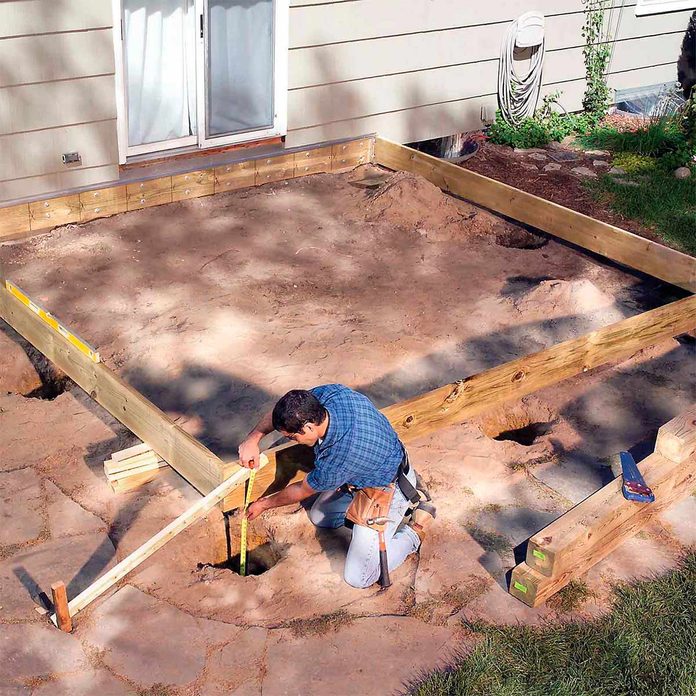
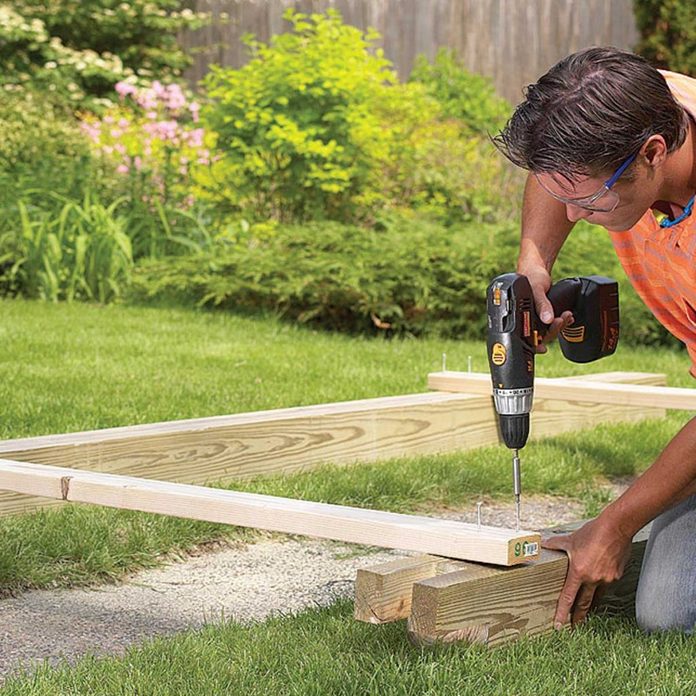
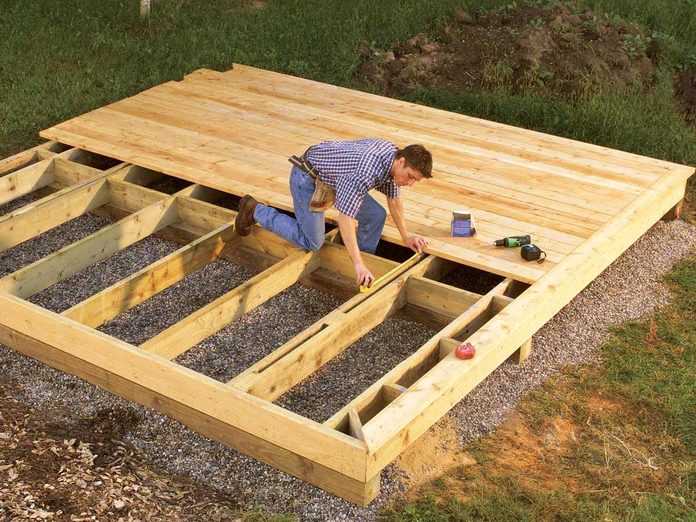
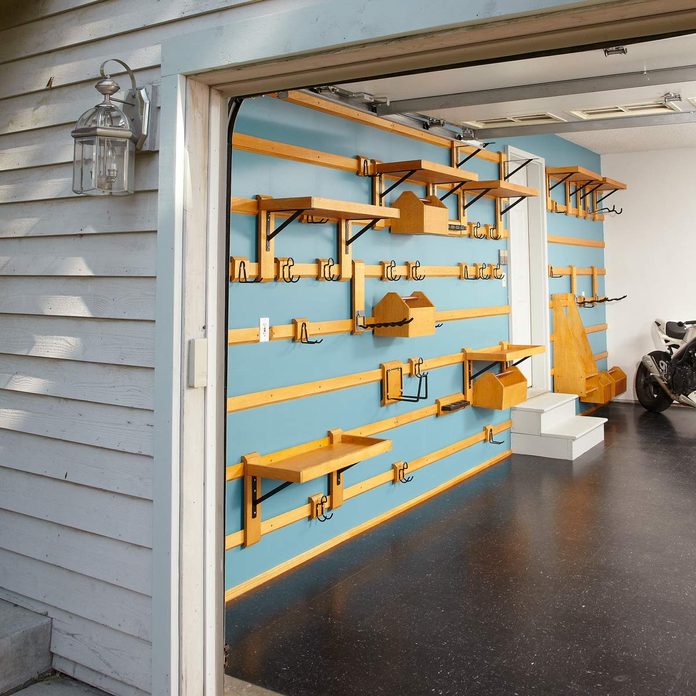
After: Breathable Bump-Out
There’s no need to pour concrete. Get off the ground with a simple treated-wood foundation. Build it just like a deck platform. You’ll enjoy the additional space. Here’s how to get started.
91
/
200
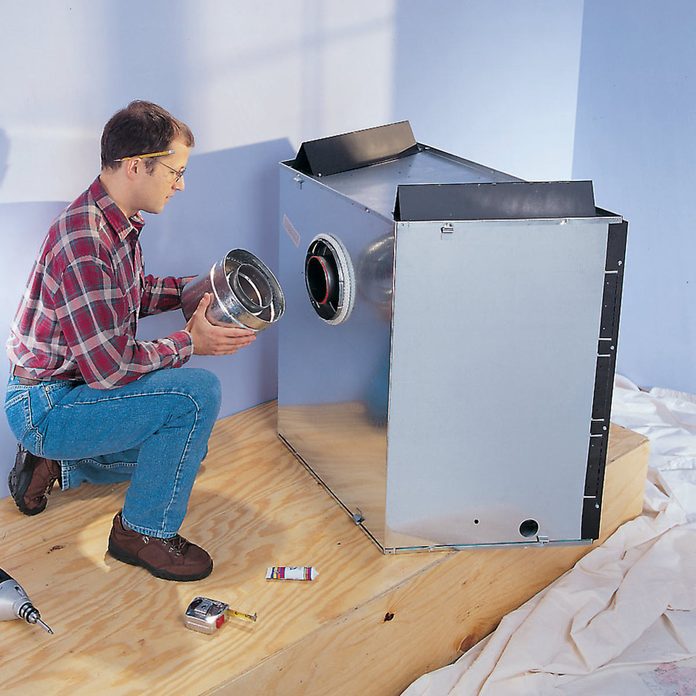
Before: No Flame
Adding a gas fireplace isn’t as hard as it sounds and it can add a warmth factor to your home in more ways than one.

93
/
200
Before: Colorless Cabinets
Cabinet doors shouldn’t be an afterthought around the home. A few tweaks can add elegance to the home.
94
/
200
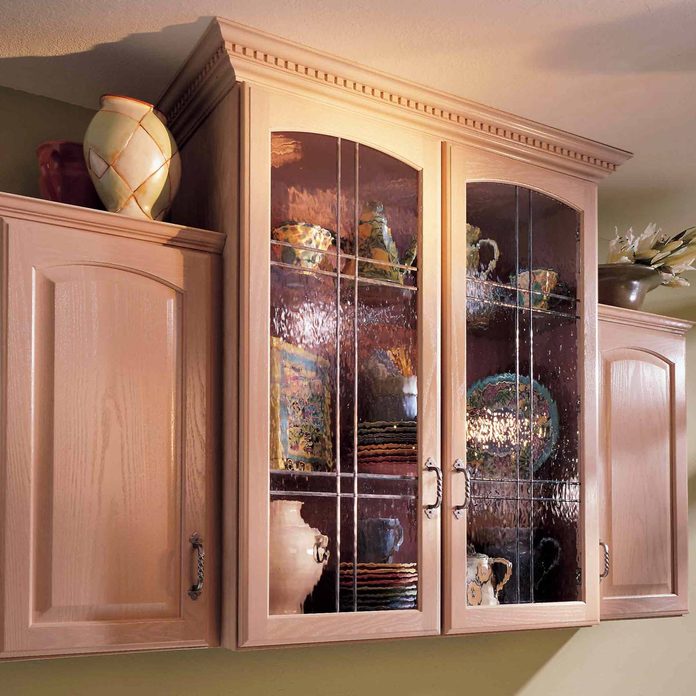
After: Something to See
These glass in cabinet doors are showpieces that break up the monotony of wood panels. There are a couple of ways to do this, see one way here.
95
/
200
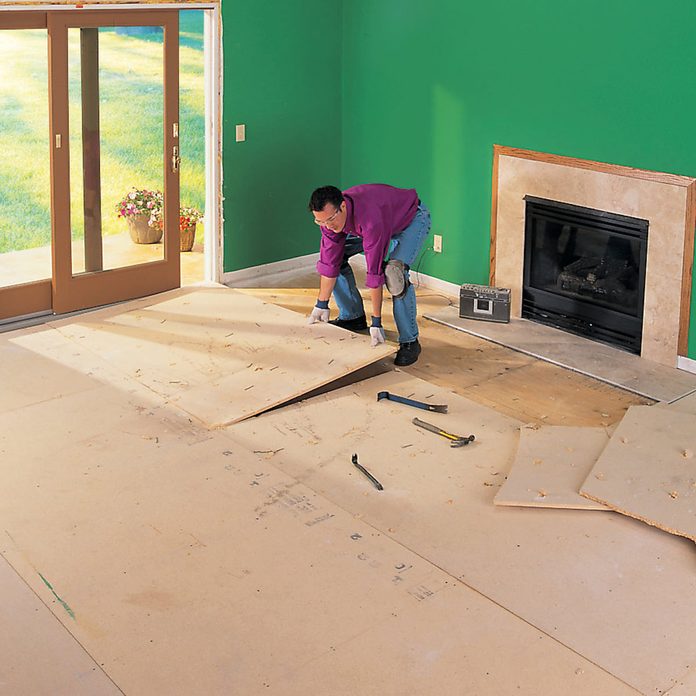
Before: Flooring Funk
A wood floor is attractive, warm and durable, and it’s affordable too if you lay it yourself. Adding the special border feature will also make it unique. Materials aren’t cheap, but you’ll save a ton by following our step-by-step directions rather than hiring a pro.
96
/
200
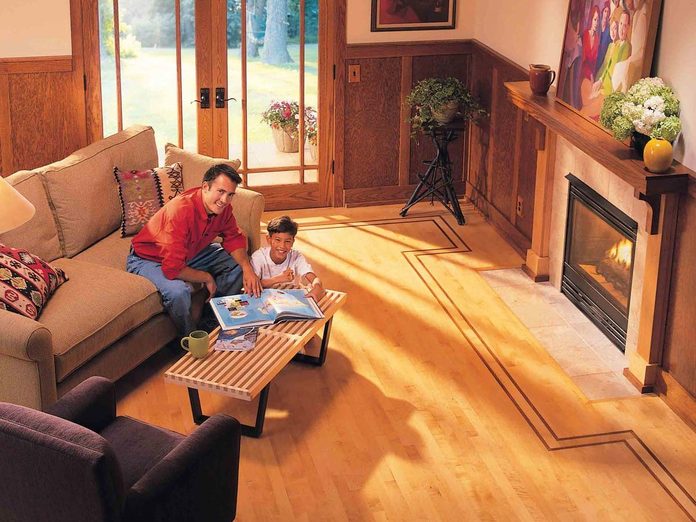
After: Flashy Flooring
The complete project is here but it’s easy to see the impact of adding wood flooring and adding additional features to the walls.
97
/
200
Before: Ugly Cabinets
It looks hopeless, but with new doors and enameled cabinet boxes you can create a whole new kitchen without the huge expense of replacing everything.
98
/
200
After: Stunning Cabinets
You’ll be amazed at how simple it is to update your kitchen without tearing out your old cabinets and completely remodeling. By repainting the cabinets and installing new doors, you can achieve a whole new look at a fraction of the cost of new cabinets. To achieve our dramatic new look, we took off the old doors and painted the cabinet frames with a black, satin-finish oil paint. Then we hung slightly larger cherry panel doors with concealed “Euro-style” hinges. This reduced the space between the doors and eliminated hinge clutter for a more contemporary look. Check out the complete look here.
99
/
200
Before: Countertop Conundrum
Countertops take a licking through the years and need some revamping. We ditched this old countertop to something a little more lively.
100
/
200
After: Countertop Answer
We’ve got an embarrassment of riches when it comes to information on plastic laminate countertops, countertop installation and even how to keep plastic laminate countertops clean.
101
/
200
Before: Out of Touch Flooring
Laminate flooring became an attractive option for people because of its durability. It can be a great solution when done right with the right look.
102
/
200
After: Sweet Stepping Floor
Our guide on how to install laminate flooring can get you down the right path but just be careful how you lay it out and where you put it because the core is vulnerable to water.
103
/
200
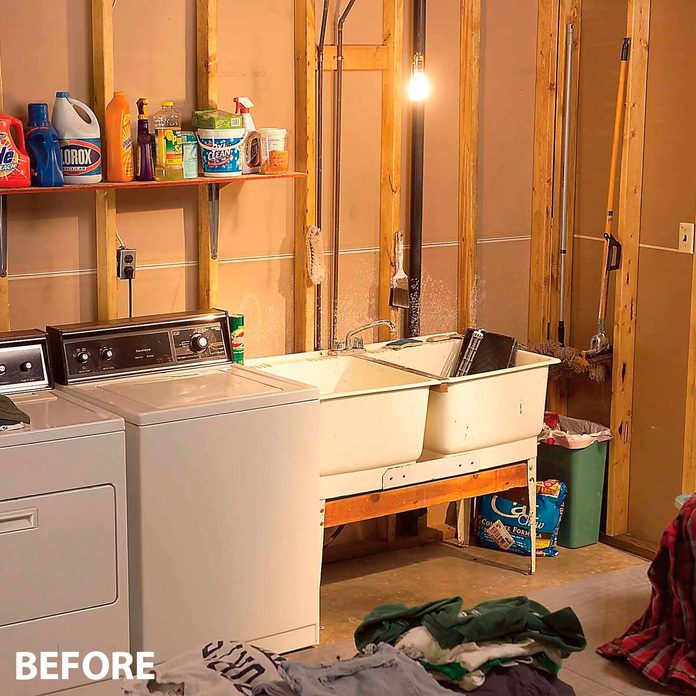
Before: Laundry Room Disaster
Make your laundry room more functional and attractive by reworking the plumbing, adding a new sink and countertop.
104
/
200
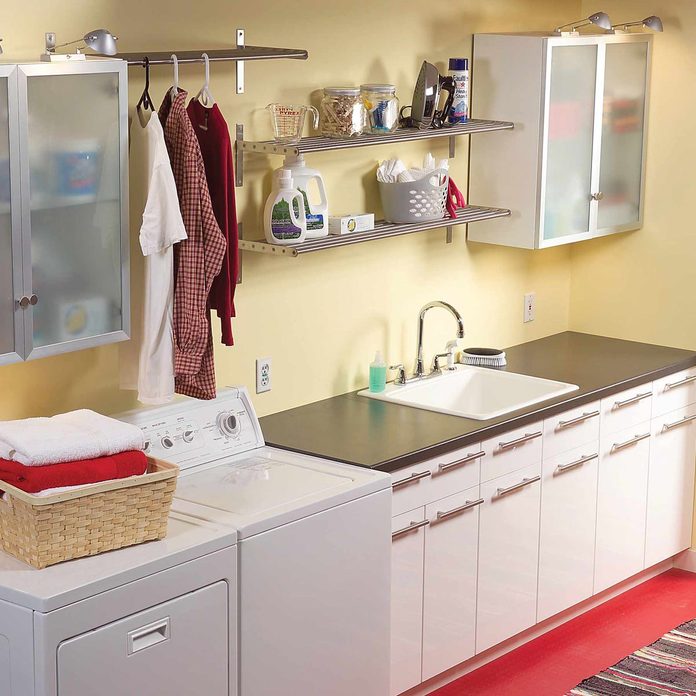
After: Lauded Laundry Room
Your laundry room doesn’t have to be a dingy, disorganized place full of cobwebs and dust bunnies. Get some ideas on how to revamp your laundry room with what we did to make this laundry room sparkle.
105
/
200
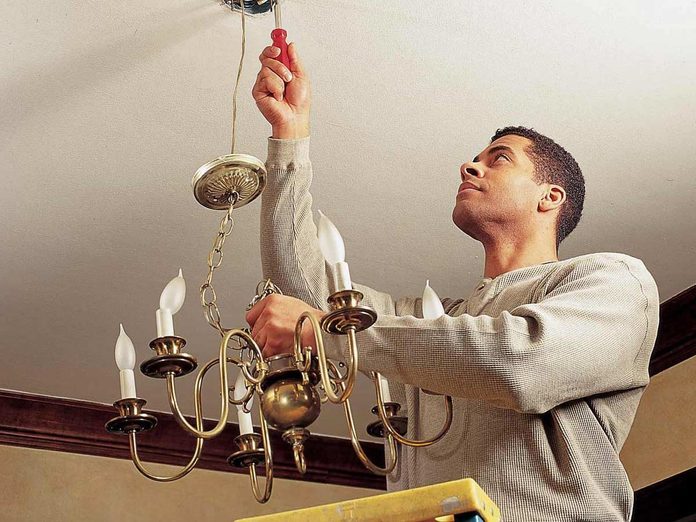
Before: See You Later Chandelier
An outdated chandelier is an eyesore, not to mention sometimes a poor light source.
106
/
200
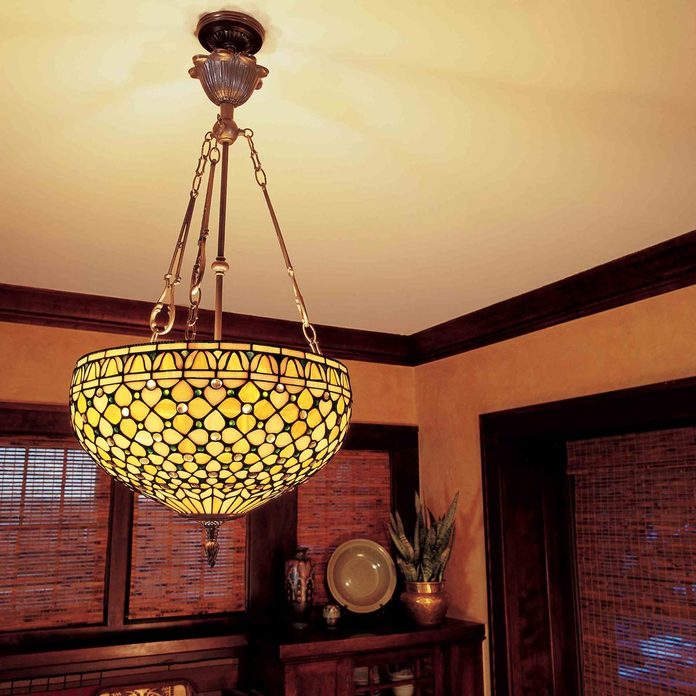
After: A Chandelier Worth Looking At
Change a drab room into a dazzling one with a new overhead light fixture like this one. Check out what we did to put this one in.
107
/
200
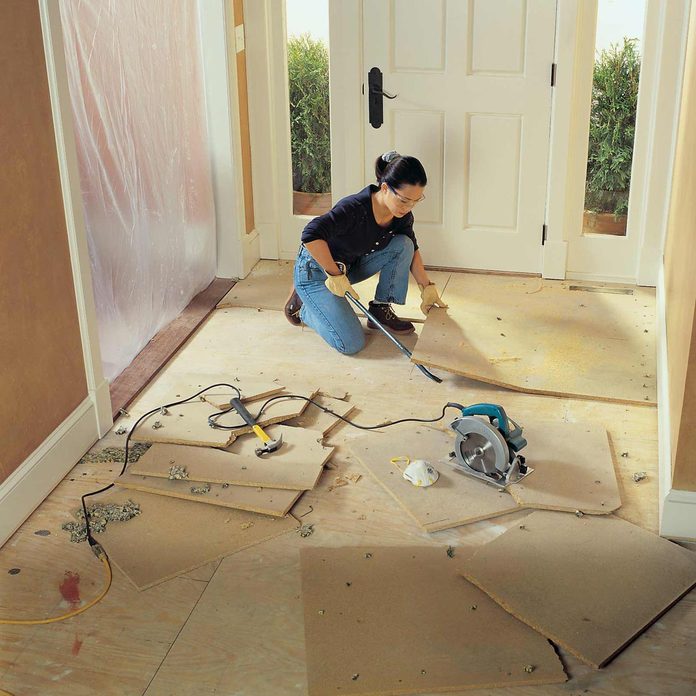
Before: Egregious Entryway
If your entryway is just kind of meh, it’s worth a look into an upgrade. The entryway is the first impression your home makes on people looking at the interior.
108
/
200
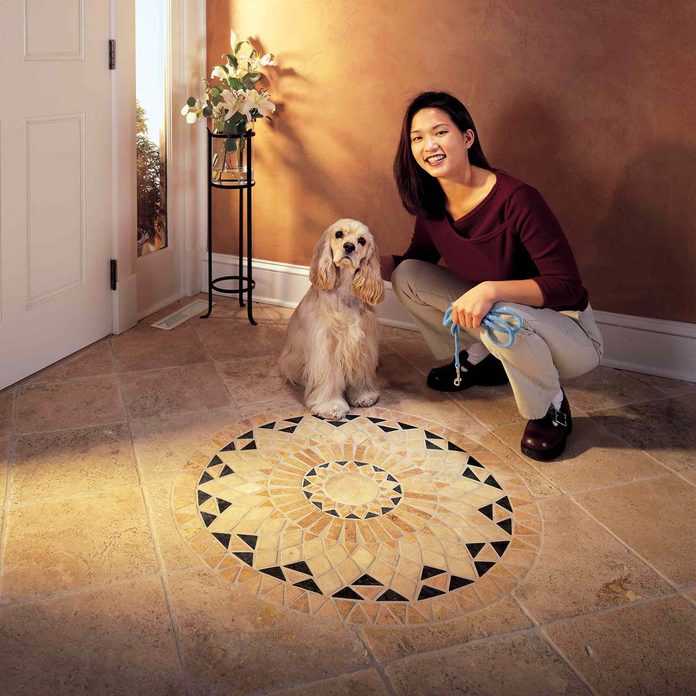
After: Expressive Entryway
A tumbled marble medallion adds a distinctive tile feature to any room. The medallion is preassembled, so it’s easy to install and makes a tile floor that’s durable and beautiful. This story shows tiling an entryway, but you can use the same techniques in a bathroom or kitchen with equally dramatic results. Here’s what you need to know about goof-proof showers.
109
/
200
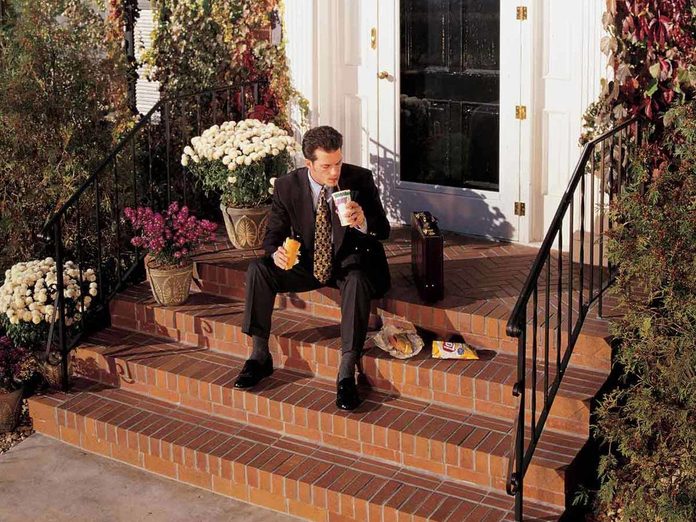
Before: Standard Walkup
A home like this needs a little character and some angles to make it more interesting. See what we did to make it more appealing.
110
/
200
After: Porch Paradise
A porch can be a special place for people to gather, drink iced tea and catch up with neighbors. It’s an inviting space.
111
/
200
Before: Baking in the Sun
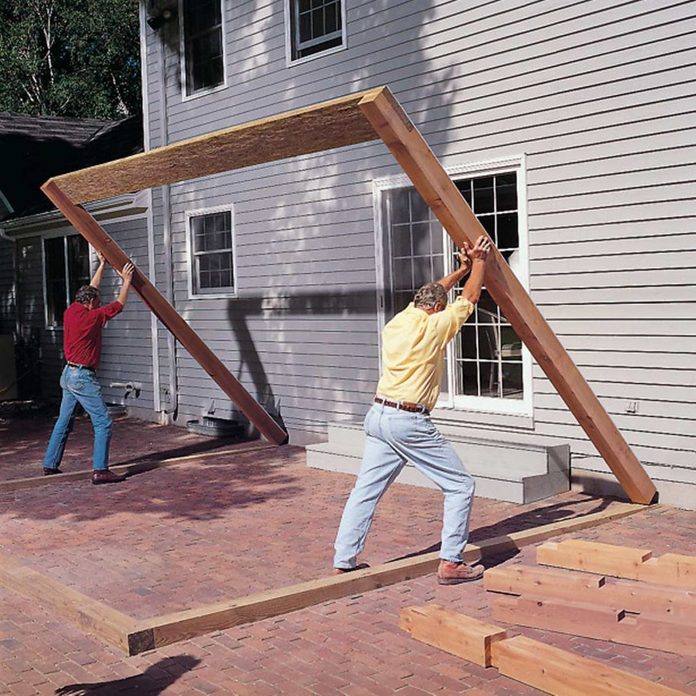
You don’t have to let the blazing sun or drippy weather drive you indoors. A simple covered pergola will keep you comfortable long after your neighbors with unsheltered decks have given up and gone inside.
112
/
200

After: Sunning Comfortably
We built our pergola from standard construction cedar because it’s weather resistant and accepts stain well. Other rot-resistant wood would work as well.
A pergola like this looks best on a larger deck, one at least twice the size of the pergola. See what went into designing this one.
113
/
200
Before: Shaded Spot
You might have a spot in your yard that’s having a tough time keeping grass or there might just be a shaded spot perfect for a little resting place, here’s a clever addition to your backyard.
114
/
200
After: Sensational Water Garden
Build your own pond and waterfall, then stock it with plants and fish. Learn the basic techniques for creating a relaxing water feature in your own backyard. Here’s how we did it.
115
/
200
Before: Hilly Backyard Walkout
It started with someone who wanted a maintenance-free deck that looked different from everyone else in the neighborhood. What it transformed into is nothing short of magic.
116
/
200
After: Stunning Stone Garden
Retaining walls were built to bring the stone patio up to the height of a deck. Pea gravel got spread over fabric, tilestone was used for the wall and flagstone was used for the steps and patio area.
117
/
200
Before: Backyard Patio
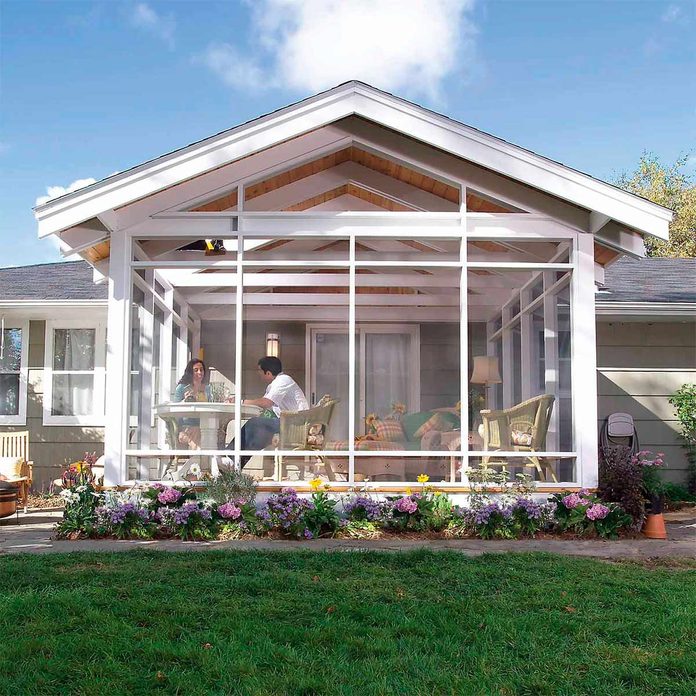
Love your patio but hate the bugs, wind and glaring sun? Our screened-in, post and beam patio enclosure with removable awning top solves it all.
118
/
200
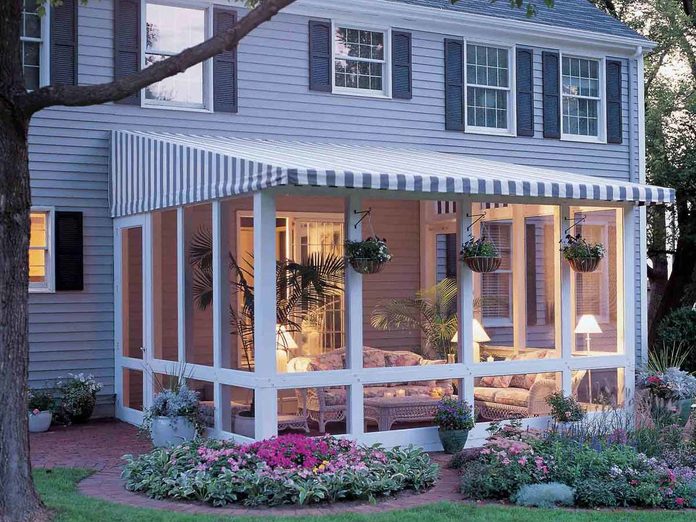
After: Backyard Screen Porch
However much you love your patio, there may be just too many days when it’s not fit to live on. Our enclosure turns a patio — or a deck — into a space as comfortable as another room of your house. Check out how we did it.
119
/
200
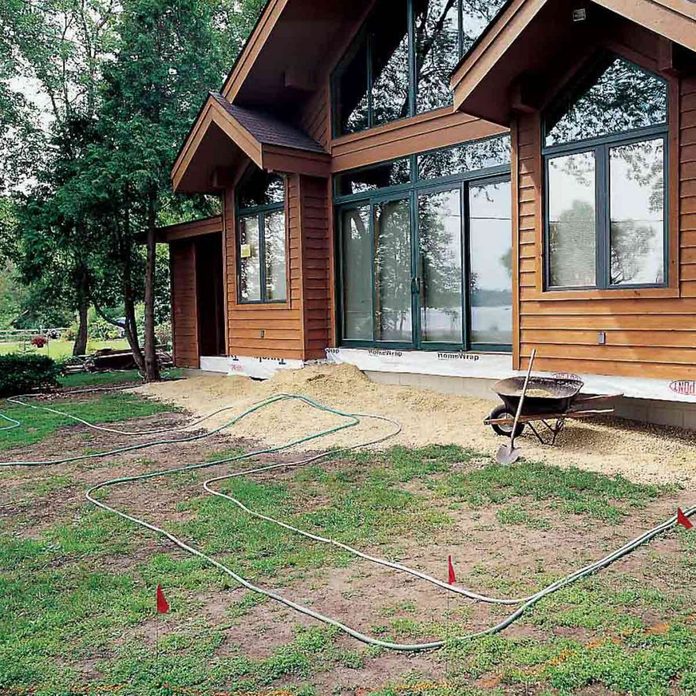
Before: Barren Backyard
This backyard was suffering from patchy spots of lawn and we came up with a perfect solution to fix it.
120
/
200
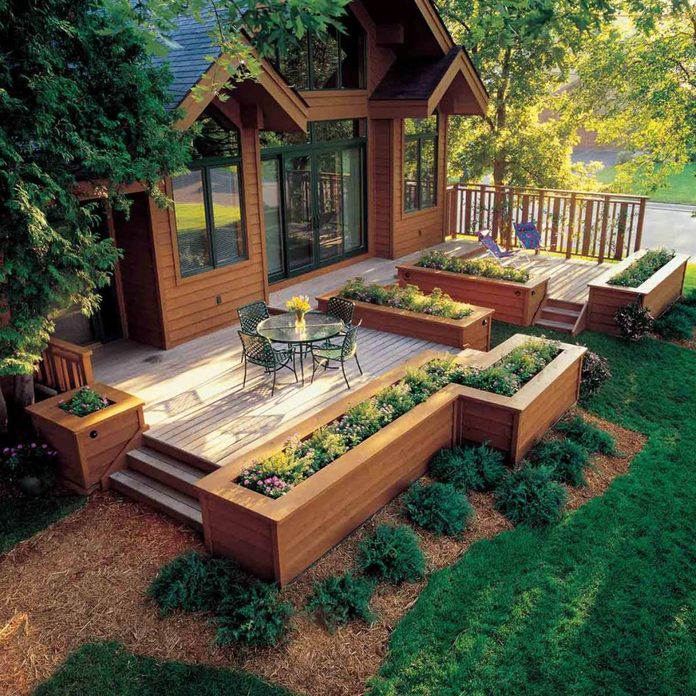
After: Low Maintenance Deck
Planters make a striking addition to any deck, and also create more privacy, making the outdoor space feel almost like a separate room. Get full plans for building these amazing deck planters here.
121
/
200
Before: Basic Flooring
If you have an existing vinyl floor that’s coming loose and the underlying floor is solid and flat, you can glue new vinyl directly over it. We don’t recommend tearing out old vinyl floors because many contain asbestos, which can be hazardous to your health.
122
/
200
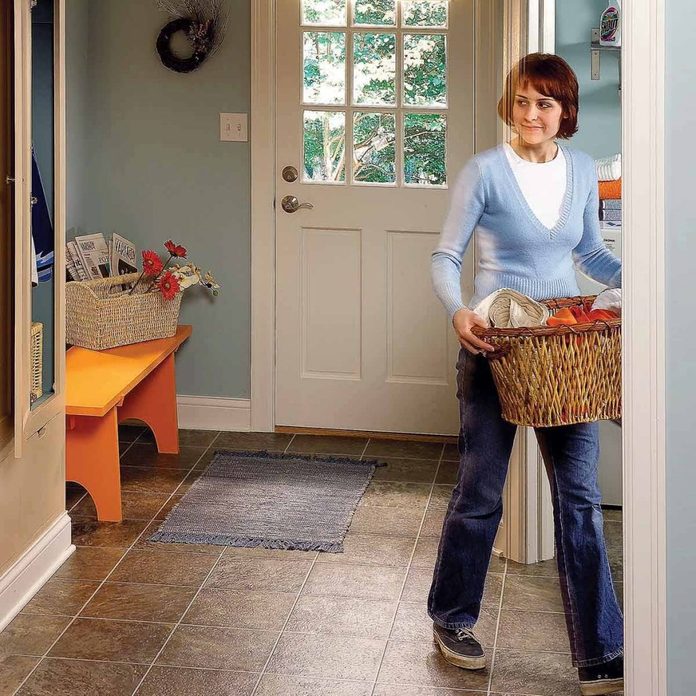
After: Beautiful Flooring Upgrade
Here’s how to get the look to remove an eyesore in your laundry room.
123
/
200
Before: Woeful Walls
Dull walls can transform into the dynamic with a couple of tricks.
124
/
200
After: Wonderful Wainscoting
In the days before paint was scrubbable and wallpaper was mass-produced, wainscoting served a practical purpose. It covered the lowest, most vulnerable parts of walls with wood—a tough, plentiful material that could be cleaned and repaired without too much trouble or expense. Wainscoting can still serve that same purpose. It’s tougher than drywall and easy to clean. But today wainscoting is valued mainly for the way it can transform a bland space into a stunning, elegant room.
125
/
200
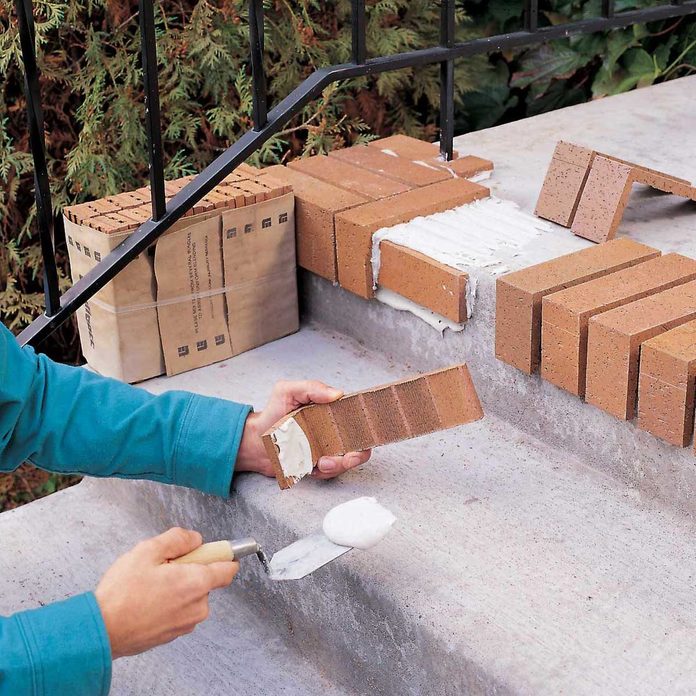
Before: Basic Concrete Steps
Rarely has anyone exclaimed over the sight of concrete steps. So adding some brick over them can liven things up.
126
/
200
After: Burgeoning Brownstone
Cover up concrete by using thin brick, which can be attached with some adhesive.
127
/
200
Before: Sorry Looking Path
With a little imagination a sorry looking path can transform into something outstanding.
128
/
200

After: Awesome Arbor
This timber garden arbor can be your place to get away for a quiet retreat or a delightful lawn sculpture that you gaze at through your kitchen window. See what it took to build a garden arbor.
129
/
200
Before: Featureless Walls
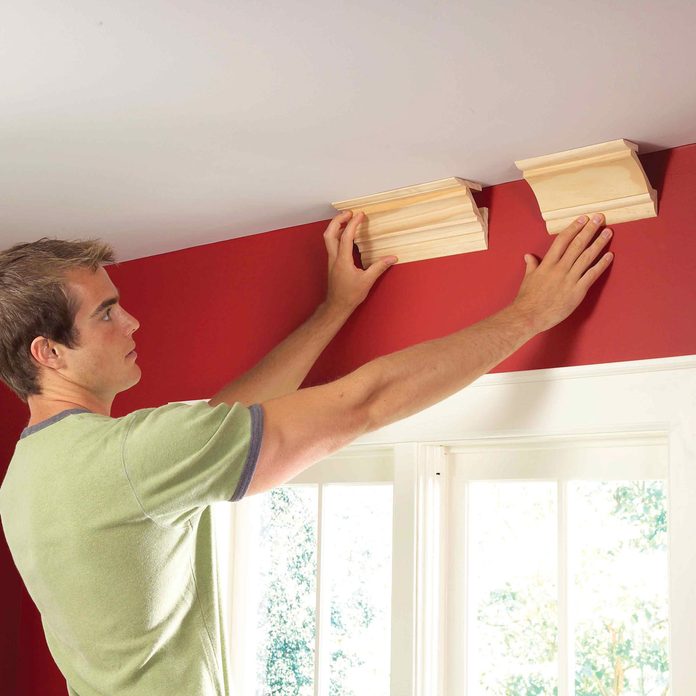
Molding can make a wall more attractive and crown molding is a pretty good option. Find out all you can about trim carpentry before a project.
130
/
200
After: Molding Fit for a King
Crown molding can be intimidating, because walls often aren’t flat and nailing is difficult. Check out how to install crown molding with our tips.
131
/
200
Before: Pretty Stone Walkout
A patio will only take you so far and you can only enjoy it under the right conditions. Find one you can enjoy nearly all the time.
132
/
200
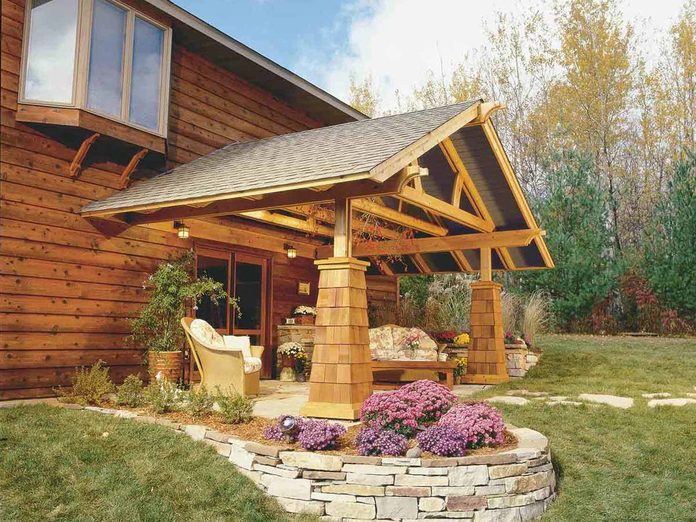
After: Outdoor Living Room
There’s nothing quite like kicking back on your own patio — until the sun starts cooking you or the rain begins to fall. But you can easily double your time in the great outdoors with this beautiful pavilion. Just think — no more rainouts during your next barbecue! And with a roof, you can relax on dry, clean, comfortable, padded furniture, which just can’t stand up to the elements on an open patio. All in all, you can give your patio the feel and function of an outdoor living room. But the best part is, this pavilion will add real beauty and value to your home by dressing up that lonely, underused space. See how you can add it here.
133
/
200
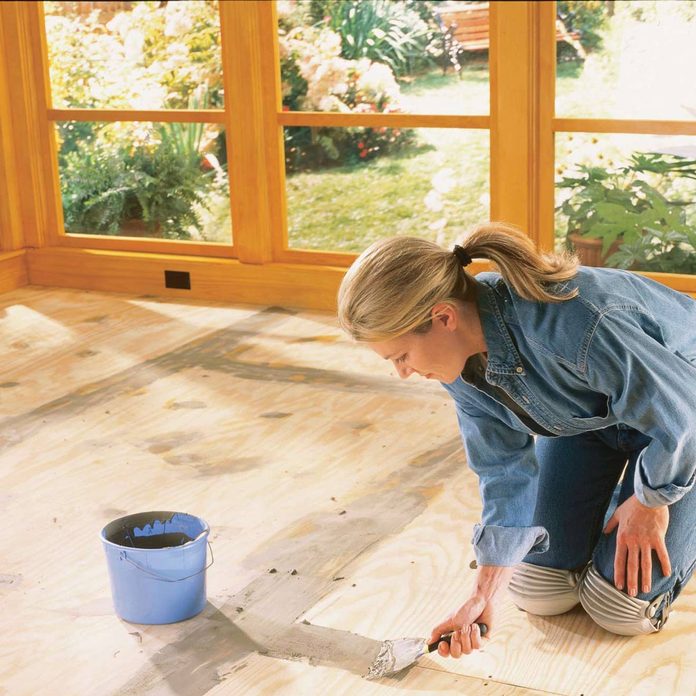
Before: Mundane Floors
If your floor isn’t flooring you in its impressiveness, then it’s time to consider an alternative.
134
/
200
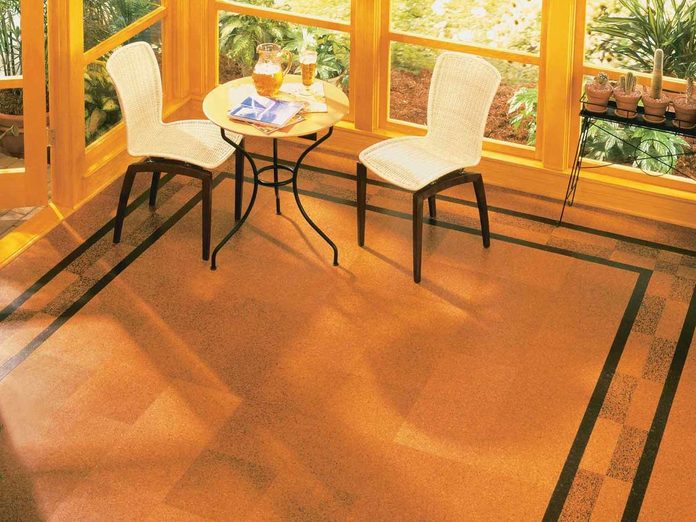
After: A Corking Good Floor
Cork flooring is a natural, renewable product that’s easy to install yourself with basic tools. It’s also attractive, quiet underfoot and easy to clean. It’s a great choice for living rooms, offices and even the kitchen. See why it’s a good option on how we installed it, step by step.
135
/
200
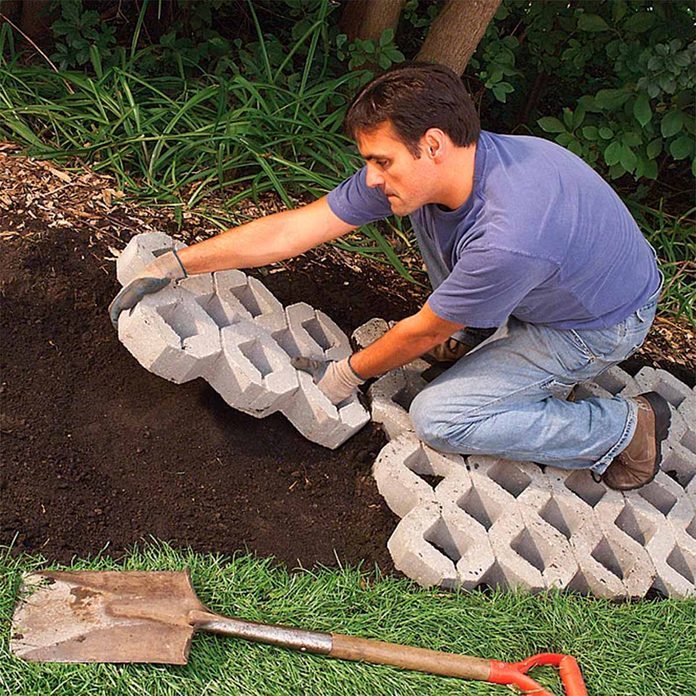
Before: Erosion-Prone Path
Patch up a troublesome path in the yard with a solution that will get you from point A to point B and keep your yard intact.
136
/
200
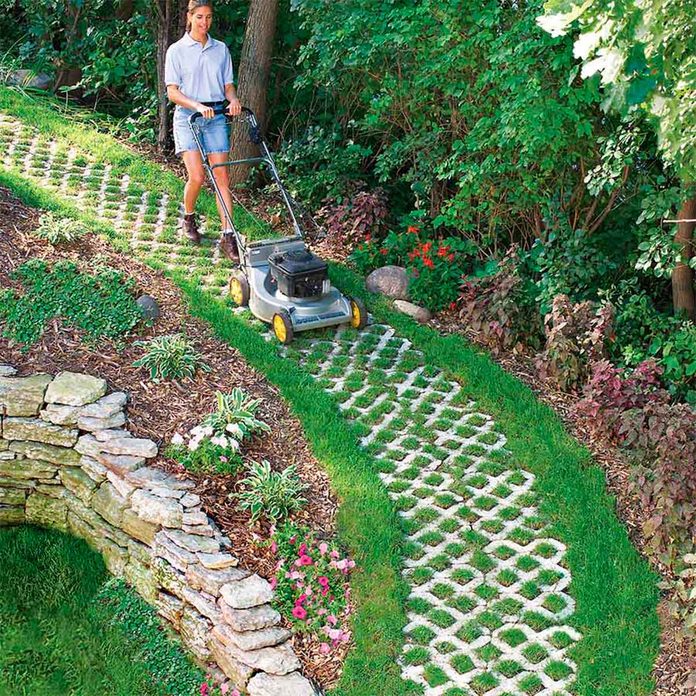
After: Erosion-Free Path
A perfect paving solution for erosion-prone paths are these 15-3/4 in. x 23-5/8 in. grid-shaped concrete pavers, called Turfstone. The concrete grid holds soil and grass in place even on steep slopes while providing good traction for wheelbarrows and lawn mowers.
137
/
200
Before: Featureless Backyard
A dull backyard is no good, so adding a structure to enjoy the backyard isn’t such a bad idea. Discover one way to transform the backyard.
138
/
200
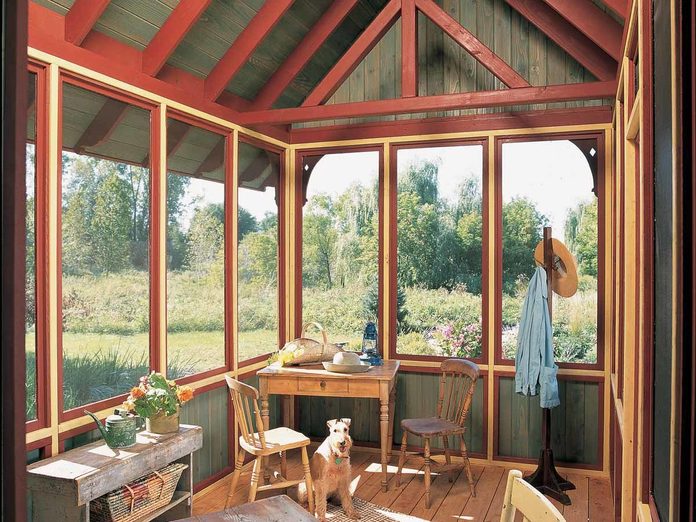
After: Cottage Getaway
Whether it’s the commotion of the house or the buzz of the bugs that’s driving you crazy, this airy retreat is the perfect place to get away from it all.
139
/
200
Before: Concrete Floor Blues
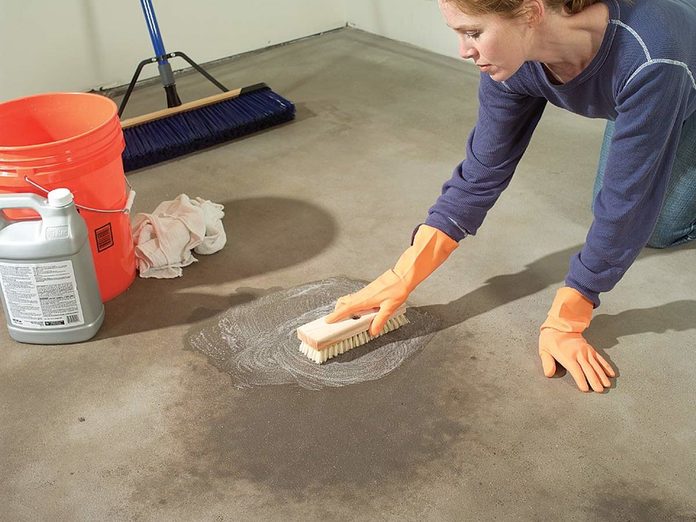
For those who want a better looking floor in their garage, there is a solution. (Here’s how to remove oil, paint and other stains from concrete.)
140
/
200
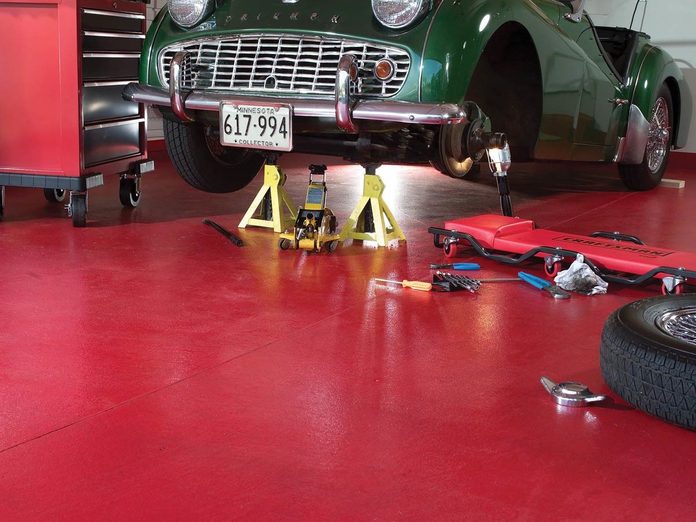
After: Epoxy Excellence
Epoxy floors can provide a better look and some more resilience to your garage floor.
141
/
200
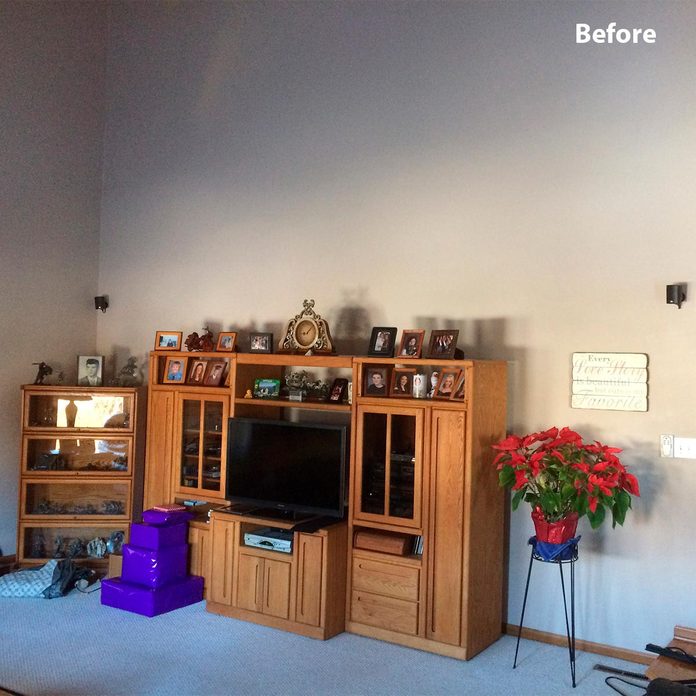
Before: Run-of-the-Mill Entertainment Center
Reader Mike Farron kept a regular entertainment space in his home before discovering our Showcase Wall.
142
/
200

After: Show-Stopping Entertainment Center
Here’s what Ferron came up with, showing that entertainment centers can still hold a spot in homes.
143
/
200
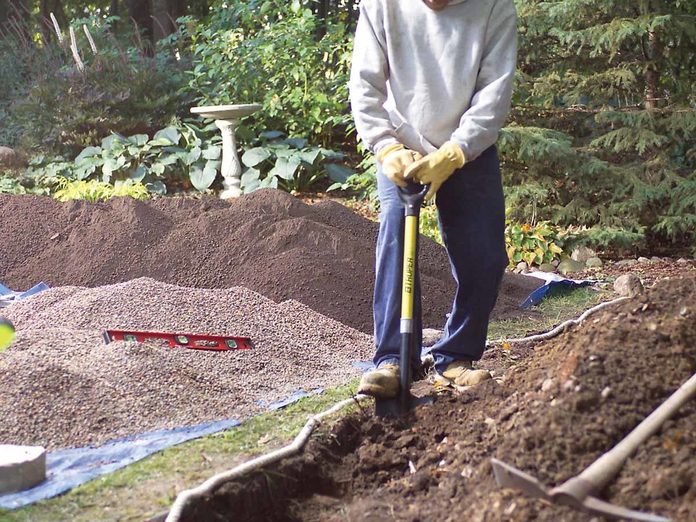
Before: Hilly Landscape
Harness the possibilities of a hilly landscape by transforming it into a raised garden bed. See how we did it next.
144
/
200
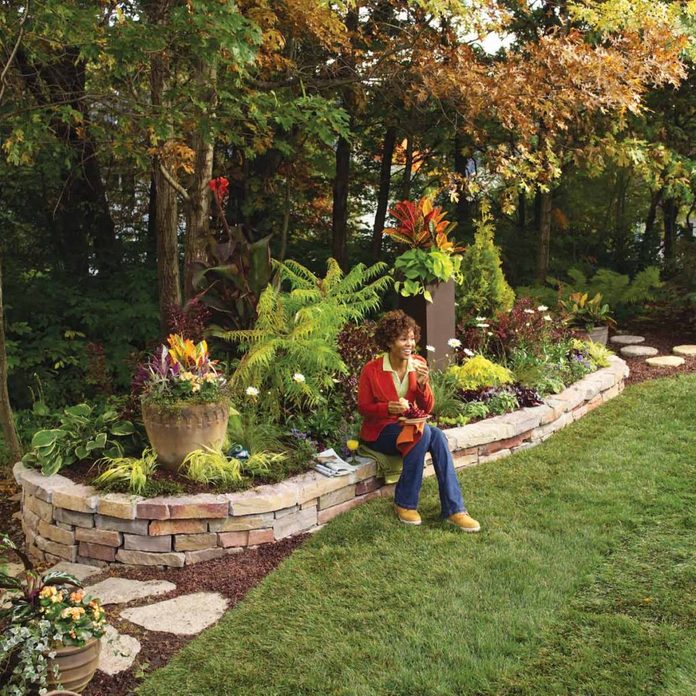
After: Restful Raised Garden Bed
If one of your family members loves plants and flowers, why not build this raised bed? It not only allows you to get just the right soil mix for healthy plants but also reduces back strain, because you don’t have to bend over so far to tend it. The natural stone walls also look great and are easy to build. We show you the complete details.
145
/
200
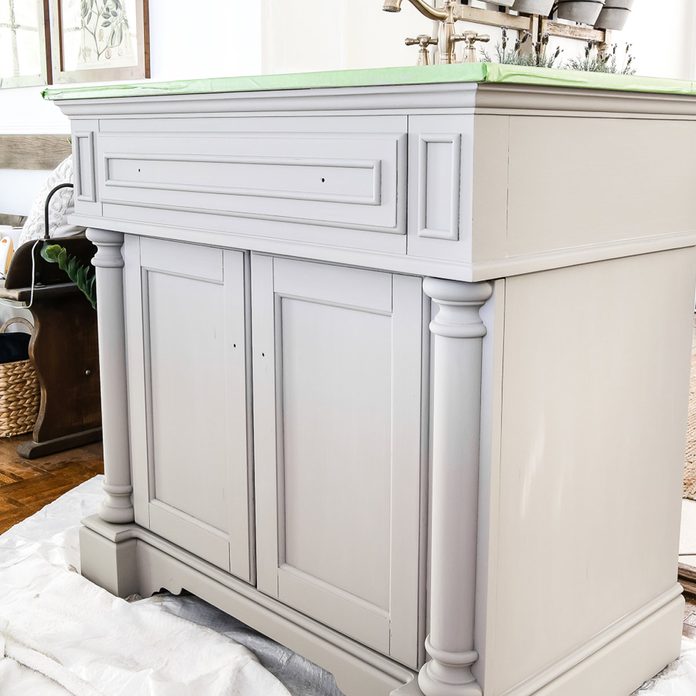
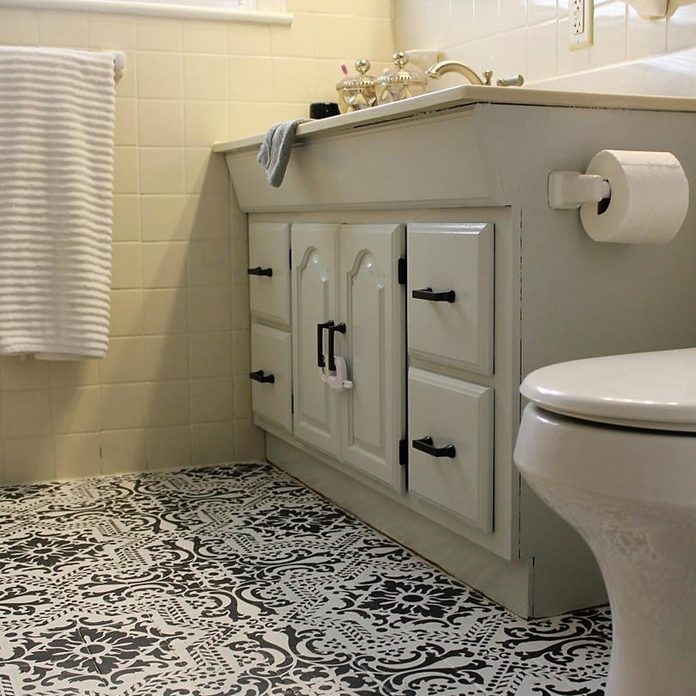
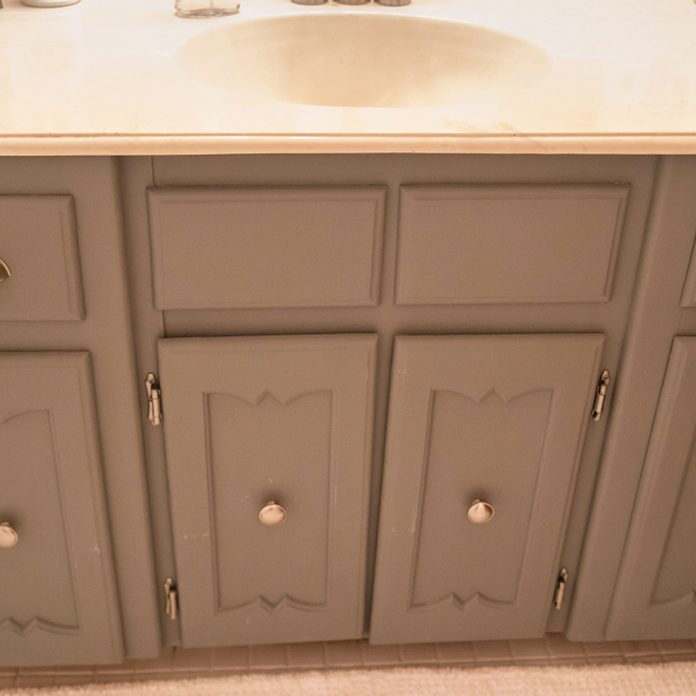
Before: Dull Gray
The columnar detail gives this vanity great lines, but its flat color is uninspired.
146
/
200
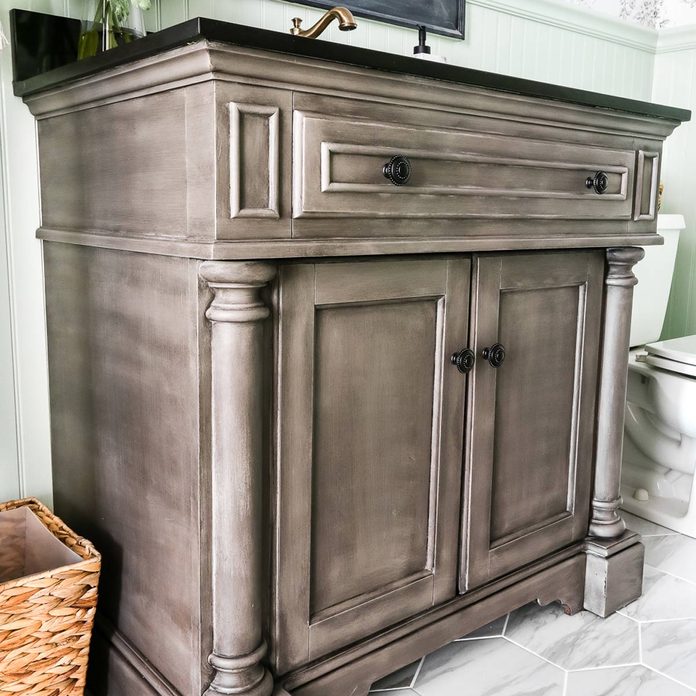
After: Rich and Rustic
After several layers of chalk paint and wax, this vanity is now stately and luxurious.
147
/
200
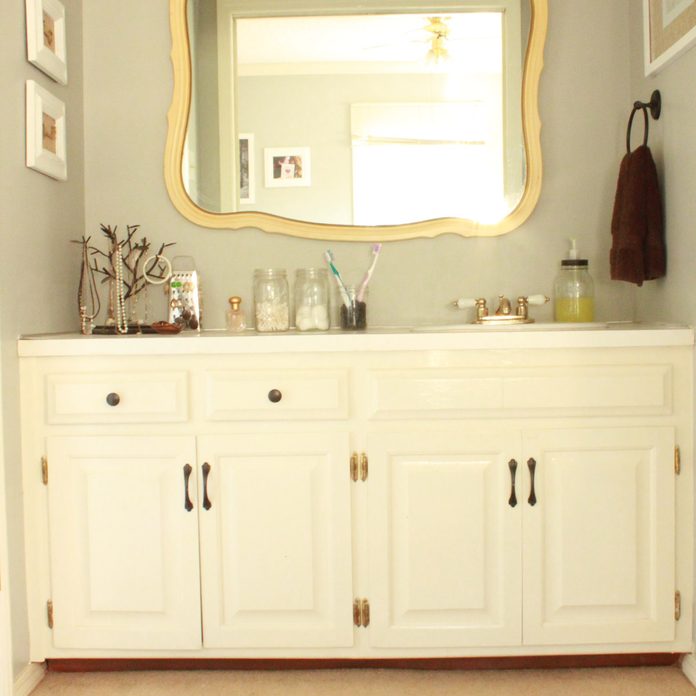
Before: Old Hollywood Boring
Compared to the vintage-chic flooring, this old oak vanity just doesn’t make the cut.
148
/
200
After: Old Hollywood Glam
By lightening the color and installing new hardware, this vanity matches the rest of the bathroom and brings out the old Hollywood charm of the room.
149
/
200

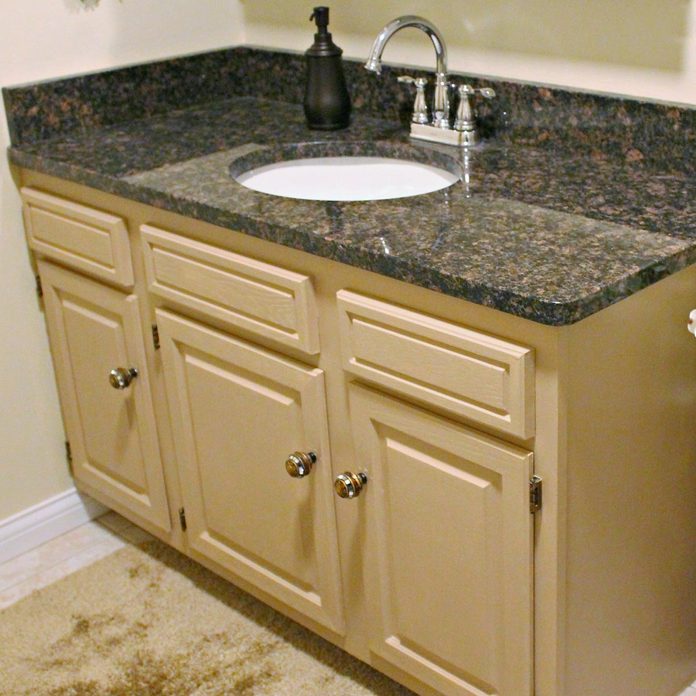
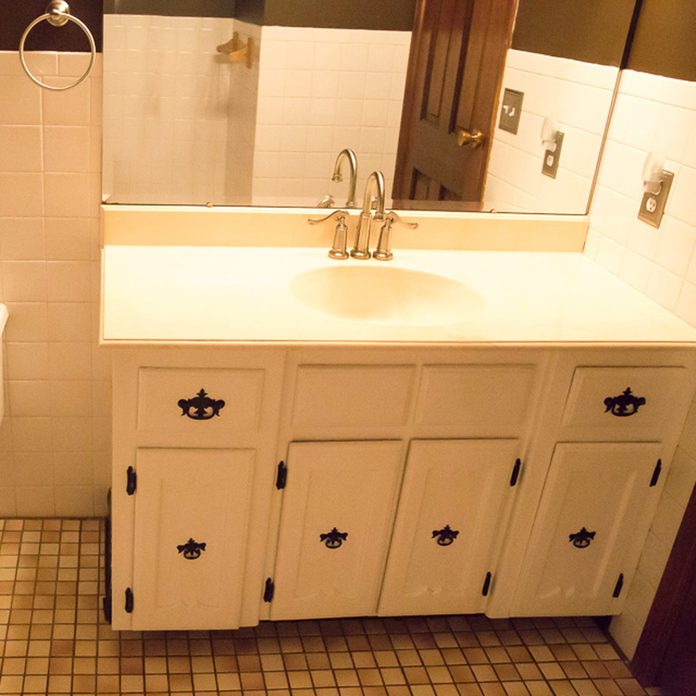
Before: Builder Basic
There’s nothing inherently wrong with this “builder’s basic” vanity except for the fact that is painfully pedestrian and likely graces millions of homes across the country.
150
/
200
After: Fresh and Clean
With a fresh coat of paint, now this vanity brightens up the bathroom. By choosing the perfect paint color even the countertop and floor seem new.
151
/
200

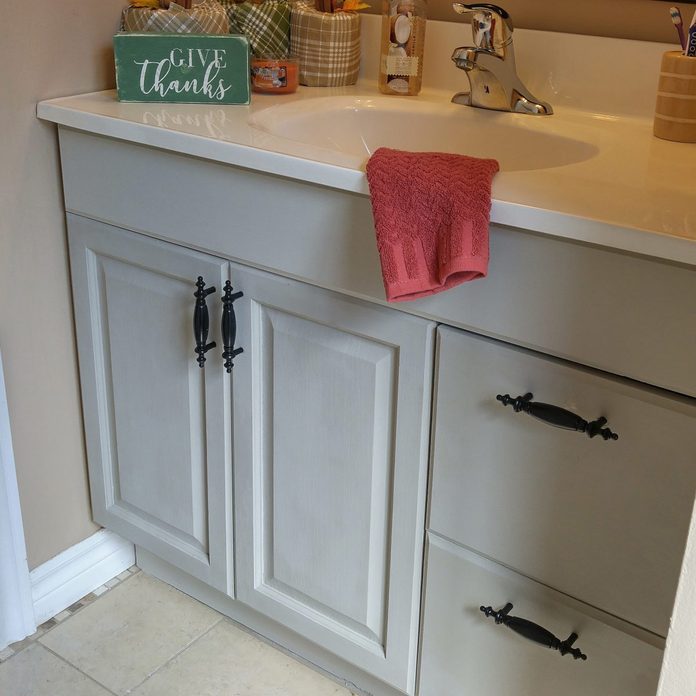
Before: Too Much White
The white cabinet, countertop and white porcelain door pulls are too much of a good thing and make this vanity look dated.
152
/
200
After: Warm and Modern
A modern color scheme and a new granite countertop transform the existing vanity without having to rip it out and start over.
153
/
200
Before: Has Potential
At first glance, this bathroom looks great, until you see what was missing in the after photo.
154
/
200
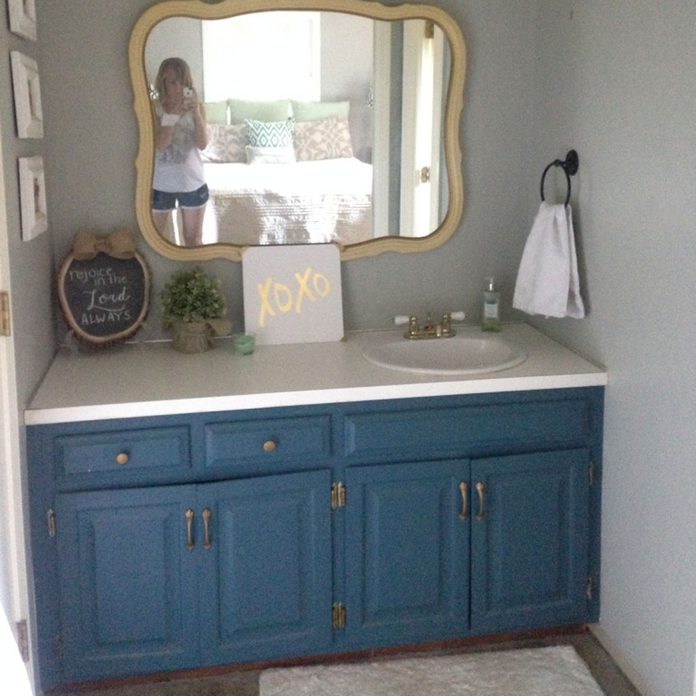
After: Swoon-Worthy Color
Painting the existing vanity deep blue, resulted in an affordable home improvement that speaks volumes. The unexpected pop of color complements the yellow mirror and gray walls perfectly.
155
/
200

Tired Antique
This former dresser, turned vanity has lots of potential. See what it looks like with a fresh coat of paint.
156
/
200
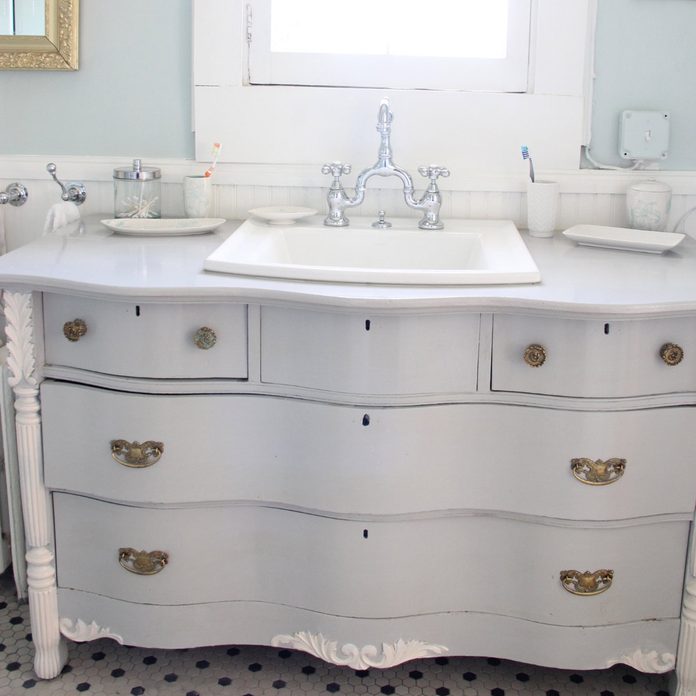
Trendy Antique
With a fresh coat of paint, and a new sink and faucet, this vanity went from blah to aha!
157
/
200
Before: Washed Out
The style of this vanity faded out at the same time as disco music. See how this homeowner took created a stunning transformation.
158
/
200
After: Gorgeous Gray
Some say gray is the new black. This modern shade and brushed nickel hardware bring this vanity right into style.
159
/
200
Before: The ’80s are Calling
As far as a bathroom vanity makeover goes, there is nothing about this vanity worth salvaging except the wood.
160
/
200
After: Modern Country
Luckily, a subtle blend of color on the old vanity, paired with a butcher block top, makes this ’80s vanity a welcome addition to a stylish bathroom.
161
/
200
Before: Short on Guest Space
A Murphy bed isn’t just for a guy with a gambling problem living in a tiny apartment. We show how a Murphy bed can look classy.
162
/
200
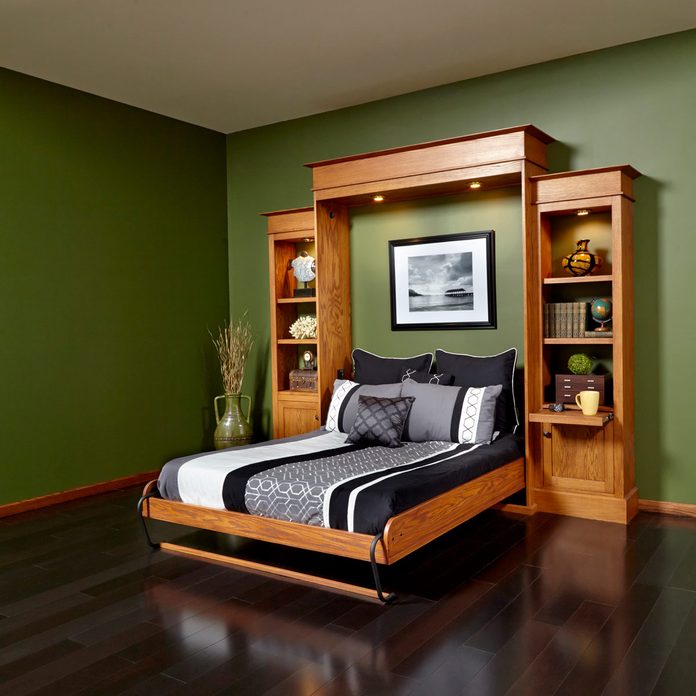
After: Elegant Guest Space
This deluxe Murphy bed morphed together with a bookcase and provides elegant lighting. The whole setup will make guests enjoy the arrangement. See how we put this extravagant Murphy bed together.
163
/
200
Before: Garage in Need of Order
The garage becomes the catch-all part of the house but a little organization goes a long way.
164
/
200
After: Glorious Garage
Organize your clutter, tools and toys. Customize this French cleat system to fit any wall width and height. A variety of easy to assemble hangers will hold just about everything in your garage. Check out how we did it.
165
/
200

Before: Bare Wall
An accent wall can add some depth to a room. See what happened to this wall when stone veneer was added.
166
/
200

After: Stunning Stone Wall
You can transform any room with a stunning stone accent wall like this. Modern materials and methods allow you to create the look of a traditional stone wall with a fraction of the work. An intermediate DIYer could easily master the techniques. In just a weekend, you can have a dramatic new accent wall.
167
/
200
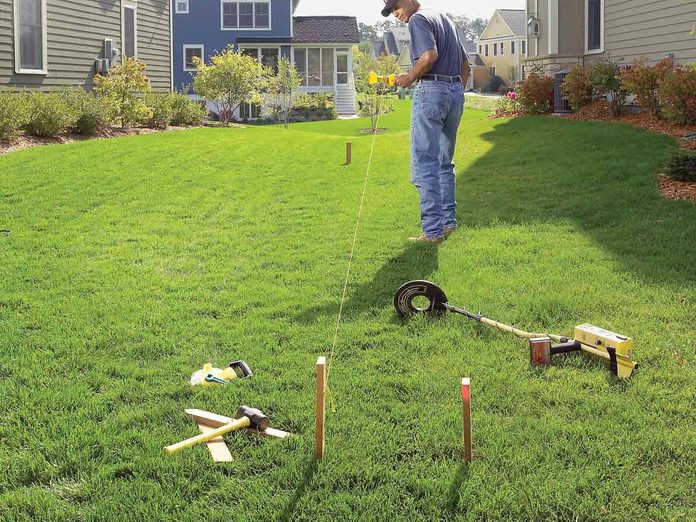
Before: No Privacy
Sometimes a fence can help give you some privacy and eliminate any neighbor issues.
168
/
200
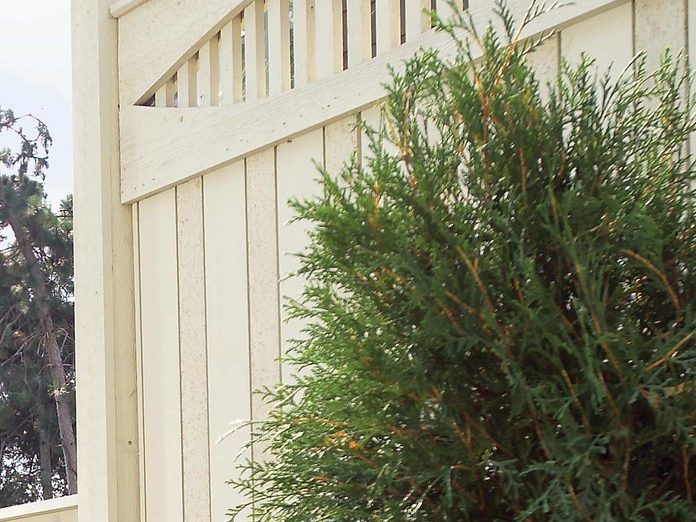
After: Privacy Achieved
A solid, high fence may wall off prying eyes, but it also walls you in. And such a boring, monolithic and material-intensive design may not be all that necessary. Your fence doesn’t have to be one continuous design, height or even material. See how we did this fence project and why it was important to the bottom line to vary the design.
169
/
200
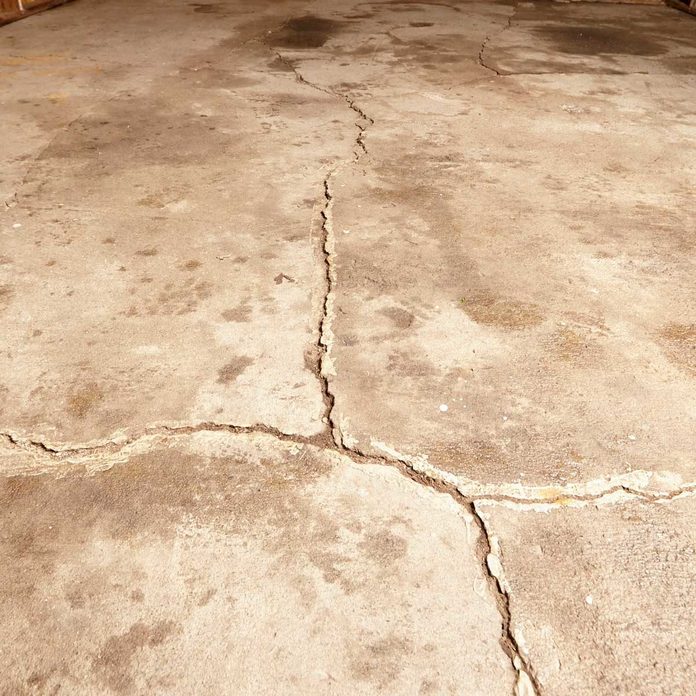
Before: Beyond Repair Patio
A slab with this much damage can’t be fixed. But it can be covered up.
170
/
200

After: A Boss Response
Even if your patio is in terrible shape, you can deck over it. Cracks, craters and seasonal movement along cracks are no problem, but be aware of the instances where it can’t be fixed and how we fixed this patio.
171
/
200
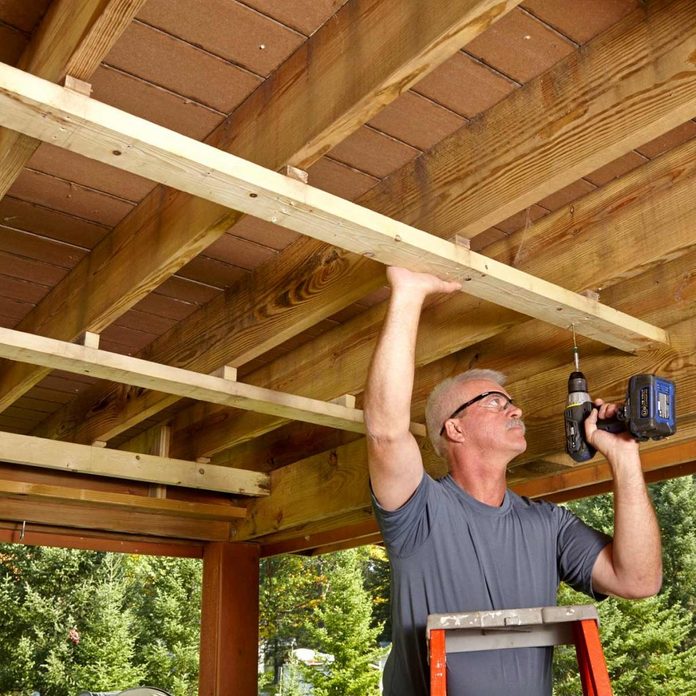
Before: A Typical Deck But There’s Potential
Don’t forget about the space under the deck. It can be utilized for another gathering spot.
172
/
200
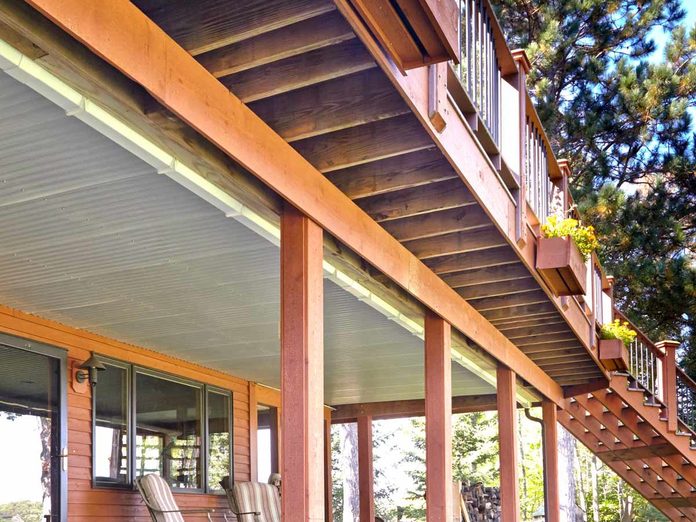
After: An Under-Deck Hangout
Convert the space under a second-story deck into a dry, spacious patio by installing this simple, under-the-deck roof and gutter system. See how to turn the space under the deck into a place to enjoy the summer during sun or rain.
173
/
200
Before: Outdated and Ignored Bathroom
This bathroom was in need of some attention. See the love it got next.
174
/
200

After: Stylish, Well-Lit Bathroom
You don’t have to completely gut a dull bathroom to make the room feel fresh, bright and inviting and improve the storage. If your sink, tile and shower are still in good shape, handsome light fixtures, a stylish mirror and a fresh, new medicine cabinet may be all you need to revitalize the space. These upgrades will cost only a small fraction of a total redo, and you can install them yourself in one sweat-free weekend. Get the details on how to get it done here.
175
/
200
Before: Confined Bathroom
Uninspired and cramped, this bathroom was overdue for an update.
176
/
200
After: Expansive Bathroom
Our bathroom design is the perfect solution for the old, heavily used, small bathroom that you can never quite get clean enough. We not only pulled a few rabbits out of the hat to produce features that make the room easy to clean but also used smoke and mirrors to make it appear much larger. We reveal the tricks we used here.
177
/
200
Before: Tired Looking Cabinets
Tired of your kitchen cabinets? Instead of replacing them, consider cabinet refacing. It’s DIY-friendly, and you can save thousands of dollars.
178
/
200
After: Resurfaced Cabinets
Refacing cabinets is a quick and easy way to change the look of your kitchen without the mess and expense of a complete remodeling. You simply cover the cabinet face frame with self-sticking wood veneer and the end panels with 1/4-in. plywood. Then replace the old doors and drawer fronts with new ones. Refacing costs about one-third what new cabinets would cost, plus you can leave the countertop in place for even greater savings. And by doing the work yourself, you’ll also save at least $1,000 in labor for a small kitchen, and a lot more if your kitchen is large. Check out how to resurface cabinets.
179
/
200
Before: Unused Corner of Space
This little spot next to a set of steps needed something, see what fit perfect.
180
/
200
After: Beautiful Babbling Brook
There are a thousand ways to build a backyard waterfall. But if you’re looking for simplicity, you can’t beat this approach. You basically dig a hole in the ground, line it with rubber membrane and cover it with a stack of rocks. The backyard waterfall looks beautiful, but the best part is the sound. If you close your eyes, it’s easy to imagine yourself sitting next to a gurgling creek in the middle of the woods. See how it got done.
181
/
200
Before: Crowded Cleaning Area
A bump-out addition is a great way to expand a small bathroom without messing with other nearby rooms. It’s complicated, but the space gained is well worth the effort. It’s one of the 14 easy ways to add square footage without breaking the bank.
182
/
200
After: Spacious Shower Area
Building a “bump-out” is a big project that adds only a few square feet to a room. But in some rooms—especially bathrooms—an extra 6 or 7 sq. ft. allows for a complete transformation. With this wee addition, you can actually turn a half bath into a full bath, install a luxury two-sink vanity or even install a spa. The bump-out shown here allowed Charlie Avoles to expand a bathroom and replace a small tub with an oversized, easy-access shower.
183
/
200
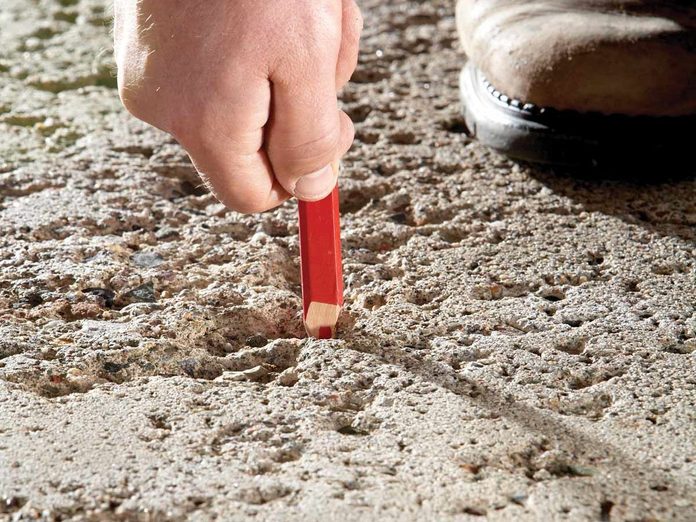
Before: Pitted Garage Floor
If your slab is suffering from low self-esteem because of pits, craters or cracks, you can cover up those scars. Concrete “resurfacer” is a cement-based coating that forms a smooth, new surface right over the old concrete. The cost of resurfacer for a two-car garage is typically less than $200. You’ll also need to buy or rent some special tools, so expect your total cost to be about $300.
184
/
200
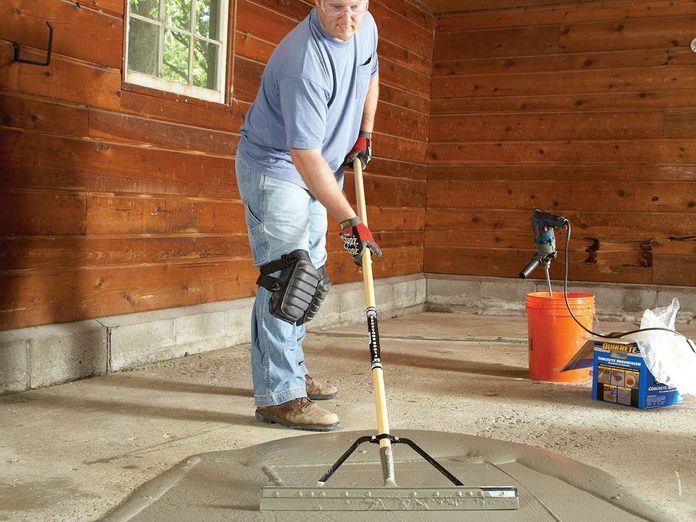
After: Flawless Floor Finish
Check out the tools you’ll need and how to get the job done here.
185
/
200
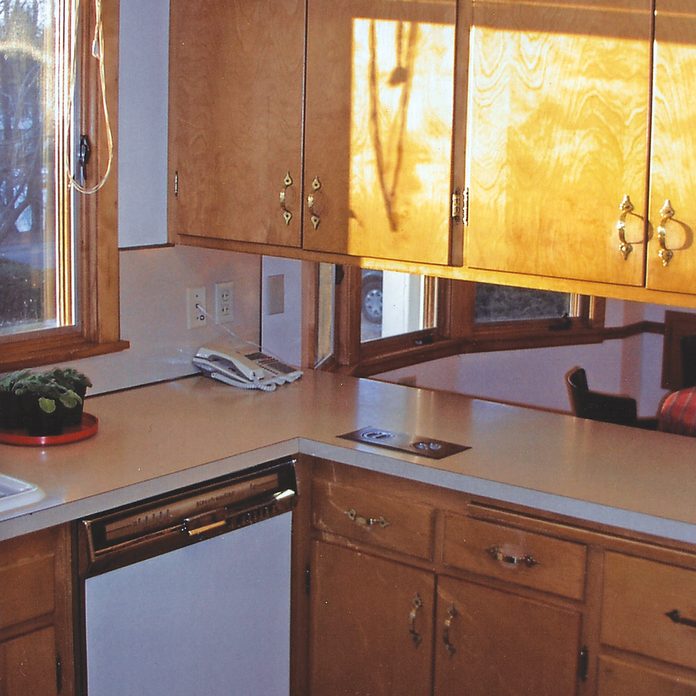
Before: Standard Rambler Kitchen
Ramblers are known for their tight kitchen quarter but they don’t have to be, as you will see with this extensive remodel.
186
/
200
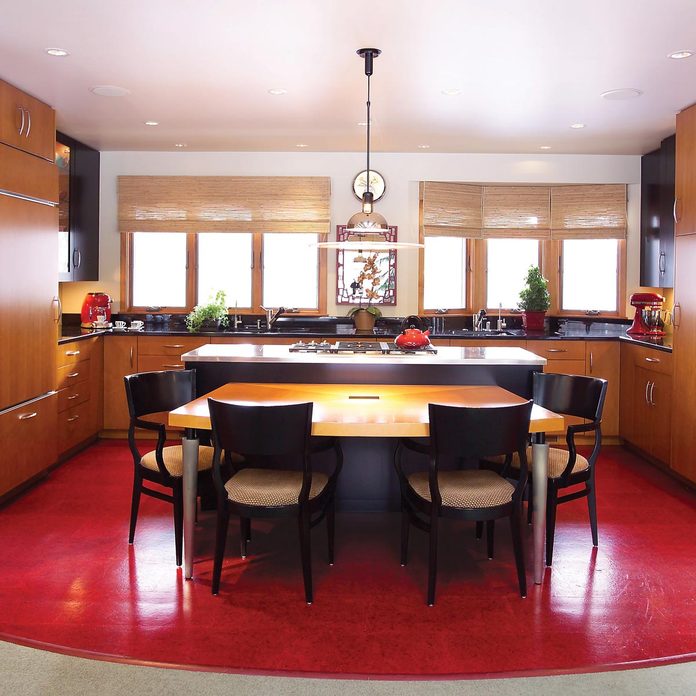
After: Stunning Modern Kitchen
The kitchen space got opened up to allow better movement by removing a wall while wiring got concealed and the countertops got updated. The sink gained a new faucet and the cabinetry got reworked for easier access. Check out the complete overhaul here.
187
/
200
Before: A Well-Worn Path
Installing a stone path can make use of space in the yard that has sat vacant. The complete project using modular stones took several days to complete. See why it took so long and how it turned out next.
188
/
200
After: Splendid Steps
This project looks complicated but if you keep a level head you can get through it fine.
189
/
200
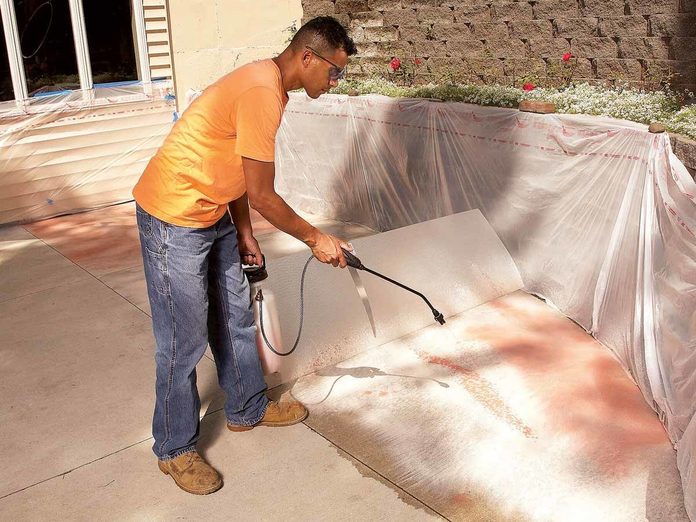
Before: Boring Old Concrete
A lot of homes have the boring old concrete patio but it doesn’t have to be that way. See how patio stain can transform a space.
190
/
200
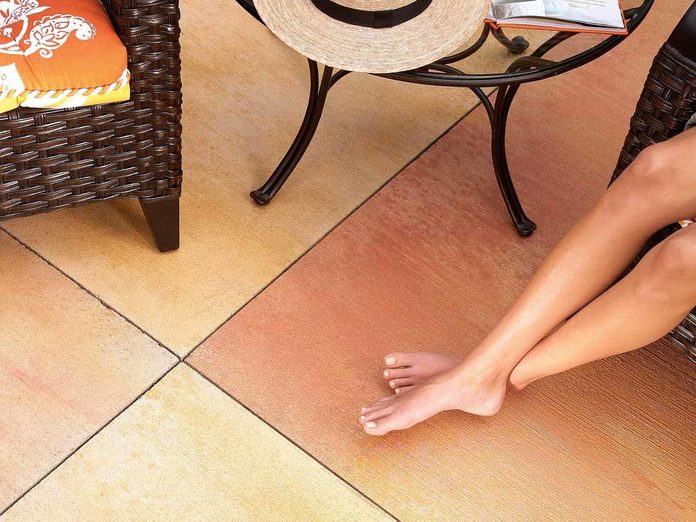
After: Spruced Up Patio
A little patio stain turned an ordinary concrete patio into something a little more interesting. It takes a weekend but it’s a relatively cheap upgrade that pays dividends. Check out the complete details here.
191
/
200
Before: Blah Bathroom Vanity Top
A boring bathroom can be turned around in a weekend with a few hundred dollars.
192
/
200
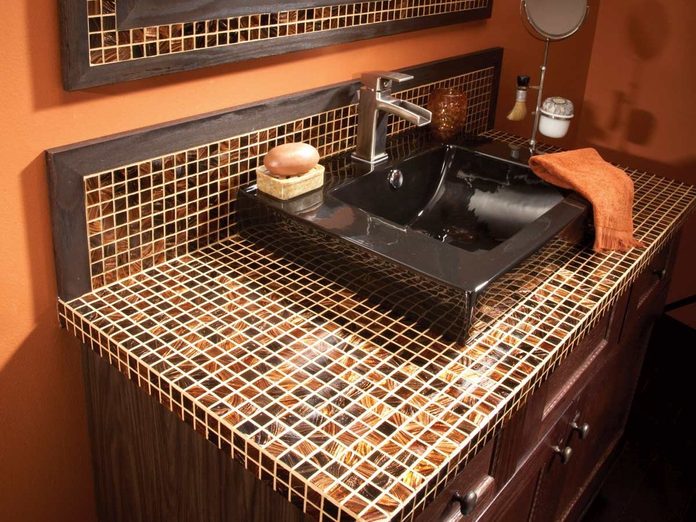
After: Gorgeous Mosaic Tile
Here’s the scoop on how to complete this tile project, which can turn a drab bathroom into a luxury spot.
193
/
200
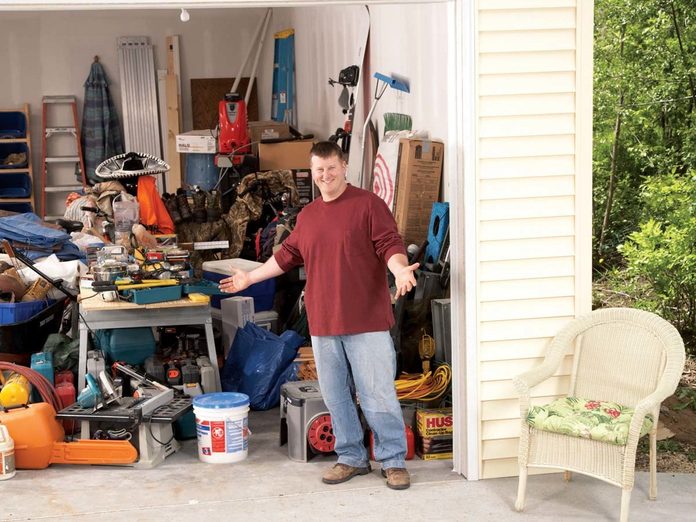
Before: Chaos in the Garage
It’s important to have a plan when moving into a new place because things can get out of hand in a hurry, especially in the garage. This garage took some work and a shelving system that cost $300.
194
/
200
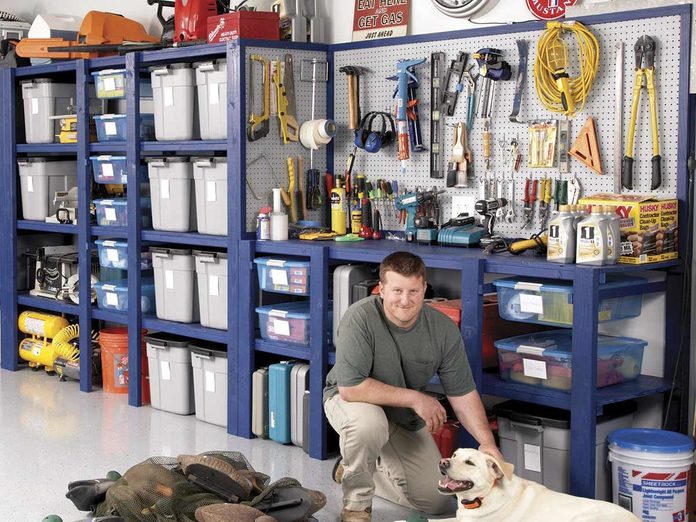
After: Clean and Organized
This garage makeover took advantage of a shelving system that relies on organization. Every bin has a place based on its size, which makes it tough to put something out of place. Check out how it got done and how it only took a day.
195
/
200

Before: Bare Patch
If you’ve got a bare patch like this in the yard, a quick upgrade can be a little boardwalk.
196
/
200
After: Beautiful Boardwalk
This boardwalk requires some planning and can dress up a yard. Check out the materials you need and how to do it in a weekend.
197
/
200
Before: Pretty Basic Bathroom Vanity
An old bathroom vanity project like this can take just a weekend and cost around $500.
198
/
200
After: Modern Light Fixtures and Tile
Here’s what we did:
- Installed a new IKEA cabinet in place of the old vanity.
- Replaced an old single-bowl vanity top with a modern double-bowl top and faucets from IKEA.
- Added a big mirror to make the room feel spacious.
- Improved the lighting by adding sconces on the sides of the mirror.
- Added style and punch with decorative glass tile.
- Tied it all together with new birch trim to match the cabinet.
Check out the complete remodel here.
199
/
200
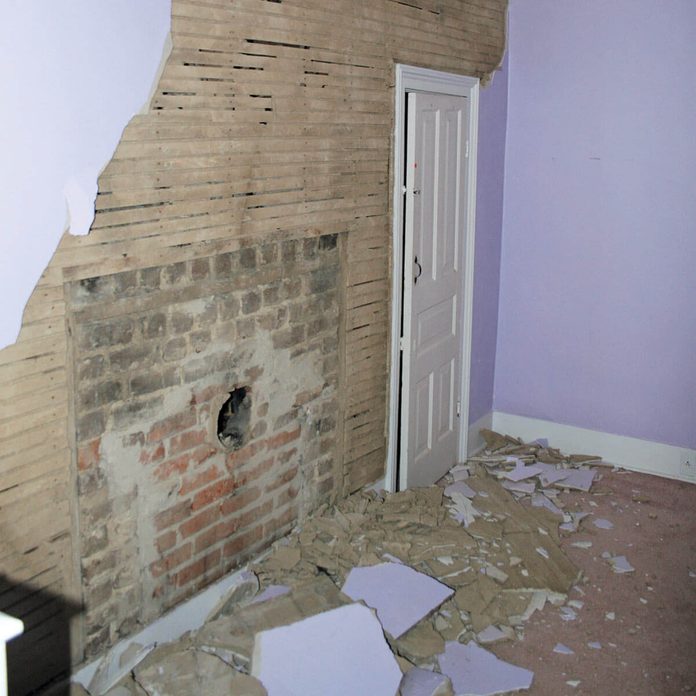
Before: Hidden Fireplace
When Gary Grant tore out the cracked plaster walls in his old house, he discovered a fireplace, bricked up and long forgotten. The fireplace wasn’t usable—the exterior portion of the chimney was gone.
200
/
200

After: Fireplace Found
Gary decided to restore it anyway. He salvaged brick from the chimney section in the attic, taught himself to lay brick and built a new surround.
“I still have a few more walls to tear out—hoping to find bags of money next time.” — Gary Grant